A major success...

Gutting the cat and stainless muffler dropped about 5lbs off and there is a noticeable surge of power at 3500-5000. Sound is a little more throaty but maybe only a DB or two over stock. Plus the cans stay cool enough to put your hand on them, the shields stay cool to the touch, except the screws that fasten them but that's to be expected.
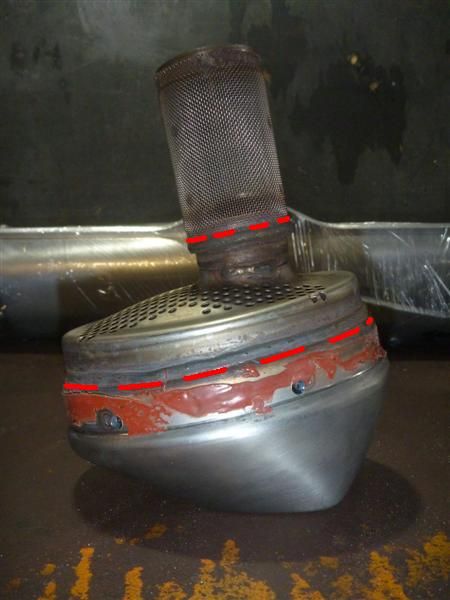
The rivets are easy to drill out with a 7/64 bit and then punch them in. The remaining rivet body drops into the inlet part of the muffler and they are easily removed once you cut off the front of the stainless muffler part.
On the TE the whole outlet end cap is a one-piece unit. Once the star-screws are removed the end cap is easily tapped out with a screw-driver blade and hammer. Go easy here so you don't dent or scratch your end cap. Now the main body of the muffler can be tapped out the other way with a block of wood and a 3lb ballpene.
With a hacksaw it's easy to cut the muffler part off and if you saw about 5/8" from the rivet flange on the inlet side you will get the complete cat as well. Look for the spot welds and saw just inside them, you'll retain the internal framing for the cat but your saw will take out the cat completely intact. You're left with an end cap with tapered inlet that the 2" perforated pipe fits right into. No punching, chiseling, or holesawing. It just cuts right off of the inlet cap assembly.
I got 3' of pipe and used all but about 4" of it.
This crap weighs 5lbs.
With a ballpene hammer I tapped the end of the perf pipe so that the sparky just slides in. This holds the internal perf pipe nicely in place. No welding required, no special tools. The other end i did a much lighter taper so that it fit into the inlet end cap snuggly. The stainless piping from Baron's is really nice heavy duty stuff. Very nice to work with. The 3' length of pipe weighs less than 2lbs.
I then wrapped the perf pipe with fiberglass muffler packing and spiral wound it with 20ga wire. The can housing is also lined with fiberglass. The whole thing fit back together easily and nicely. I used hi-temp RTV silicone on both fastening flanges of the end caps, aluminum rivets for the inlet, and re-used the star-end machine screws on the outlet.
I now have a completely flow-thru cans with spark arrestors, plus the old girl dropped 5lbs in the process - Win-Win!! This thing just gets up and scoots now!