-
Hi everyone,
As you all know, Coffee (Dean) passed away a couple of years ago. I am Dean's ex-wife's husband and happen to have spent my career in tech. Over the years, I occasionally helped Dean with various tech issues.
When he passed, I worked with his kids to gather the necessary credentials to keep this site running. Since then (and for however long they worked with Coffee), Woodschick and Dirtdame have been maintaining the site and covering the costs. Without their hard work and financial support, CafeHusky would have been lost.
Over the past couple of weeks, I’ve been working to migrate the site to a free cloud compute instance so that Woodschick and Dirtdame no longer have to fund it. At the same time, I’ve updated the site to a current version of XenForo (the discussion software it runs on). The previous version was outdated and no longer supported.
Unfortunately, the new software version doesn’t support importing the old site’s styles, so for now, you’ll see the XenForo default style. This may change over time.
Coffee didn’t document the work he did on the site, so I’ve been digging through the old setup to understand how everything was running. There may still be things I’ve missed. One known issue is that email functionality is not yet working on the new site, but I hope to resolve this over time.
Thanks for your patience and support!
You should upgrade or use an alternative browser.
Tard Vision Quest... (pic heavy)
- Thread starter Virginian
- Start date
Virginian
Husqvarna
AA Class

Next up is to install new handgrips and Symtec heating elements. Freak'n brilliant of me to install these as winter comes to close here in the east....

Virginian
Husqvarna
AA Class
heres the shift tip you want. Hammerhead shift tip.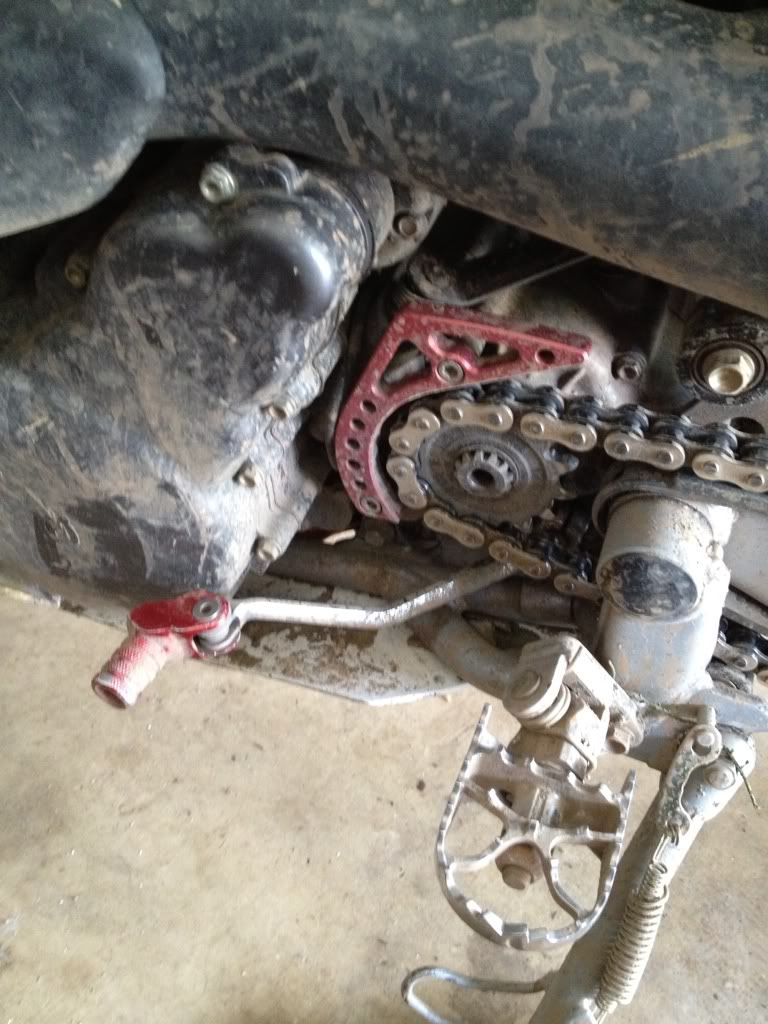
I can't imagine where I got this idea from? hehe
Virginian
Husqvarna
AA Class
Today was an expensive day. First off I ordered two new tires/tyres for the SM. I labored over every thread in this forum on rubber and pm'ed several members who were kind enough to share their thoughts. Many thanks goes out to the members of this forum. Words can't descibe the help I get from all of you.
 What I wound up going with were Michelin Pilots. Bang for the buck I hope to get more than 900 miles out of the stock tire that was trashed.
I called around and the only Husky shop in VA (that I know of?) is Motorcycle Factory Inc. in Woodbridge, VA. Believe it or not they had the best price on these tires within $10 of internet orders. So I ordered them and set the appointment to have them installed. $63 per rim to in stall... yikes...
 Set an appointment with service for today.
I get up this morning... perfect... So much for riding down there and getting the install. I just didn't feel good about trying to ride home with new tires being so slick and snow and ice.

I load up the trailer and off I go. 1.5 hours later I'm there and unload and do the waiting game. A couple hours later she done and I'm good to go. So I have a trailer and aluminum ramp that's fairly low to the ground. As I'm loading the bike up, the front tire with brake holding isn't enough to hold and the bike starts sliding backwards in the slick icy conditions. I lose my footing and down we go in a pile. A complete yardsale...
 I bounce up as any male with any pride left to see if anyone saw this mess, sure enough I had an audience. Someone came over and helped me load it and I get the hell out of there feeling like a complete horses arse.
  No damage to the bike as I managed to have it fall on me. Just my pride...
New Pilots installed ready to be scrubbed in.


Virginian
Husqvarna
AA Class

You have the option of setting the pegs in normal height or low position. I'm 6' 4" so low for me. This is accomplished by placing the metal bushing on the top or bottom depending on how you want it set up in the peg shaft hole. The bushing is a tapered fit and has to be compressed in. They provide a tool to hammer it in. I chose to just pop it in the vise and squeeze her together.

After I removed the the stock pegs I test fitted them to see if they were level/or not when installed. As luck would have it, they were level on the 610 without any shimming required! They provide you ample shims if you need them. I should note that I had to remove the rear brake lever to get the stock peg off and install the new one.

I had to grind the bracket on the bike a bit to get the peg to fold up properly. No big deal; about 5 minutes with a grinder and a couple of swipes with a fine file, good to go. I touched up the bare metal with some heat resistant rustoleum paint and let it cure.

I fit the spring on, installed the peg and started to install the cleats. I would suggest using blue Locktite on these so if you don't like them, you can easily remove them and replace with something else. Time will tell if these cleats will eat up my Sidi's.

Right peg installed.

Left one required no alteration and was installed in under 5 minutes.

As always, thanks for reading.
Eric
Virginian
Husqvarna
AA Class

Lowers installed. Model specific for Huskies!

Checking the fitment of the upper and rearranging all the cables.

Installed the heating elements on the handlebars.

HDB even includes the tap for the bar ends. I have to say this was awful to the threads in the stock bars. After drilling out the ends in steps I started tapping... Good gawd, I needed a man sized come along wrench.

Virginian
Husqvarna
AA Class

I went to wire up the heated hand grips and install the toggle switch and the dang thing wouldn't fit. It appears that they are sending switched a different diameter so I had to hand file and Dremel the hole a little larger to accommodate.

Handguards installed with the mirrors.


Here's a pic of the finished product without the Powlet socket installed. I'm still waiting on parts for that. It houses my Zumo 550 perfect and the heated hand grips are the shizzle! Best $37 I ever spent and get the job done nicely.

Paul is a great guy at HDB and worked to meet my needs. He didn't just try to sell me something off the shelf when I had a specific need. Delivery time to from when I ordered to my doorstep was 3 days. That included fabrication of a custom bracket and anodizing.
Thanks for reading my build,
Eric
Virginian
Husqvarna
AA Class

A member of this forum I've been confiding in on this journey turned me on to Moty batteries at motydesign.com and i spent some time with Brian Harris on the phone discussing the upkeep of this type of next gen battery. Super nice guy and I had a couple of take-aways from this conversation. The original Moty's were very small packs that were encased in shrink wrap. You had to pack foam around the battery to secure it in the stock cavity. He since has created a feux battery box to mimic the stock size for a slip install. Indeed it did fit as the stock battery would except being 1 or 2 shorter (which was fine with me). The stock rubber strap used to secure the battery did not have enough resistance so I packed an 1" of foam in the bottom, problem solved. I also though the foam provided some shock/cushion for the battery itself.
Of course I hooked the polarity up wrong because the posts were opposite what the stock batteries were. Popped a fuse... Put that on my list of things I wish I had never done. lol

EricV
Husqvarna
AA Class
http://www.cafehusky.com/threads/stranded-again-please-advise.28288/
Nice job you're doing...keep up the good work (and hope you're riding it at least as much as tinkering with it!)
Virginian
Husqvarna
AA Class
Thanks for the reply. I'm about done with farting around with it till this fall. I'm going to ride the wheels off of it this spring, summer and fall. I just wanted to get it to 100% before I ventured out really far from home on it. I set this up for sport touring and I'm working on a tank bag solution from what I have kicking around in the garage. I'll post that up when I get done. I have some other ideas for this bike but it will have to wait till later. Time to ride!
Eric