• Husqvarna Motorcycles Made In Sweden - About 1988 and older

  • Hi everyone,

    As you all know, Coffee (Dean) passed away a couple of years ago. I am Dean's ex-wife's husband and happen to have spent my career in tech. Over the years, I occasionally helped Dean with various tech issues.

    When he passed, I worked with his kids to gather the necessary credentials to keep this site running. Since then (and for however long they worked with Coffee), Woodschick and Dirtdame have been maintaining the site and covering the costs. Without their hard work and financial support, CafeHusky would have been lost.

    Over the past couple of weeks, I’ve been working to migrate the site to a free cloud compute instance so that Woodschick and Dirtdame no longer have to fund it. At the same time, I’ve updated the site to a current version of XenForo (the discussion software it runs on). The previous version was outdated and no longer supported.

    Unfortunately, the new software version doesn’t support importing the old site’s styles, so for now, you’ll see the XenForo default style. This may change over time.

    Coffee didn’t document the work he did on the site, so I’ve been digging through the old setup to understand how everything was running. There may still be things I’ve missed. One known issue is that email functionality is not yet working on the new site, but I hope to resolve this over time.

    Thanks for your patience and support!

1972 WR250 the beginning

You may want to review my post on removing stuck sprockets, I noticed you commented on it in 2018.
I tried to attach the link to this 2018 post but the system wants to embed it. I tried a few times but gave up. You'll have to find it yourself.

Looks like your broken sprocket may be a defect as described in the above mentioned post.

Heres a modification to the Husky sprocket puller that I found helpful. The holes are .400" wide and .200" deep. Allows the sprocket teeth a place to go so the puller gets a bigger bite on the sprocket hub. Drill a 3/8" (10mm) dia hole in each puller leg for the sprocket teeth. About .200" (5mm) deep.
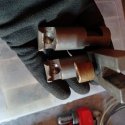
20250409_185425_001 15%.jpg

Also, your sprocket looks like its has a large hub that doesn't allow the puller to slide on all the way.
You'll have to make the opening larger on the puller legs so they slide on all the way.
The puller pictured hasn't been modified for this because the sprocket is already broken.
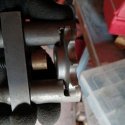
20250409_190947_001 15%.jpg
 
Last edited:
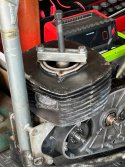
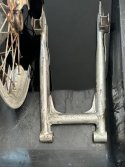
Upping my game / loosing patience... applying pressure on the piston! Removed PO "chain slider" and chain guide mounts. Ordered a stud remover, so hopefully we can get the cylinder loose : )
 

Attachments

  • Move_Piston.jpeg
    Move_Piston.jpeg
    110.1 KB · Views: 6
  • swingarm.jpeg
    swingarm.jpeg
    91.9 KB · Views: 6
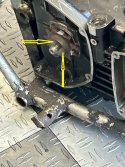
Or you can drill and tap the Sprocket and use a bar across the end of the shaft?
As was mentioned I have torque on one and heated and left overnight and found it on the floor in the morning.
 

Attachments

  • Frozen_Sprocketa.jpg
    Frozen_Sprocketa.jpg
    107.2 KB · Views: 6
Or you can drill and tap the Sprocket and use a bar across the end of the shaft?
As was mentioned I have torque on one and heated and left overnight and found it on the floor in the morning.
IDK but isn't the sprocket heat treated making it hard to drill? I broke a sprocket once and ended up welding two bolts to it, then used the puller while applying oxy/acetylene heat. Popped right off. Oh yeah, I also cut off all excess sprocket material to reduce the mass so it would heat faster.
 
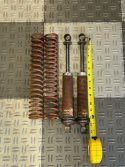
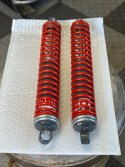
Not really related to the '72 rebuild, but the parts bike 400CR Curnutt shocks have been rebuilt by Scott Tremblay an now installed on my '74 400CR : )
 

Attachments

  • Curnutt_Before.jpeg
    Curnutt_Before.jpeg
    113.3 KB · Views: 13
  • Curnutt_After.jpeg
    Curnutt_After.jpeg
    96.9 KB · Views: 13
  • IMG_1407.jpeg
    IMG_1407.jpeg
    194.8 KB · Views: 13
Not really related to the '72 rebuild, but the parts bike 400CR Curnutt shocks have been rebuilt by Scott Tremblay an now installed on my '74 400CR : )
Good looking shocks after their restoration. At 14" those are long shocks. You'll need to keep an eye on excessive chain tension and slack.
 
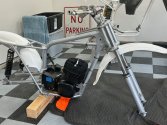
The frame is a lot lighter than the engine - put the engine on the clutch side on some 12" long 2x4s to provide some working space for hands (towel or foam under the clutch cover) and get a helper and carefully bring the frame down over the engine. Remember to insert the lower rear bolt in the engine prior to installing in frame. Painters tape on the lower frame rails help prevent nicks and scratches. Insert the upper rear bolt and front engine mounts - snug them up and rotate the frame/engine assembly in the vertical.
 
Last edited:
* I use a towel too. I install the engine in the completed chassis with no front motor mounts or gas tank and with the bike on its kickstand. I suppose a center stand would work but would make it hard for a shorter fella or lady to mount the bike in step three. Could remedy this by removing the rear shocks.
* Using a beach towel folded in half, I cover the entire bottom of the frame within the engine bay allowing the towel to roll up the front main frame rail about eight inches, taping it if necessary.
* I pickup the motor and set it in the engine bay on the frame rear end first then gently set it on the front frame rail. If the bike is on the kickstand I enter on the clutch side because the kickstand keeps the bike from tipping over. If you're using a bike stand then either side should work.
* With the engine sitting securely on the towel covered frame I throw my leg over the seat. While straddling the bike I reach down on each side of the motor grabbing the bottom of the cylinder or ignition cover on the right and the kicker lever on the left. Then man handle it into place. Top rear mount first then allow the motor to pivot into the lower rear mount, which is notched.
* Next I remove the towel and install the front mounts.

The 450's are monster motors so I install these with the top end off and cylinder studs removed. I assemble the top end inside the frame. Could also do this with any motor.

I've installed all my motors this way from 68 360's to 73 450's.
 
Back
Top