Part 1: Tear Down
Background:
I have a 2008 CR125. Here is the tear down procedure that I used to remove my original 125 top end. It should be applicable to other model years as well. I probably removed more things than needed, but it made the job easier for me. I will be installing a WB165 big bore kit. When upgrading to the WB165 kit, you will need to send Motosportz/Wallybean your old cylinder, head, and power valves (still assembled in the cylinder). Those parts will be modified for the new 165cc piston.
Since this was my first tear down of a top end, I got some helpful tips from Walt (Wallybean). These are included below along with pictures that I took to help document the process. Hopefully, this can help others that are also be new to this. The top end guru's are welcome to post their comments. Any tips/tricks that can help make it an easier process would be great to have.
NOTE: I have omitted some of the basic steps like removing gas tank, exhaust pipe, and pv cover. Everyone has done these at some point.
General Note:
Power wash your engine area of the bike before you do any disassembly to remove most of the dirt that could get into the crankcase. Use a little brake cleaner after you get the pipe off to get the rest. Always keep your open engine parts covered to eliminate the chance of dirt/dust/flying parts getting in where it doesn't belong.
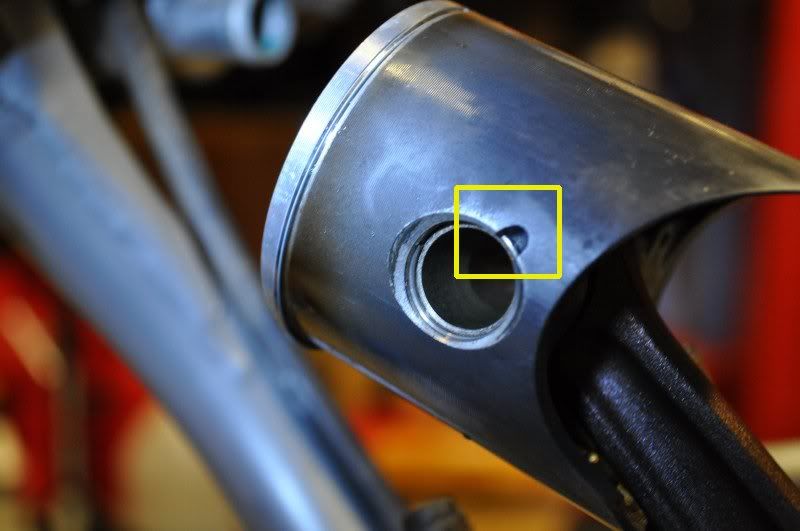
VERY IMPORTANT: Always stuff rags, old towels, etc. in the lower end BEFORE removing the piston circlips.
A new thread has been created for Part 2: Installation of the WB165 Kit.
Background:
I have a 2008 CR125. Here is the tear down procedure that I used to remove my original 125 top end. It should be applicable to other model years as well. I probably removed more things than needed, but it made the job easier for me. I will be installing a WB165 big bore kit. When upgrading to the WB165 kit, you will need to send Motosportz/Wallybean your old cylinder, head, and power valves (still assembled in the cylinder). Those parts will be modified for the new 165cc piston.
Since this was my first tear down of a top end, I got some helpful tips from Walt (Wallybean). These are included below along with pictures that I took to help document the process. Hopefully, this can help others that are also be new to this. The top end guru's are welcome to post their comments. Any tips/tricks that can help make it an easier process would be great to have.
NOTE: I have omitted some of the basic steps like removing gas tank, exhaust pipe, and pv cover. Everyone has done these at some point.
General Note:
Power wash your engine area of the bike before you do any disassembly to remove most of the dirt that could get into the crankcase. Use a little brake cleaner after you get the pipe off to get the rest. Always keep your open engine parts covered to eliminate the chance of dirt/dust/flying parts getting in where it doesn't belong.
VERY IMPORTANT: Always stuff rags, old towels, etc. in the lower end BEFORE removing the piston circlips.
A new thread has been created for Part 2: Installation of the WB165 Kit.


")