• Husqvarna Motorcycles Made In Sweden - About 1988 and older

  • Hi everyone,

    As you all know, Coffee (Dean) passed away a couple of years ago. I am Dean's ex-wife's husband and happen to have spent my career in tech. Over the years, I occasionally helped Dean with various tech issues.

    When he passed, I worked with his kids to gather the necessary credentials to keep this site running. Since then (and for however long they worked with Coffee), Woodschick and Dirtdame have been maintaining the site and covering the costs. Without their hard work and financial support, CafeHusky would have been lost.

    Over the past couple of weeks, I’ve been working to migrate the site to a free cloud compute instance so that Woodschick and Dirtdame no longer have to fund it. At the same time, I’ve updated the site to a current version of XenForo (the discussion software it runs on). The previous version was outdated and no longer supported.

    Unfortunately, the new software version doesn’t support importing the old site’s styles, so for now, you’ll see the XenForo default style. This may change over time.

    Coffee didn’t document the work he did on the site, so I’ve been digging through the old setup to understand how everything was running. There may still be things I’ve missed. One known issue is that email functionality is not yet working on the new site, but I hope to resolve this over time.

    Thanks for your patience and support!

Magnificent 7

Great Posts

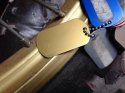
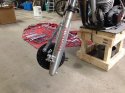
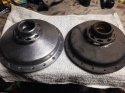
Since I will doing a few rims soon. How much does one polish the base metal ? Meaning how far to go. Why ? Well friend had his just done
and turned out looking good but was just a bit disappointed they were more of a flat gold. Looks
great but I want some gloss of the rim to show through the color.

May send rims out to just a motorcycle rim anodizer. Price was quoted at $60 each for 6 rims

Color is an based on how long rims stay in solution. So that why we see so maybe different golds out there.

Good questions Gary.

I spent an hour in the anodizing plant in Indy with their foreman. Great guy!
He told me what you get out of your prep is what your anodizing turns out like.
He told me if to polish them so anodizing turns out the best. They send a lot of raw parts out to be polished before anodizing. I'm pretty sure that he said if I want them dull, not to polish them.
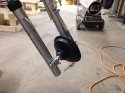
I am taking mine down to a mirror finish. Maybe overkill but I do not want to redo them.
I will to like 3000 grit and takes a lot less effort to polish on buffing wheel.
He assures me that he can get close to the color. If memory serves me correct? Thought he said they add blue to darken gold? If memory is correct, I think they can also clear when done. Cause they kept saying that make sure I get old anodizing off and something about the clear being removed or it affects the new process?
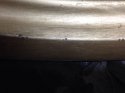
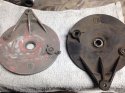
Funny thing is: some of my rims are brushed aluminum and some are not?
I think I have a well preserved unfaded rim that I am taking to match the gold.
I will find out soon. But also check as well. Two heads are better than one unless your are Siamese twins and your attached brother likes Pentons!
I will run mine down right after thanksgiving and spend some time there.
I have had a lot of auto parts done and was always told to polish them. I know they clean the aluminum and never had to worry about polish stuff down in holes to get out.
Never have done the brushed affect on any parts.
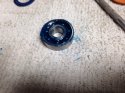
He gave me those sample color chips and they are shiney. The one antique gold one above matches my good original rim. Pretty darn close, match titch darker.
 
I just spoke to Mrs Wetzel think several months ago. Wanted to see if they had any jersey's around.
She looked and did not have any left.
They were good people and guys drove for miles to get their bikes and get stuff done.
They were like another Hall's.
 
Here is the sample chip I have held up to my best rim.
Pretty darn close if you take out the lighting hitting parts of the rim?

Also, here is a pic showing those brushed aluminum marks under anodizing in some of my rims.
Pic looks lighter because had to put it in light for brush marks to show up.
 

Attachments

  • image.jpg
    image.jpg
    121.6 KB · Views: 52
  • image.jpg
    image.jpg
    71.6 KB · Views: 52
Going to try this combo on my 83 forks.

Use a seal plus a modern fork wiper like newer bikes. Then go with short blue fork skins or like seal savers?
 

Attachments

  • image.jpg
    image.jpg
    166.4 KB · Views: 21
Just love new wheel bearings with no grease ! Wth?
 

Attachments

  • image.jpg
    image.jpg
    164 KB · Views: 22
  • image.jpg
    image.jpg
    149.7 KB · Views: 23
  • image.jpg
    image.jpg
    132.8 KB · Views: 23
Hmm, the longest part of changing bearings for me is washing the small excuse for grease out, and re-packing properly with waterproof stuff.

There is a lot of work gone into those rims, they should turn out perfect.
 
Thanx guys! I got some work ahead of me to get rims ready.
Think I will get everything blasted up today then get my inside places done with a welding pass.
Then got the holes to fill up in another rim where I had to drill and knock out the rim pins that snapped off.
 
Damn, that sounds like a ton of work, but they are going to look great I'm sure! Looking forward to your continued progress on this herd of huskies.
 
Going to try this combo on my 83 forks.

Use a seal plus a modern fork wiper like newer bikes. Then go with short blue fork skins or like seal savers?

These wipers do not work. These create air pressure between seal and wiper and hard to get in and when you push on fork, then one side pops out from air build up. Guess go back to the old way.
I had to stick a feeler gauge between fork tube and wiper to get them in.
 
Here is front hub/brake plate on two fitty.
Plating definately makes it stand out. Going to look good with forks.
 

Attachments

  • image.jpg
    image.jpg
    162.2 KB · Views: 52
  • image.jpg
    image.jpg
    138.3 KB · Views: 48
dang will those things ever see dirt?

Troy,

Ha! Not for a while. There is a lot of stuff I do behind the scenes that you guys don't see. Just the end results.
Like on my front hubs. Here is finished one ready for etching primer versus one not done yet.
Same on the back brake plates. I take out all those corroded pits using Evercoat, primer and spot putty. Plus, I put in all new bearings, seals, etc..... And if the back brake places are loose, I press in new bushings.
 

Attachments

  • image.jpg
    image.jpg
    174.6 KB · Views: 29
  • image.jpg
    image.jpg
    187.1 KB · Views: 29
Oh, many of us are oh so familiar with how much work, elbow grease, & patients it takes to get the results you do. I however am glad to see all the detailed steps you are showing us. Your builds are the ones I like following as much as any I've seen. You do nice work & are getting great results. You are going to have quite the collection of pristine Huskys. Hmmm, which one to ride first.......:popcorn:
 
Thanx guys!

I think they will be worth it in the end.

Tough doing all this cause I work like 50 hours a week, sometimes 60, and put about 70,000 miles a year on my truck traveling. Then I still race Harescrambles and we take care of 9 horses!

Four Purty progressing and got forks done on 83 two fitty.
 

Attachments

  • image.jpg
    image.jpg
    145.1 KB · Views: 37
  • image.jpg
    image.jpg
    139 KB · Views: 35
Back
Top