-
Hi everyone,
As you all know, Coffee (Dean) passed away a couple of years ago. I am Dean's ex-wife's husband and happen to have spent my career in tech. Over the years, I occasionally helped Dean with various tech issues.
When he passed, I worked with his kids to gather the necessary credentials to keep this site running. Since then (and for however long they worked with Coffee), Woodschick and Dirtdame have been maintaining the site and covering the costs. Without their hard work and financial support, CafeHusky would have been lost.
Over the past couple of weeks, I’ve been working to migrate the site to a free cloud compute instance so that Woodschick and Dirtdame no longer have to fund it. At the same time, I’ve updated the site to a current version of XenForo (the discussion software it runs on). The previous version was outdated and no longer supported.
Unfortunately, the new software version doesn’t support importing the old site’s styles, so for now, you’ll see the XenForo default style. This may change over time.
Coffee didn’t document the work he did on the site, so I’ve been digging through the old setup to understand how everything was running. There may still be things I’ve missed. One known issue is that email functionality is not yet working on the new site, but I hope to resolve this over time.
Thanks for your patience and support!
You should upgrade or use an alternative browser.
Help! Debris found in my engine - 610/630 clutch issues
- Thread starter Rough Rider
- Start date

Spice Weasel
Husqvarna
AA Class
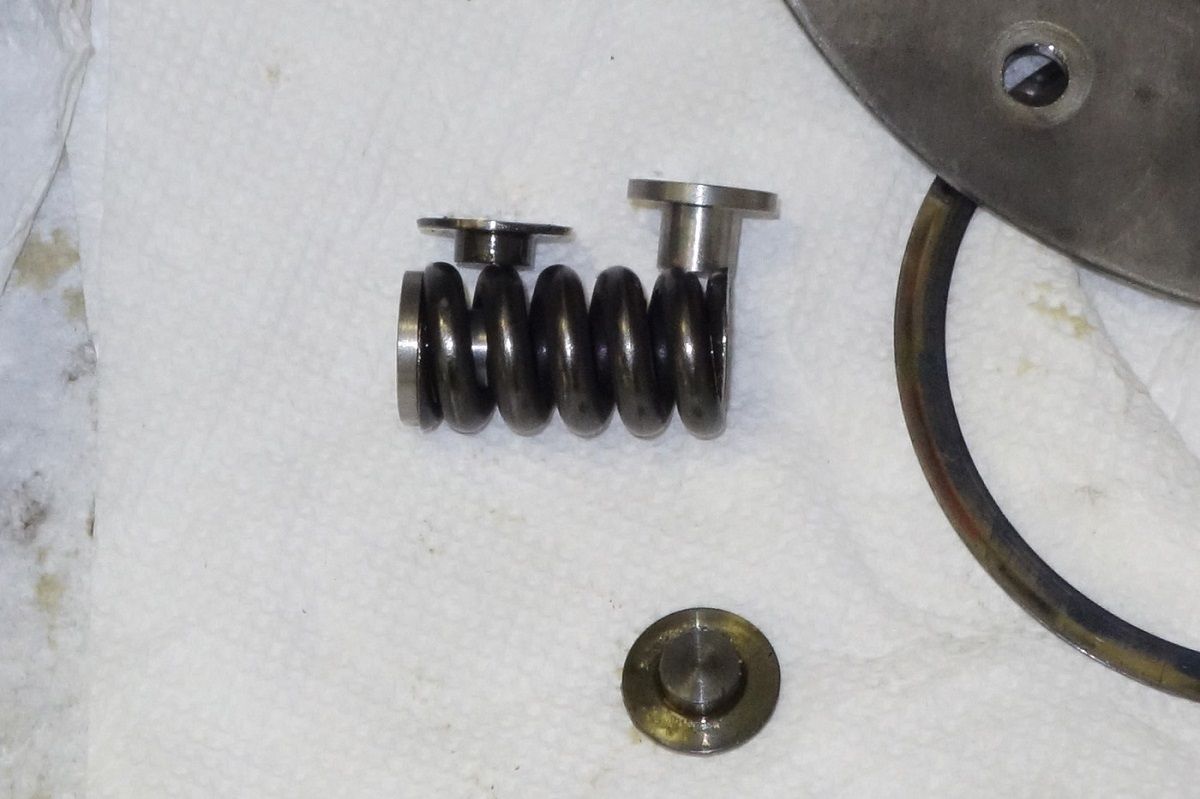
IMO the worst thing is that the rivets and too short. They are 18mm lengh and that means that you have only 2,8mm lengh to rivet. If the were 20mm instead 18mm they were ideal ones.
I had a look inside some steel bar this afternoon to see if there were some rivets inside it -But I insist: if they were 20mm instead of 18mm we'll get a fat 10mm "head" instead of a thin 8,5mm one.


motranqui
Husqvarna
AA Class
I had a look inside some steel bar this afternoon to see if there were some rivets inside it -
View attachment 84552View attachment 84553
Do you make your own rivets? This case your a lucky man ;-).
Yes, I think that 19mm with the head we can see in your pics is ideal. Or 20mm in case the head has the shape that the Spanish dealer has sent to me. If you are not a profesional riveting I think is better option "my" rivets. Other wise you will have to use a tool with the same diameter of the head of the rivets to prevent the hits goes (indirectly) not only to the rivet but also to the inner surface of the housing... and be very carful every single time you hit the tool so that it stays in place.
For me it's not easy if you don't have help (is not a one - man job). May be that's why now the rivets comes like the ones I've got...
Spice Weasel
Husqvarna
AA Class
#1 rivet i done cold, striking it directly with the ball side of the hammer, the results were good and the method proved to be sound.
#2 rivet i held a large drift on the rivet and struck the drift. This method was by far the hardest and most violent method and involved many more forceful strikes, it did not prove to be a sound method.
#3 rivet i heated the tip until glowing orange then put it into its position and used the same method as #1 rivet. This didnt seem to make much of a difference, so made heating seem like a waste of time.


 #1 rivet is on the right side of the last picture
If anyone wants, i will grind the heads off the rivets, remove them and post pictures of the used rivets.
motranqui
Husqvarna
AA Class

I used method number two because I must say I'm not good shot and so for sure I would've damaged the cluth housing. And yes, I agree with you: method 2 is more violent than number 1 but I have not choice...
If you have got 10mm head diameter... this is ideal
 (I've got only 8,5 due to the shortness of the rivet...)
Anyway, now I'm a "lucky" man since I have the "old" clutch housing and so I can make "riveting tests" on it

mg94
Husqvarna
A Class
bertie@rietveldknives.com
He sold me a couple of sets; 50 $USD per set, shipped. High quality hardened tool steel. I put them in my 610 and my 630. Sweet relief.
I'm in need of a set of cup washers. I know cutler1 made them but he hasn't replied to my pm yet. I know there was another fella from europe that made them a while back. If anyone has a spare set and is willing to sell it just PM me or reply to this post so I can get in touch with them!
DYNOBOB
Husqvarna
Pro Class
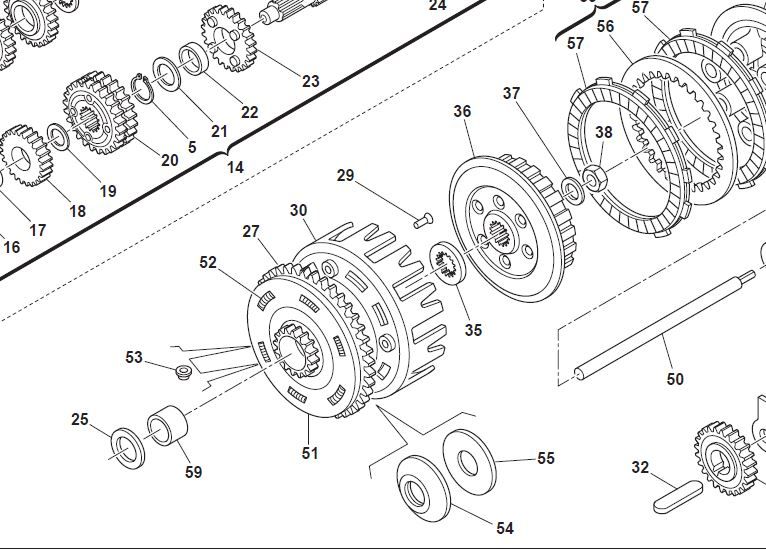
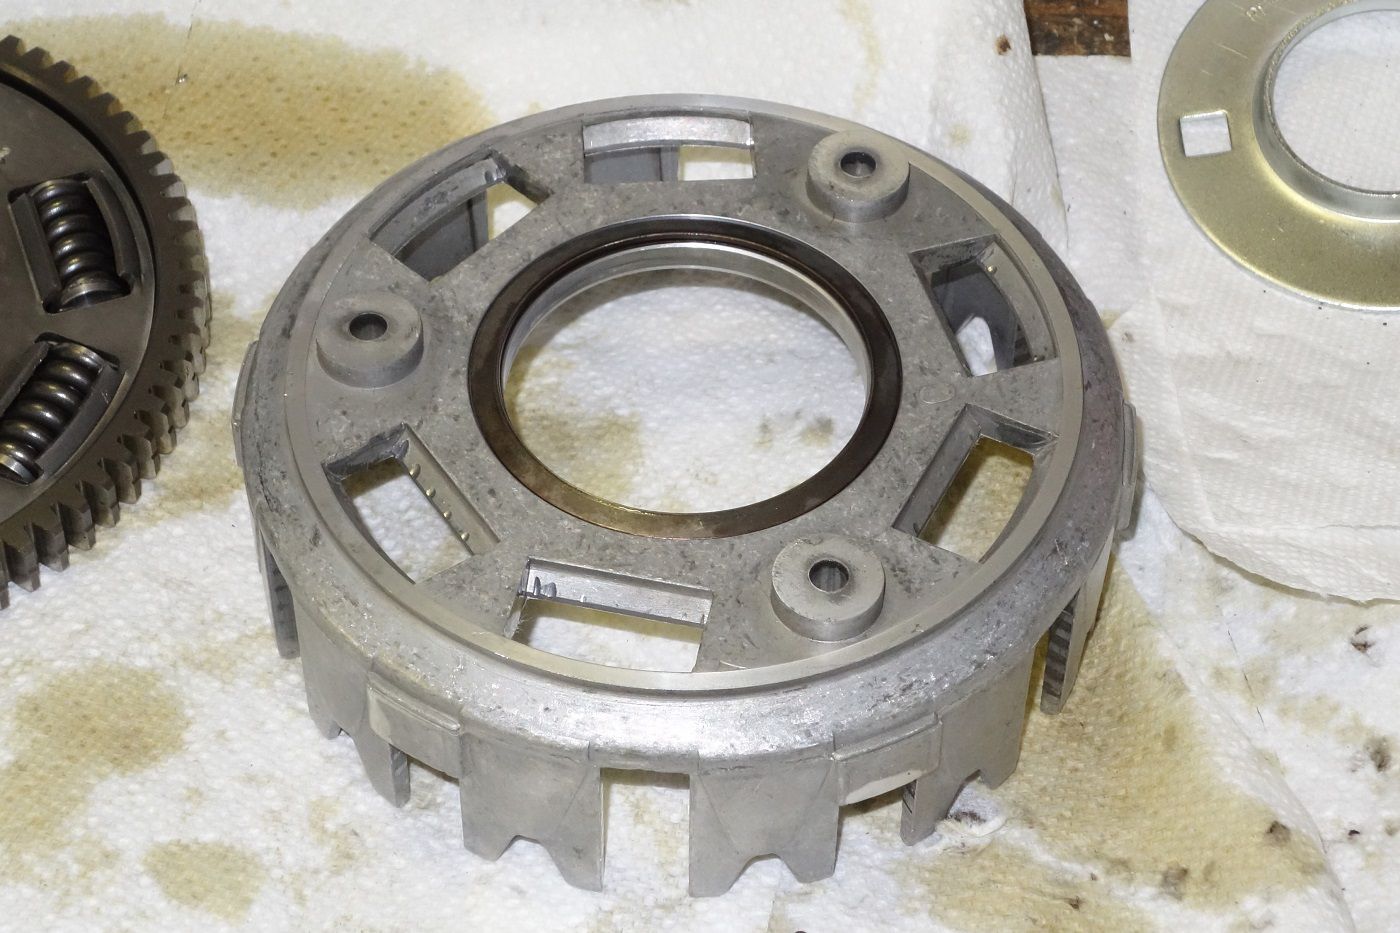
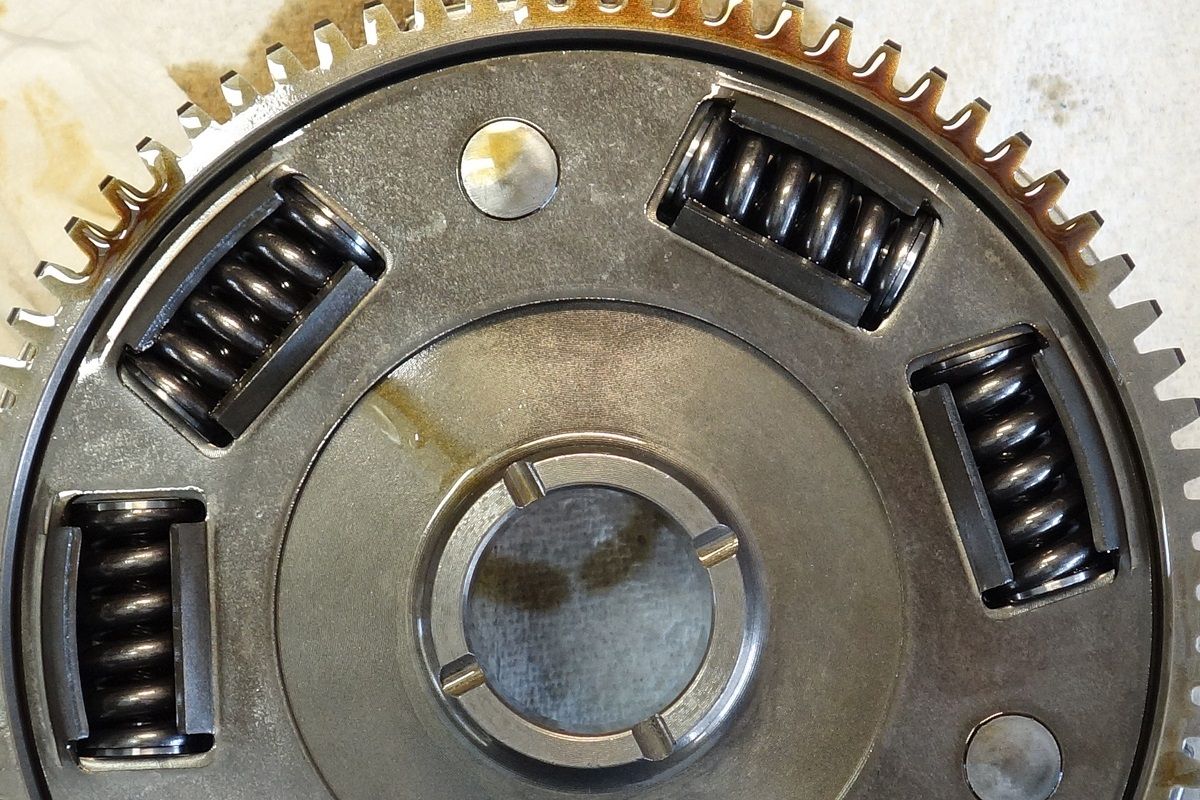
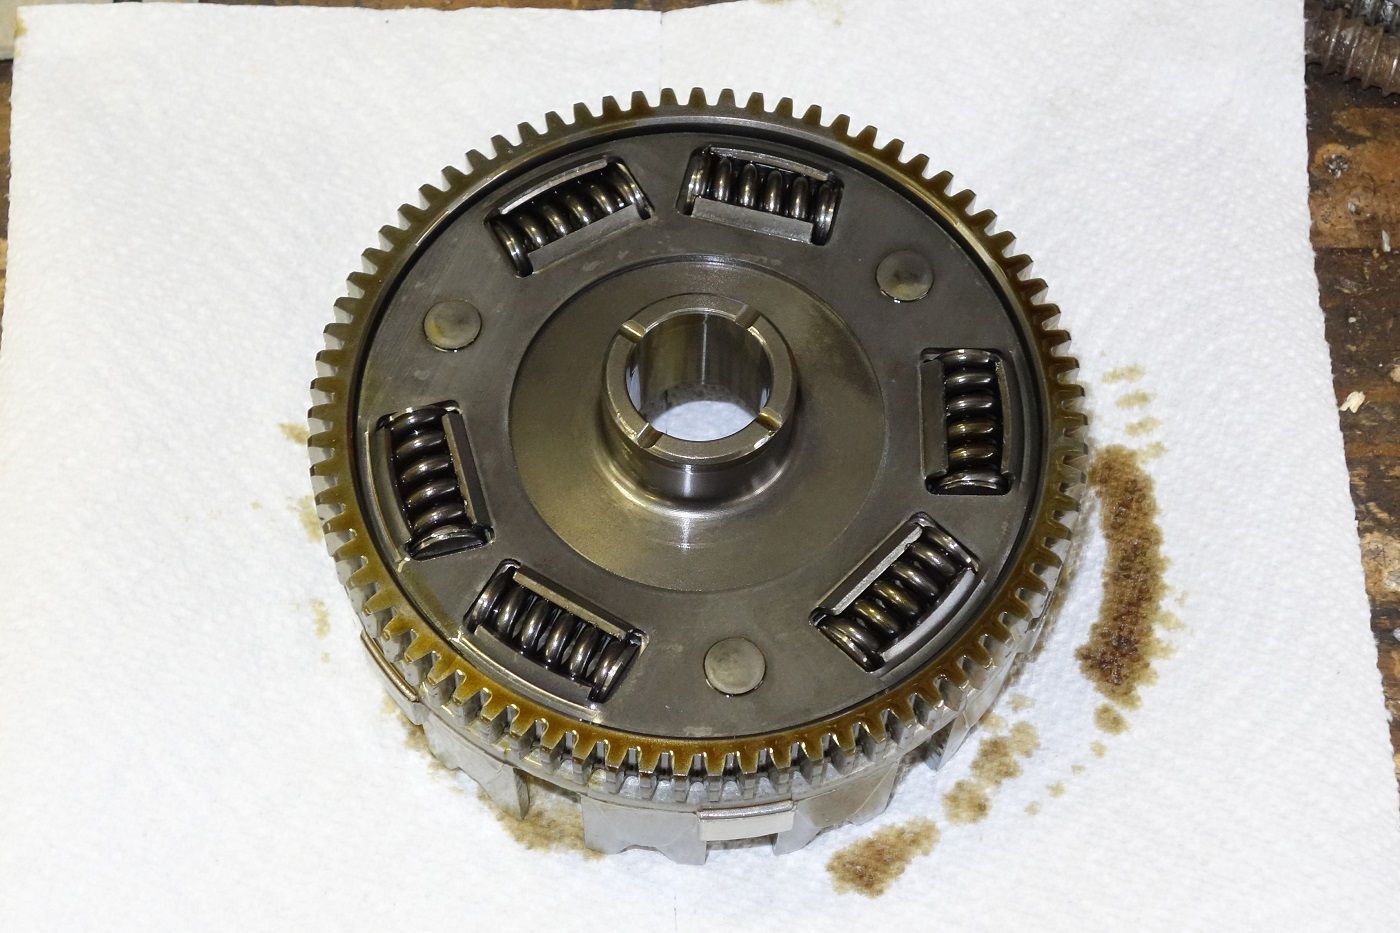
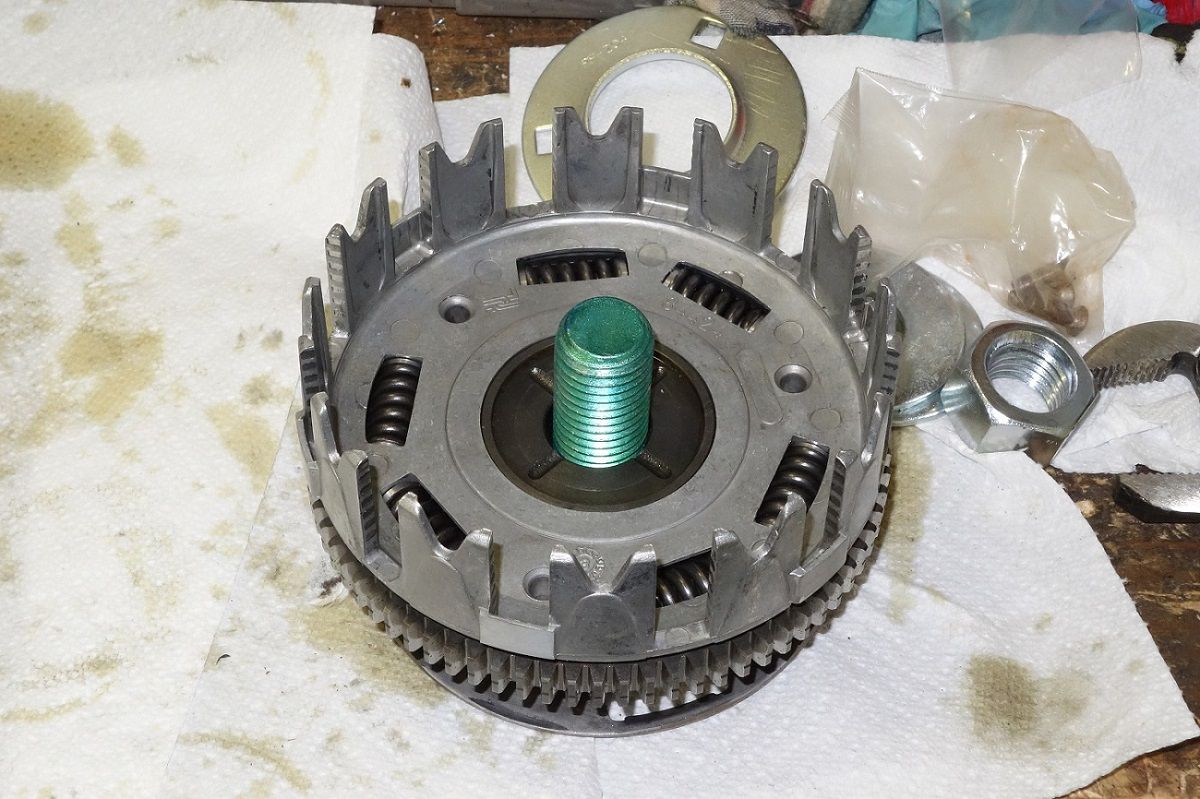
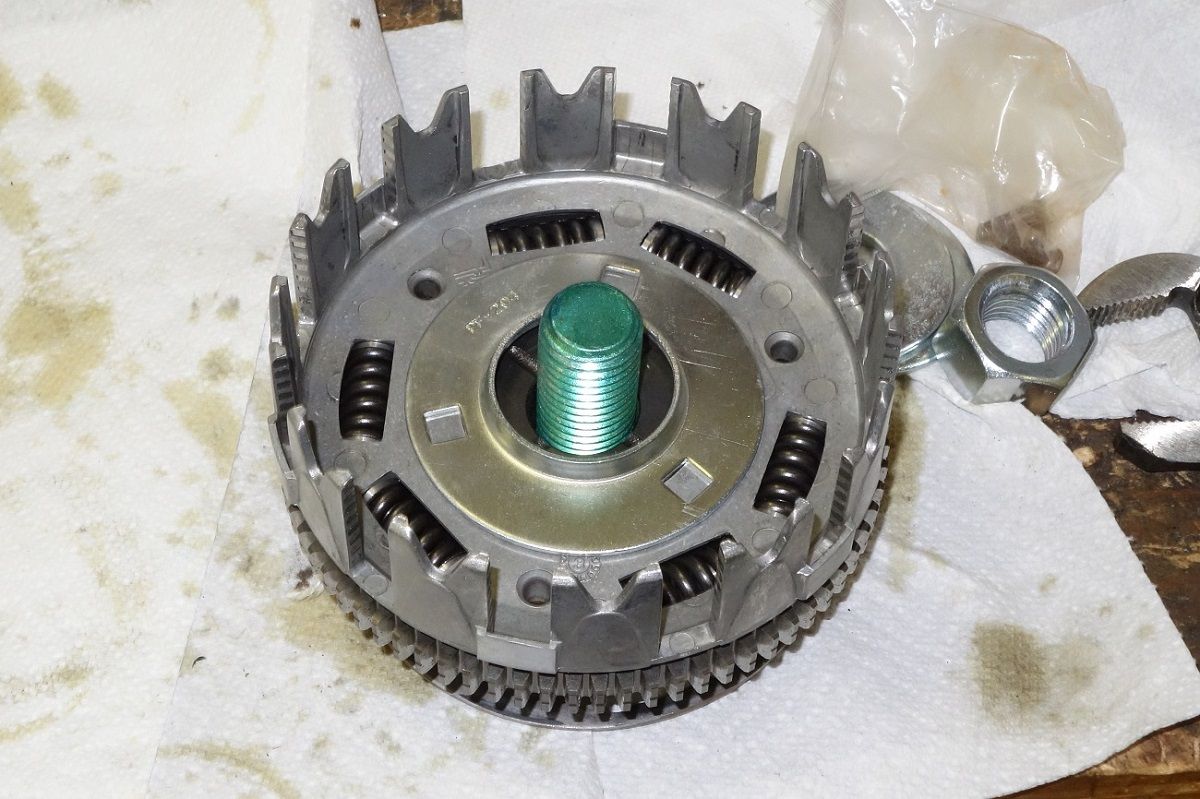
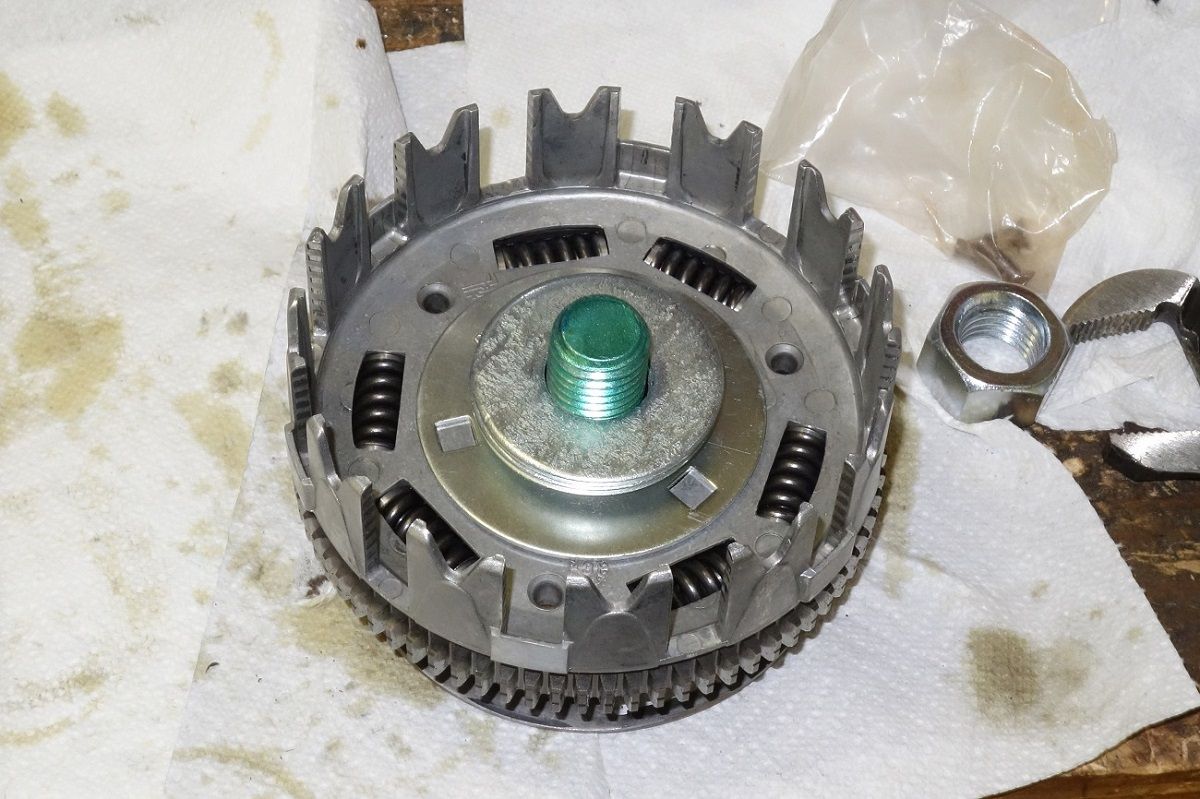
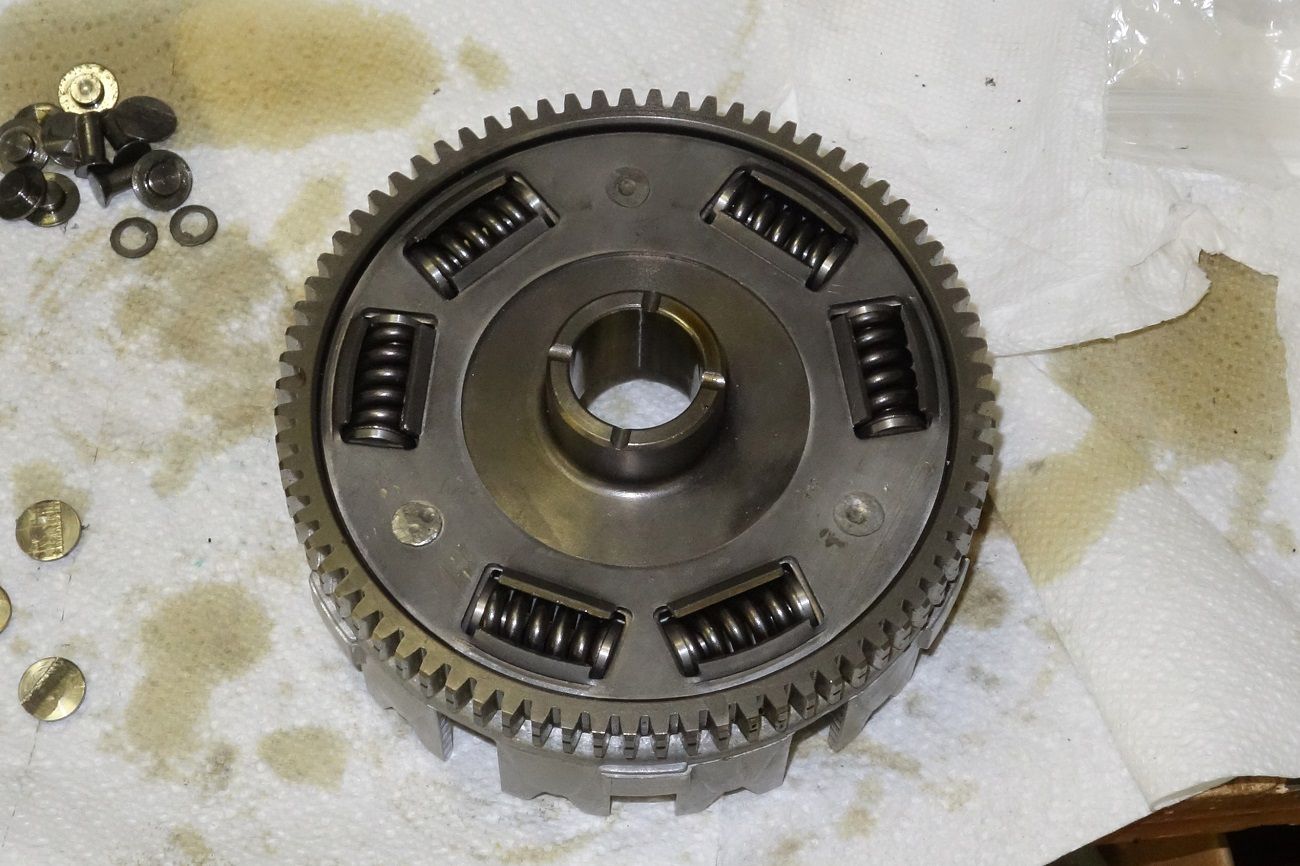
When I fit the pieces back together, the basket side and gear side rock slightly over the big cone washer that separates them. How have you guys insured that the two parts are still parallel when the whole assembly is back together? If the first rivet installed pulls the two pieces out of parallel then it seems to me you're screwed and the clutch basket is spinning out of round.
Have you pulled the two together somehow and compressed the cone washer?
Should the cone washer be compressed? It appears to me it's job is to keep the basket and gear slightly separated so they don't rub as the cush springs compress.
I have a sickening feeling that this is not going to be back in stock tolerance when assembled.
.
CJBROWN
Husqvarna
AA Class
Are you sure they're both seating correctly? None of it is a 'spring fit' nor was there any pressure in mating everything to re-rivet.
Spice Weasel
Husqvarna
AA Class
I have done 7000 miles since i done mine, im sure there will be forum members that have higher miles since riveting theirs.
DYNOBOB
Husqvarna
Pro Class
Something doesn't sound right - I don't recall any reassembly issues. Unfortunately I didn't take a lot of pictures and don't even remember all the parts.
Are you sure they're both seating correctly? None of it is a 'spring fit' nor was there any pressure in mating everything to re-rivet.
All the parts are definitely in the same order as they came apart. You can see the wear on the flat washer and cone washer and the wear on the basket/gear where they were touching. When you set the gear on the basket it is definitely landing on the cone washer and not touching the basket (until you push down on one side of the gear and it rocks over).
I think I have a solution to hold the basket/gear tight and parallel while the rivets go in, don't know what else I can do. May peen the rivets this evening. Only want to do this once if possible.
Having read what everybody else has done over the years, I was surprised this had never come up. It could be that the act of peening the rivets naturally draws everything together evenly?
.
EricV
Husqvarna
AA Class
Have there been any reports of clutch components failing from any of the forum members that have riveted their baskets?
I have done 7000 miles since i done mine, im sure there will be forum members that have higher miles since riveting theirs.
I'm curious also. I did mine at around 8K miles and I'm at around 18K now. I hope/plan to open it up in the not too distant future to have a look.
DYNOBOB
Husqvarna
Pro Class
Have there been any reports of clutch components failing from any of the forum members that have riveted their baskets?
I have done 7000 miles since i done mine, im sure there will be forum members that have higher miles since riveting theirs.
I'd also like to see some of the replacement cup washer jobs once they have some miles on them. I'm wondering if the wear is going to transfer away from the cup washers to the basket and hub. I'm a little pissed at myself for taking it apart, my stock washers still looked pretty good at 12,500 miles...
.
Spice Weasel
Husqvarna
AA Class
Have there been any reports of clutch components failing from any of the forum members that have riveted their baskets?
I have done 7000 miles since i done mine, im sure there will be forum members that have higher miles since riveting theirs.
Im willing to bet there has not been any failures of any clutches that have been put back together and riveted.
My clutch looked fine when i took it out 5000 miles after upgrading the spring washers.
I will bet that the clutch basket fingers will be worn well out of tolerance and the clutch basket will need replacing before any significant amount of wear has been done by the upgraded spring washers, you could probably take the upgraded spring washers from the worn out clutch and use them when you need a replacement basket.
TLDR- i wouldnt worry about it
DYNOBOB
Husqvarna
Pro Class
Anyway...
This is what my washers looked like at 7500 miles
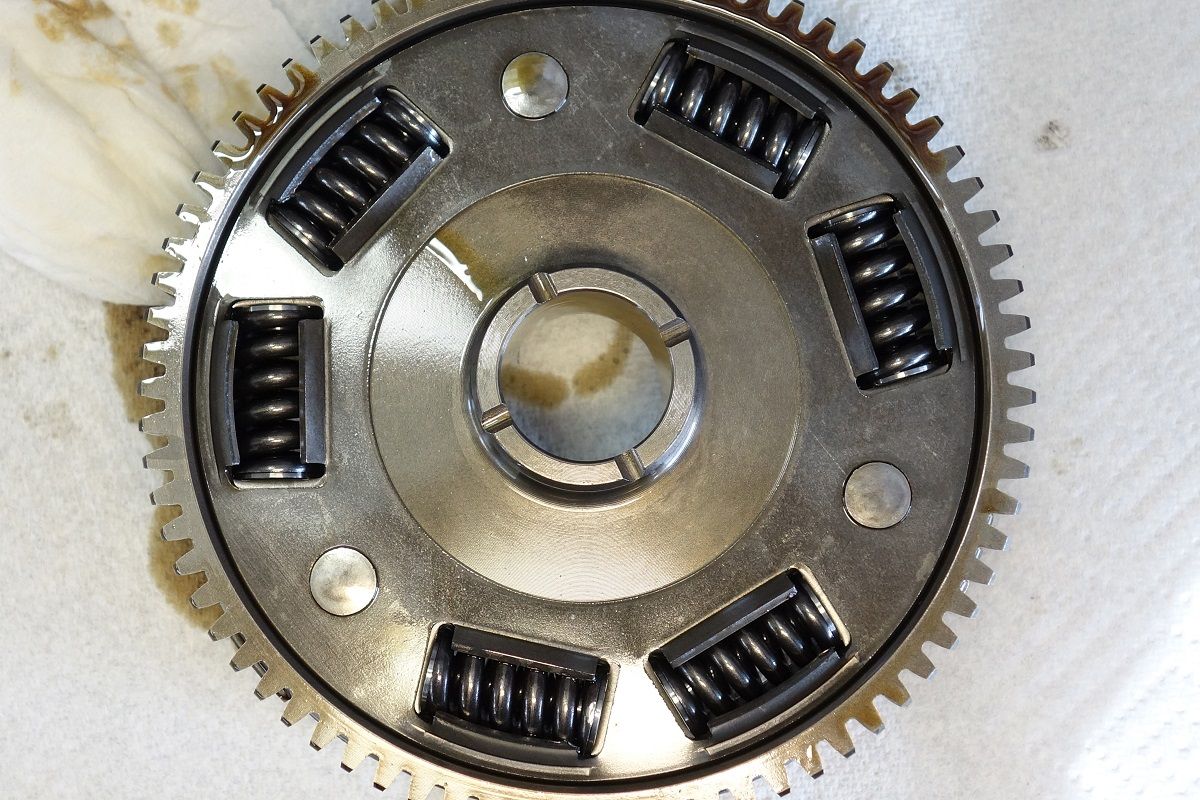
And this is what they look like at 12,500 miles as I pulled things apart
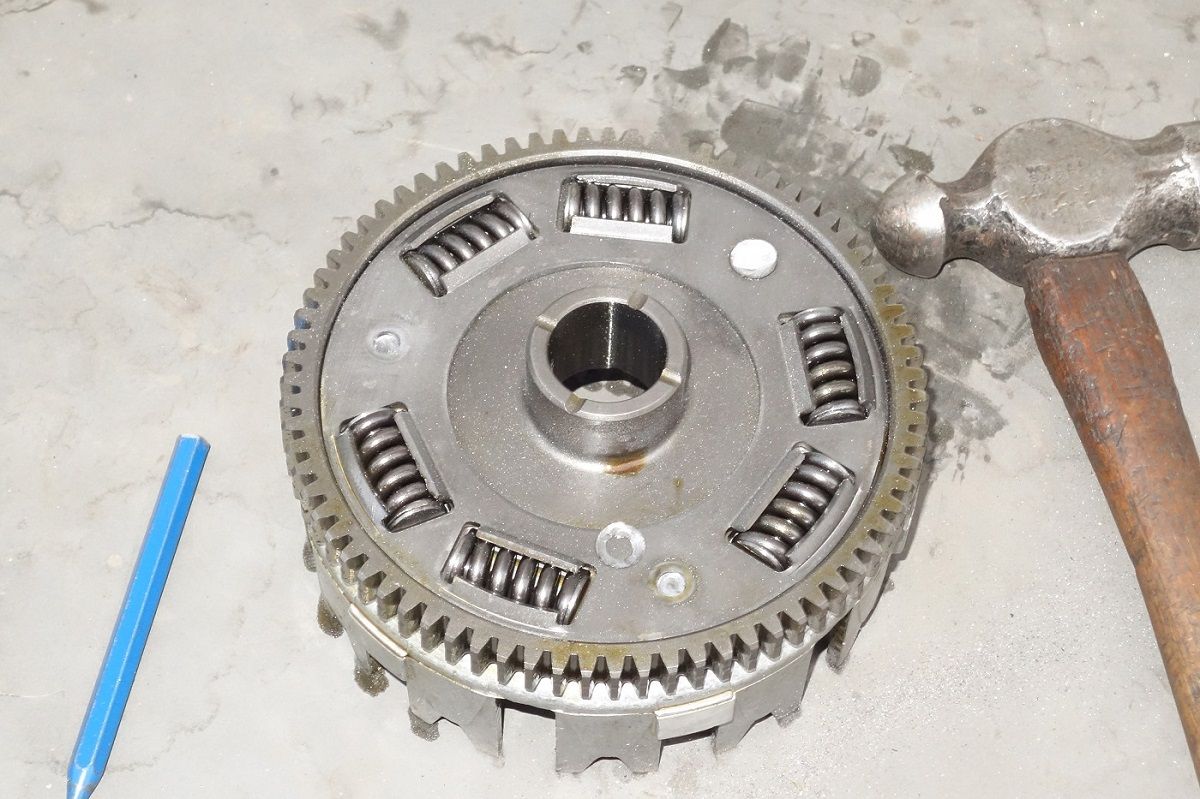
I ended up using a 1" bolt and some large washers to pull the two parts together evenly on the cone washer. Might not have been necessary, but made me feel better. It drew the parts together sufficiently that the top plate (piece under the mushroomed rivet) was in contact with the three legs of the basket.
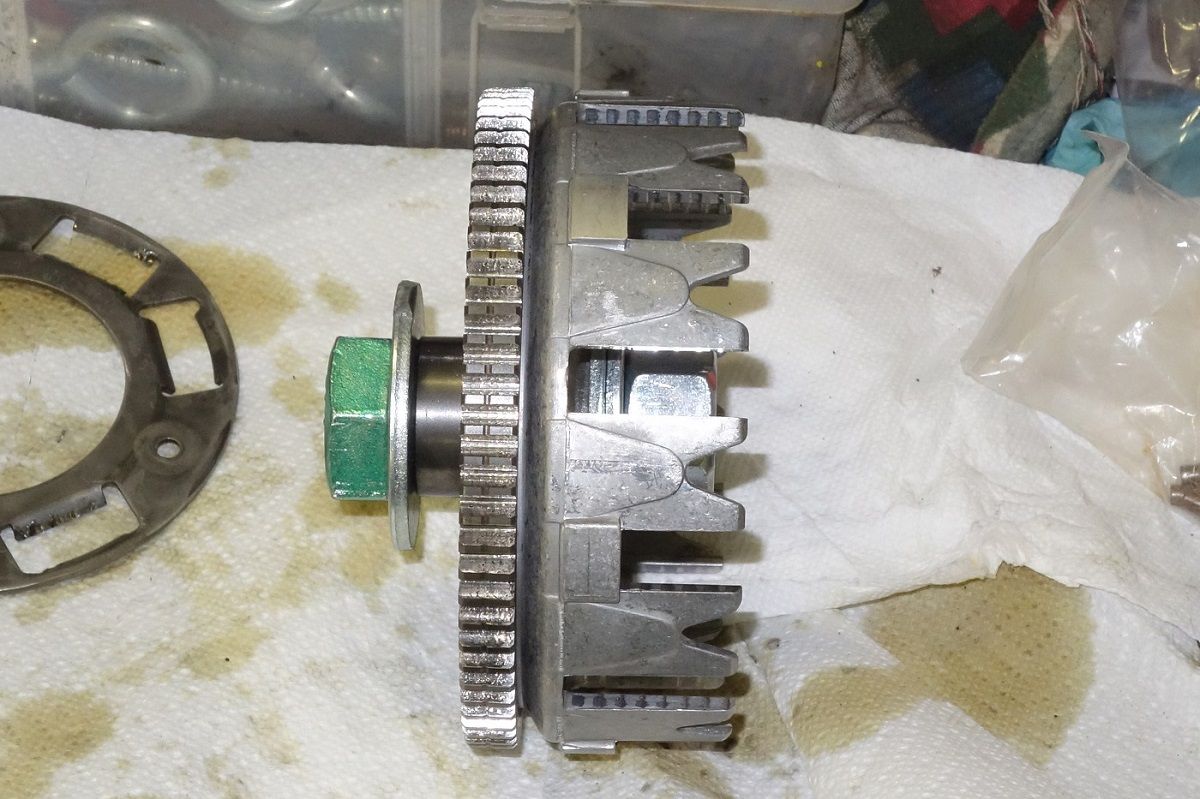
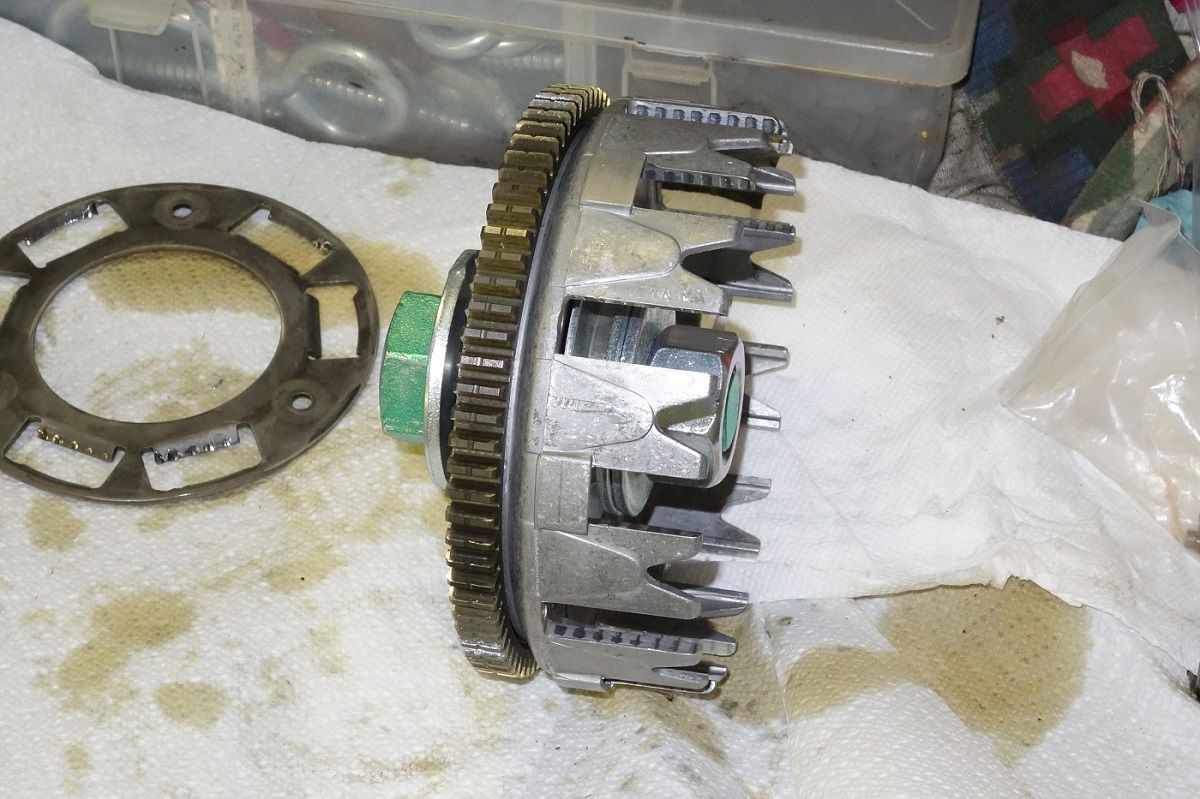
I held the assembly over a dolly in the vice while my buddy peened the rivets. Everything looks good.
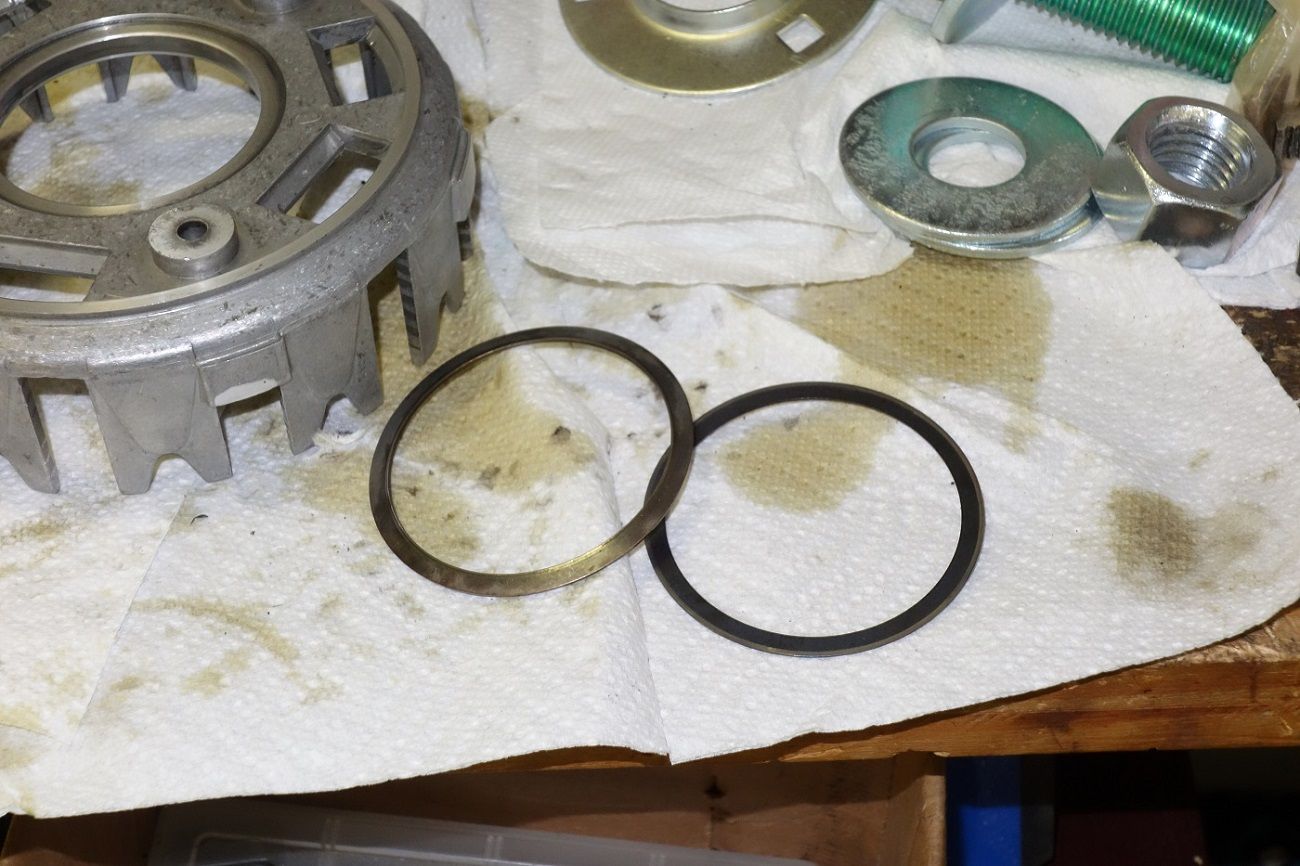
Old washers vs new. I believe then new ones are Indy's, they came with a box of parts I bought several years ago from Jersey Janet when she sold her bike.
Old ones have wear but don't look much different than at 6500 miles. I believe they would have easily gone 20,000 miles.

.
motranqui
Husqvarna
AA Class
. How have you guys insured that the two parts are still parallel when the whole assembly is back together? If the first rivet installed pulls the two pieces out of parallel then it seems to me you're screwed and the clutch basket is spinning out of round.
Have you pulled the two together somehow and compressed the cone washer?
Should the cone washer be compressed? It appears to me it's job is to keep the basket and gear slightly separated so they don't rub as the cush springs compress.
I have a sickening feeling that this is not going to be back in stock tolerance when assembled.
.
As someone said above... "you will stop hammering the rivet when you feel that enough is eonoug". In my opinion you have made a good remark to this issue. Is too bad that nobody had checked the "gap" betwen the two pieces before take them apart. May be because the gap is so tiny that is not noticeable.
So, IMO, all of us have put toguether both pieces without leting a tiny gap betwen them, I mean, we have smash 100% the spring washer. Is it too bad? I don't know, but it really make no sense that Husqvarna put a spring washer (part number 54) betwen both pieces (basket side and gear side) just to be smashed...
But I'm afraid that it's completly imposible using a hammer to let a tiny gap betwen the two pieces... nobody has the precision machinery to make it... even the onces that send the work to be made to a mechanic
(Edit) Ok, Ok, I've thought a bit more about it and now I'm optimist
") . Let's see: the pieces 54 and 55 form a set so that no matter how much the 54 is tightened there will always be a small gap ... due to the thickness of both washers.
. Let's see: the pieces 54 and 55 form a set so that no matter how much the 54 is tightened there will always be a small gap ... due to the thickness of both washers.And the 54 has a very special shape to withstand the pressure without hardly deforming.
I am left with this point since I do not think that Husqvarna had a precision machine to rivet with such precision. A rivet is not a mechanical piece for precision ...
