Boosted Josh
Husqvarna
AA Class
Thanks to the install threads on the forum and the help identifying a couple parts in my thread this past weekend I'm happy to say that I got the 144 kit installed without any problems.
I'd never done a top end on a bike before so I was a little apprehensive about tearing into it but I took my time and everything went smoothly.
It was already dark by the time I had it buttoned up on Sunday so I only had a chance to run it through one heat cycle and check for leaks and proper operation.
I gave the metering rod on the Lectron a 1/2 turn clockwise (rich) based on the color of my spark plug base ring and the assumption that the 144 kit would need more fuel (I may be wrong here) throttle response was nice and crisp while in neutral and the idle was good but it was a little crackly when rolling on the throttle before it would "clear its throat" and go. I wasn't going past 1/2 throttle, I just rolling on it easily riding up and down my street. Once I get a chance to ride the bike I'll fiddle with it a bit more. The ground strap was light brown color and looked pretty much right to me, if anything it might be just slightly on the lean side of perfect.
I also installed a WR fuel petcock so now I have reserve which I've been meaning to do for a while. Less stressful not having to worry about forgetting to check my fuel level, running out, and then having to push the bike back to the house or truck.
And I installed a 12T countershaft sprocket. I'll see how 12/50 (4.17) gearing works with the 144 and go from there. If it's too short I picked up a 51T rear from Hall's so I can always try 13/51 (3.92). I was planning going to go 12/51 with the stock displacement but then just decided to put the 144 kit in. I'm about 200lbs and I've been riding behind my house cutting my own trails where it's very steep and overgrown so having more power and torque will keep me from frying my clutch.
I took some pics along the way to help me out if I forgot how something went together and while I'm sure all of this stuff can be found in other threads I figure maybe these will help someone in the future.
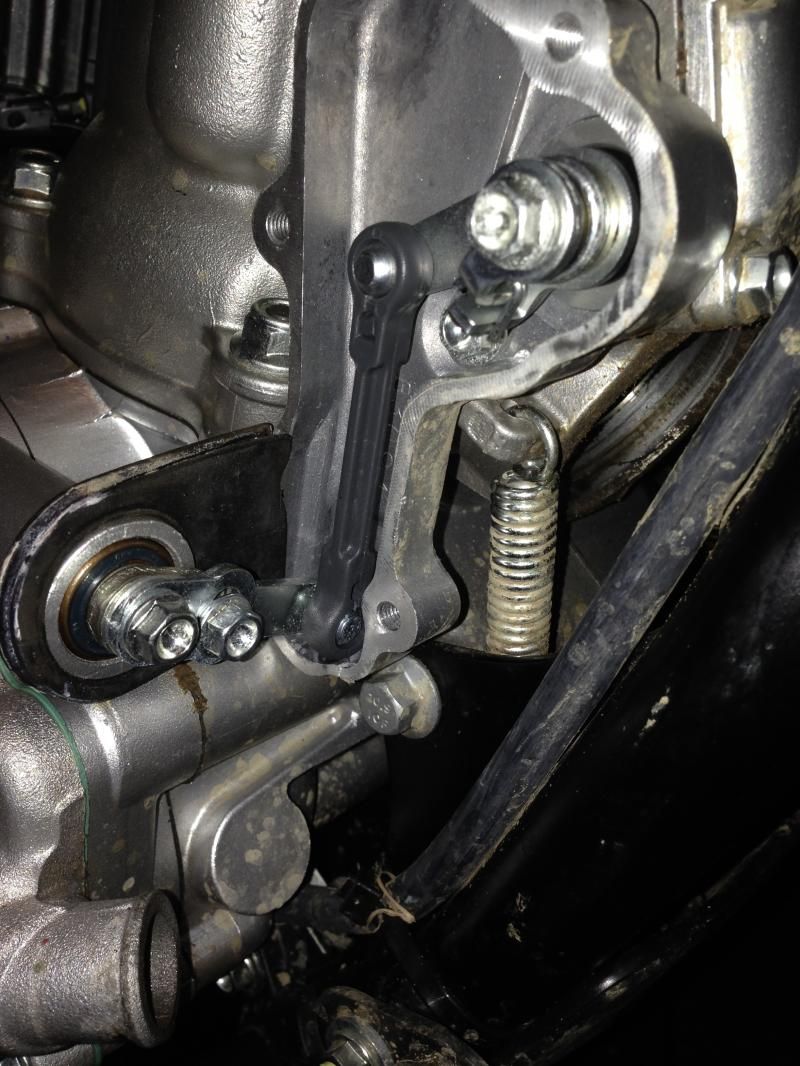
Power Valve linkage
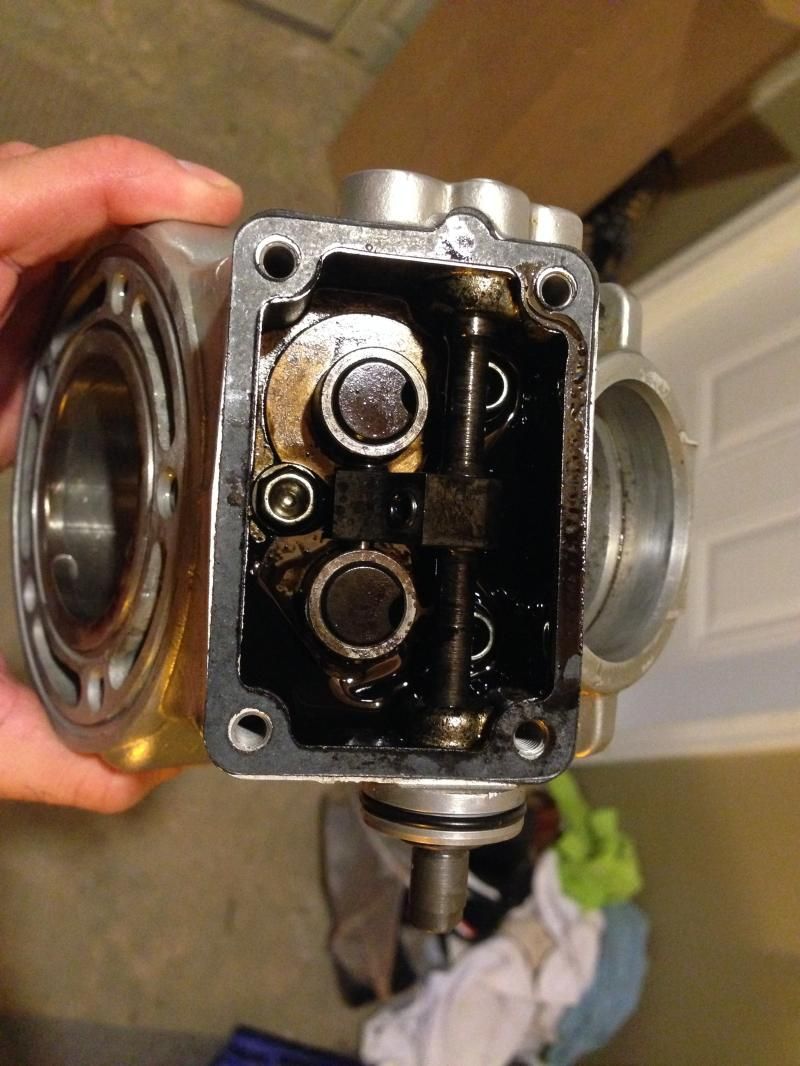
Power valve cover removed
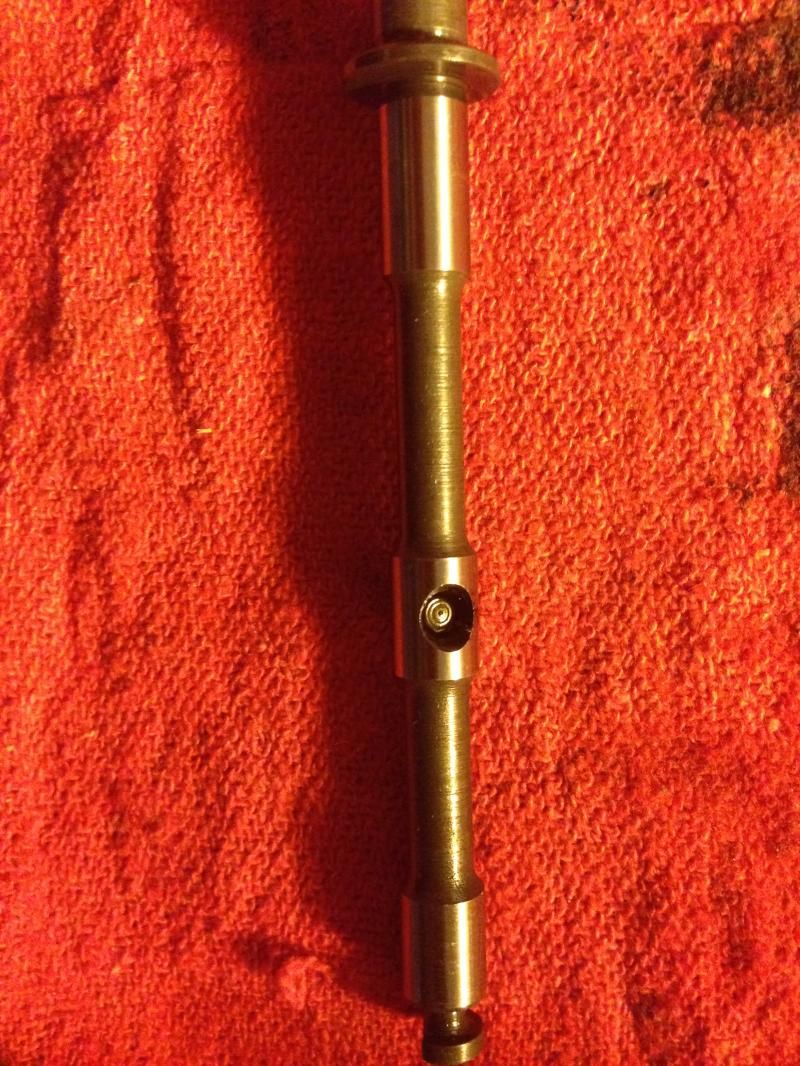
Power valve rod removed. This shows the spot where the grub screw goes in to secure the lever to to rod. Kelly mentioned it in his thread so I took a pic of it.
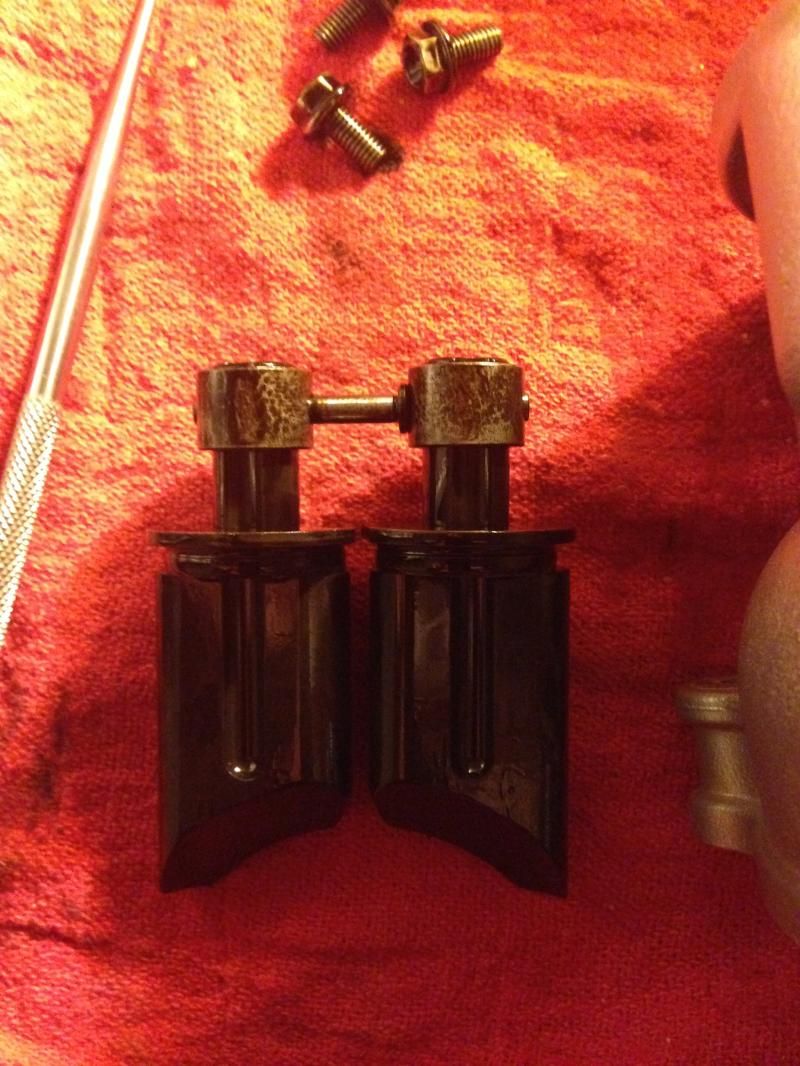
Power valves removed
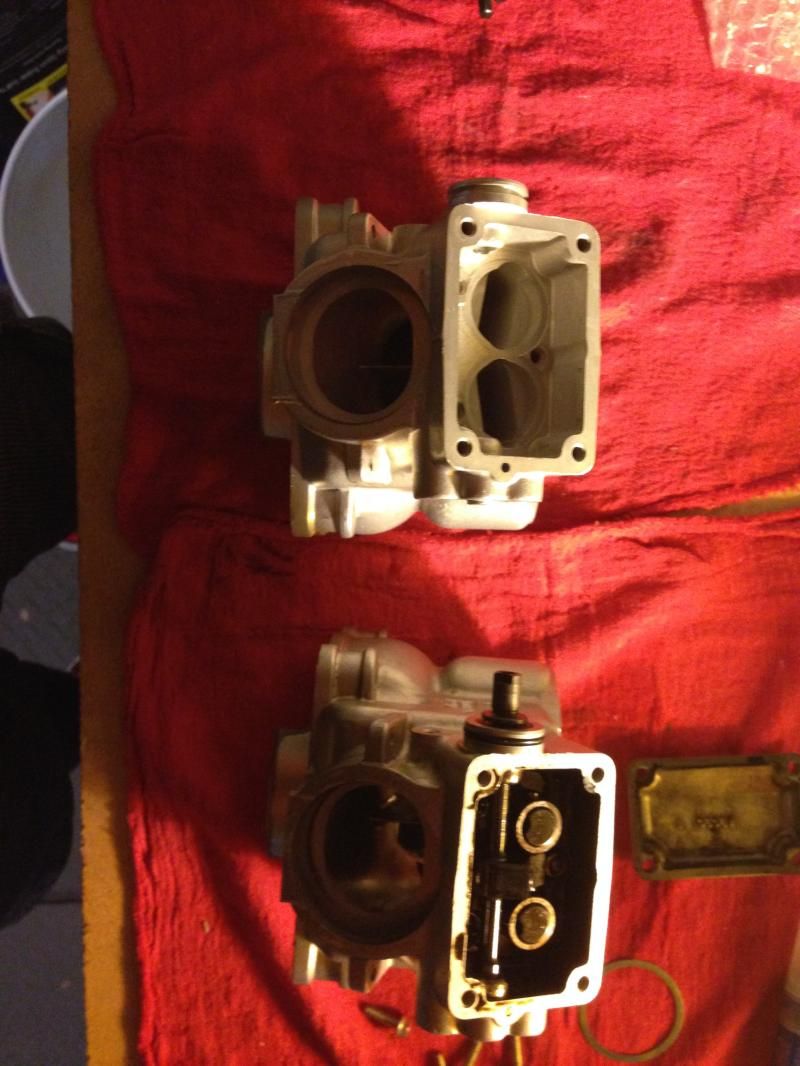
125 jug vs new 144 jug
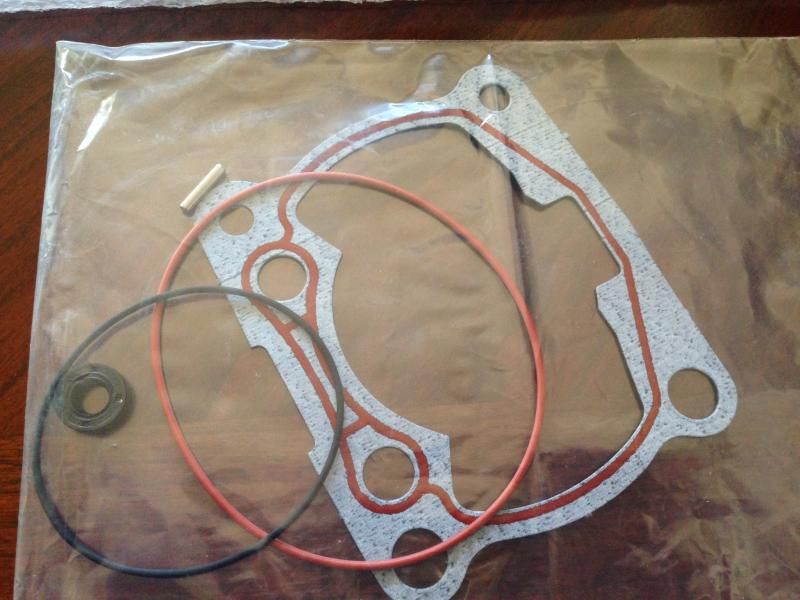
Included with the base gasket and new o-rings for the head was a small metal dowel and a black rubber grommet/bushing. Thanks to help here on the forum I knew what they were for before opening everything up. The metal dowel goes in that small hole on what would be the left side of the bike between the top and bottom power valve cover bolt holes. It keeps the power valve rod in place. The black grommet/bushing goes in on the right side of the bike where the rod exits. I put a small amount of waterproof grease on it before installing it. The o-ring where the rod exits gets swapped over.
Also that metal ring at the bottom of the picture goes in the exhaust. It would be easy to overlook if you didn't know it was there.
Metal dowel and black grommet were in this bag.
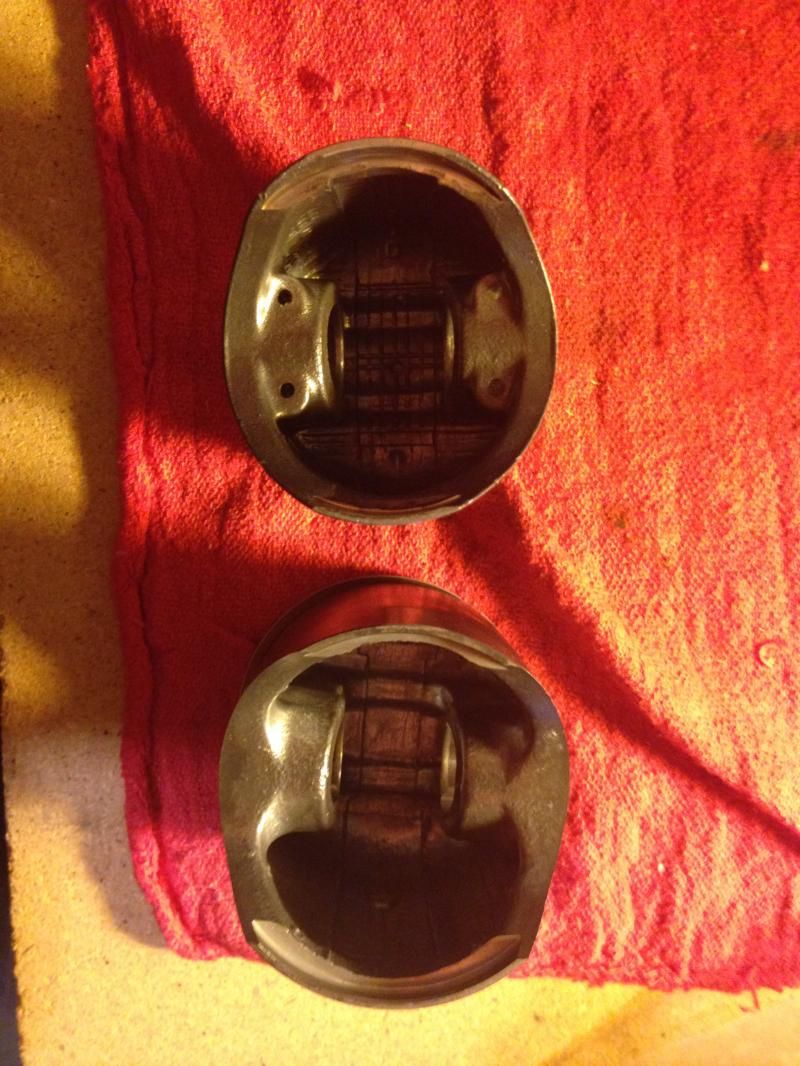
125cc piston on top 144cc piston on bottom.
Interesting that the 125cc piston has holes in it (presumably to get oil to the wrist pin??) and the 144cc piston doesn't.
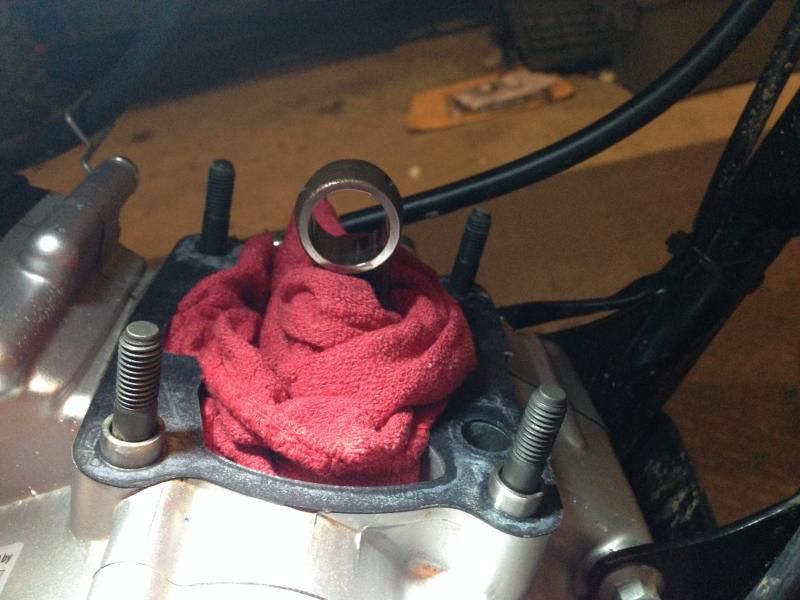
Piston removed, wrist pin bearing removed, old rag in place to keep anything out of the bottom end.
So the hardest parts were the install for me were:
Installing circlips in the new piston while trying not to scratch or gouge anything all while trying get the gap at either 12 or 6.
And
The removal of the old base gasket. I probably spent 30 minutes with a razor blade trying to make sure I got it completely clean. On a side note I installed the base gasket dry, I couldn't figure out if it needed any oil or grease. My internet search was inconclusive with some saying dry and some saying to wet. I decided to go with dry because the gasket had that red ring imbedded in it. Hopefully that is the correct way.
I'd never done a top end on a bike before so I was a little apprehensive about tearing into it but I took my time and everything went smoothly.
It was already dark by the time I had it buttoned up on Sunday so I only had a chance to run it through one heat cycle and check for leaks and proper operation.
I gave the metering rod on the Lectron a 1/2 turn clockwise (rich) based on the color of my spark plug base ring and the assumption that the 144 kit would need more fuel (I may be wrong here) throttle response was nice and crisp while in neutral and the idle was good but it was a little crackly when rolling on the throttle before it would "clear its throat" and go. I wasn't going past 1/2 throttle, I just rolling on it easily riding up and down my street. Once I get a chance to ride the bike I'll fiddle with it a bit more. The ground strap was light brown color and looked pretty much right to me, if anything it might be just slightly on the lean side of perfect.
I also installed a WR fuel petcock so now I have reserve which I've been meaning to do for a while. Less stressful not having to worry about forgetting to check my fuel level, running out, and then having to push the bike back to the house or truck.
And I installed a 12T countershaft sprocket. I'll see how 12/50 (4.17) gearing works with the 144 and go from there. If it's too short I picked up a 51T rear from Hall's so I can always try 13/51 (3.92). I was planning going to go 12/51 with the stock displacement but then just decided to put the 144 kit in. I'm about 200lbs and I've been riding behind my house cutting my own trails where it's very steep and overgrown so having more power and torque will keep me from frying my clutch.
I took some pics along the way to help me out if I forgot how something went together and while I'm sure all of this stuff can be found in other threads I figure maybe these will help someone in the future.
Power Valve linkage
Power valve cover removed
Power valve rod removed. This shows the spot where the grub screw goes in to secure the lever to to rod. Kelly mentioned it in his thread so I took a pic of it.
Power valves removed
125 jug vs new 144 jug
Included with the base gasket and new o-rings for the head was a small metal dowel and a black rubber grommet/bushing. Thanks to help here on the forum I knew what they were for before opening everything up. The metal dowel goes in that small hole on what would be the left side of the bike between the top and bottom power valve cover bolt holes. It keeps the power valve rod in place. The black grommet/bushing goes in on the right side of the bike where the rod exits. I put a small amount of waterproof grease on it before installing it. The o-ring where the rod exits gets swapped over.
Also that metal ring at the bottom of the picture goes in the exhaust. It would be easy to overlook if you didn't know it was there.
Metal dowel and black grommet were in this bag.
125cc piston on top 144cc piston on bottom.
Interesting that the 125cc piston has holes in it (presumably to get oil to the wrist pin??) and the 144cc piston doesn't.
Piston removed, wrist pin bearing removed, old rag in place to keep anything out of the bottom end.
So the hardest parts were the install for me were:
Installing circlips in the new piston while trying not to scratch or gouge anything all while trying get the gap at either 12 or 6.
And
The removal of the old base gasket. I probably spent 30 minutes with a razor blade trying to make sure I got it completely clean. On a side note I installed the base gasket dry, I couldn't figure out if it needed any oil or grease. My internet search was inconclusive with some saying dry and some saying to wet. I decided to go with dry because the gasket had that red ring imbedded in it. Hopefully that is the correct way.