-
Hi everyone,
As you all know, Coffee (Dean) passed away a couple of years ago. I am Dean's ex-wife's husband and happen to have spent my career in tech. Over the years, I occasionally helped Dean with various tech issues.
When he passed, I worked with his kids to gather the necessary credentials to keep this site running. Since then (and for however long they worked with Coffee), Woodschick and Dirtdame have been maintaining the site and covering the costs. Without their hard work and financial support, CafeHusky would have been lost.
Over the past couple of weeks, I’ve been working to migrate the site to a free cloud compute instance so that Woodschick and Dirtdame no longer have to fund it. At the same time, I’ve updated the site to a current version of XenForo (the discussion software it runs on). The previous version was outdated and no longer supported.
Unfortunately, the new software version doesn’t support importing the old site’s styles, so for now, you’ll see the XenForo default style. This may change over time.
Coffee didn’t document the work he did on the site, so I’ve been digging through the old setup to understand how everything was running. There may still be things I’ve missed. One known issue is that email functionality is not yet working on the new site, but I hope to resolve this over time.
Thanks for your patience and support!
You should upgrade or use an alternative browser.
125-200cc 06 Wr125 Redo - Done
- Thread starter dartyppyt
- Start date
dartyppyt
Husqvarna
Pro Class
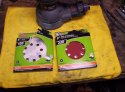
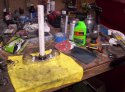
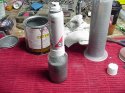
Pic 321 I will be installing a new polishing wheel on my wire wheel-polisher. You can purchase packages of polishing compounds that you apply to buffing wheels. I use a dark red product, modtly called "Tripoli".
Also you will need a round file (Chainsaw sharpening file) and 1/2 round file.
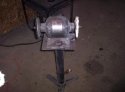
Pic 322 Is an old grinder that I converted exclusively for a wire wheel and a polisher. I mounted it on a moveable stand. To the left is the wire wheel and to the right is the new buffing wheel installed.
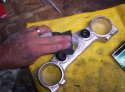
Pic 323/324 Using a 1/2 round file and the small round one. I am going to file off all the visible casting marks that you can see. I don't worry about any that are behind the number plate and etc.... that are hidden. I file these flush with the surrounding aluminum surfaces.
Pic 325 After I have filed all the visible casting marks off. I wire wheel the whole triple clamp to get rid of any blemishes on the aluminum from years of crud.
Continued-
Attachments

dartyppyt
Husqvarna
Pro Class
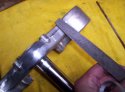
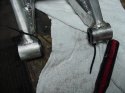
Pic 328 You will have to do some hand sanding to get into the hard to reach areas.
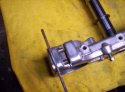
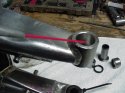
Pic 329 I wanted to show you the top clamp where a grinder was used to grind the aluminum away to clear a steering stabilizer mount. I want to file and sand the marks out to clean them up.
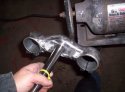
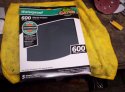
Pic 330 After you sand the triple clamps in 220 grit paper. I will be final wet sanding them with 600 grit , silicone wet/dry paper along with using a solution of water and dishwashing soap.
Don't ever, never, notta, sand inside of the tubes, in the pinch clamps, that hold the fork tubes.
Continued-
Attachments
dartyppyt
Husqvarna
Pro Class
Pic 332 I apply Tripoli compound to my buffing wheel.
Pic 333 Polish all the aluminum on your triple clamps. I keep the wheel loaded with Tripoli compound often.
Pic 334 Final hand polish your clamps and all the can't reach areas. I use a liquid product called "Green Dragon".
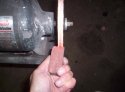
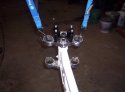
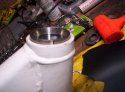
Pic 335 Next I am going to install the seal, spacer and bearing on my lower triple clamp. I have to use my press to get the bearing on. So that I don't damage my new bearing. I simply cut a long piece of 1" PVC pipe to press the bearing on. It is usually the same size as the bearing race and also is cheap. I put all the hammers away! Only use a press a little at a time.
Continued-
Attachments

dartyppyt
Husqvarna
Pro Class
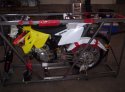
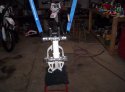
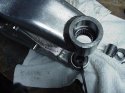
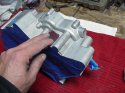
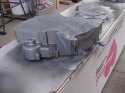
Pic 037/038 Shows the triple clamps greased, reassembled and the sure look sharp! I also found a BRP mount in the box of extra parts included with the bike. I put those on so we can get a set of those Trail Tech Fat Bars (1 1/8") that Kelly recommended. I will come back later once the forks and wheel are installed to adjust the (side to side) steering play in the new bearings.
If it wasn't for those deep grinding marks I encountered on the top triple clamp. I could of had these done in a couple of hours. I spent alot of time filing them out and reshaping the aluminum so it looked like a stock piece.
Pic 039 Sorry that I didn't get a little further. I wanted to get the swing arm polished and back on, as well. I sold my son's 04 RM 125 and had to just final clean it and crate it up (What a pain). It is going to a new home in Colorado. But this is also the 06 Husky fund! To top it all off, we had a nice blizzard today!
The old 04 RM still looks looks pretty good!
Thanx!
More to come next weekend!
Attachments
wallybean
Mini-Sponsor
This is awsome stuff as always. I can see myself going through this process later this winter for my WR 360. It is feeling like the redheaded step child right now and you never want a sullen 360 on a ride.
 The WR 125/144/167 will have to wait until next year as I can't have it not available for those moments when it is rideable.
rockdancer
Husqvarna
Pro Class

Good work - makes me realise I shouldnt even attempt to do this stuff
Your a good dad
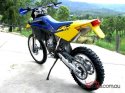
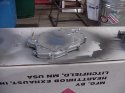
Pics of my old 06 when it was like new
View attachment 7565
View attachment 7566
Attachments
dartyppyt
Husqvarna
Pro Class
Sorry but for some reason, I lost some pictures. Using my fine wire wheel mounted on my floor grinder and polisher. I lightly removed all the anodizing off the tubes. It was faded, corroded and anything was better than what was on there. I also wanted them updated in color. I final sanded them with 400 grit sand paper. I took great care not to remove any aluminium off the tubes. I also removed that brown/gray anodizing on the feet.
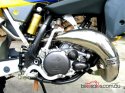
Pic 006 I sprayed my fork tubes in SEM black self etching primer. Same stuff I showed you in the frame painting section. They looked so darn good that I decided not to spray them with black enamel. So I stayed with the SEM black primer on them. It is actually tough and durable. If I have issues with it then I can reprime them or get them black anodized.
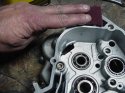
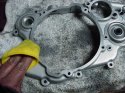
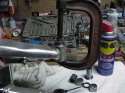
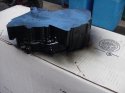
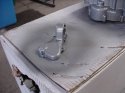
Pic 008 I decided to move on to get the engine cases ready for painting while the forks were drying. Using a razor blade. I removed all the gasket material.
Pic 009 Using a scratch pad. I polished/cleaned the gasket surfaces.
Pic 010 Using a tooth brush and engine cleaner. I removed all dirt and years of grunge. You want all dirt and grease removed.
Attachments

dartyppyt
Husqvarna
Pro Class
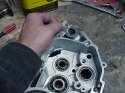
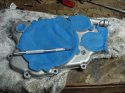
Pic 013 Using Lacquer Thinner and a rag, I wiped down all the existing case paint and gasket areas that I will mask off.
Pic 014 I used Blue Painters Tape and trimmed the edges using a razor Exacto Knife.
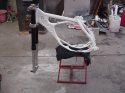
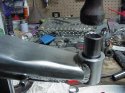
Pic 016 My forks are dry so I decided to take a break and slide them into the triple clamps.
Attachments

dartyppyt
Husqvarna
Pro Class
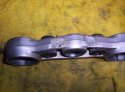
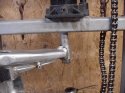
Pic 018 Once the bearings were removed. I cleaned the corrosion out of the holes with 220 grit sandpaper.
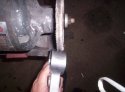
Pic 020 To press the new bearings in. I will use a large C clamp, 16mm socket and some WD 40 (To help the new bearings slide in). I don't use grease because it can get in between the bearings when pressing and keep them from bottoming out.
Pic 021/022 At first press the inner retainer in the swingarm from the kit. You should always do one side at a time, both new and old so you have a re-assemble reference.
Attachments


dartyppyt
Husqvarna
Pro Class
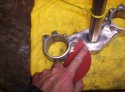
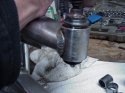
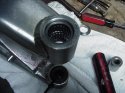
Pic 001 Using the C clamp and an extra retainer that was in the kit. I started pressing the new bearing in. Make sure the bearing starts square and is in line with the hole. If not you'll damge the new bearing. This is my I like using a C clamp because I can go a little at a time.
Pic 002 Keep pressing the bearing till it is flush with the swingarm.
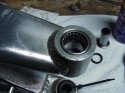
Pic 003/004 Next I use a 16mm socket to press the bearing down the rest of the way, until it bottoms out on the inner retainer that I previously installed.
Attachments

dartyppyt
Husqvarna
Pro Class
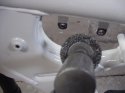
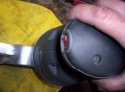
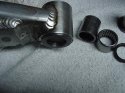
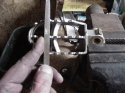
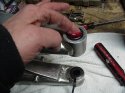
Pic 006 Using a hammer/16mm socket. I used a light tap to install the seal.
Pic 007 Pack your new bearings with grease and install your bushing.
Pic008 I use zip ties so nothing falls apart until I install my swingarm down the road.
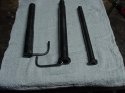
Pic 010 Next I moved on to file the cleets on the foot pegs. They were rounded over from wear. I just want some better bite in them to grip the bike. I wired wheeled/sanded them to remove any chipped/worn paint/rust. These will get a new nice silver paint job.
Attachments
dartyppyt
Husqvarna
Pro Class
Pic 012 Next I primed the foot pegs and axle ends.
Pic 013 Now I am moving back to final sand and prepp my the engine cases. I want to get rid of all the discoloration, chips and etc..... I use 220 grit sand paper on all the old silver finish.
Pic 014 Next I use a scratch pad to scuff all areas again and also the tight areas. I also use Wax/Grease remover (Duplicolor) and wipe down the finish. I do not want my primer or finish to lift/fisheye because of old grease/oil.
Pic 015 Next Using the SEM self etching primer. I primed the cases.
Attachments
rockdancer
Husqvarna
Pro Class
How do you keep all the parts organised when bikes apart ?
dartyppyt
Husqvarna
Pro Class
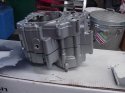
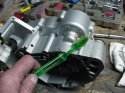
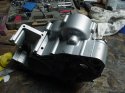
Pic 017 Paint your pegs, axle ends, and engine cases. On the foot pegs and cases. I sprayed one cover coat, one medium coat and one final mist coat.
Attachments

dartyppyt
Husqvarna
Pro Class
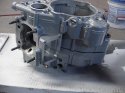
Pic 024 I remove the paint on the coil bracket tabs so the cole can ground against frame.
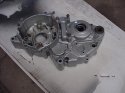
Pic 001/002/003 Shows the engine cases all painted up and the tape removed. Wallah! Looking good!