• Hi everyone,

    As you all know, Coffee (Dean) passed away a couple of years ago. I am Dean's ex-wife's husband and happen to have spent my career in tech. Over the years, I occasionally helped Dean with various tech issues.

    When he passed, I worked with his kids to gather the necessary credentials to keep this site running. Since then (and for however long they worked with Coffee), Woodschick and Dirtdame have been maintaining the site and covering the costs. Without their hard work and financial support, CafeHusky would have been lost.

    Over the past couple of weeks, I’ve been working to migrate the site to a free cloud compute instance so that Woodschick and Dirtdame no longer have to fund it. At the same time, I’ve updated the site to a current version of XenForo (the discussion software it runs on). The previous version was outdated and no longer supported.

    Unfortunately, the new software version doesn’t support importing the old site’s styles, so for now, you’ll see the XenForo default style. This may change over time.

    Coffee didn’t document the work he did on the site, so I’ve been digging through the old setup to understand how everything was running. There may still be things I’ve missed. One known issue is that email functionality is not yet working on the new site, but I hope to resolve this over time.

    Thanks for your patience and support!

630 Rear Brake Foot Pad Adjustment

Fast1

Husqvarna
AA Class
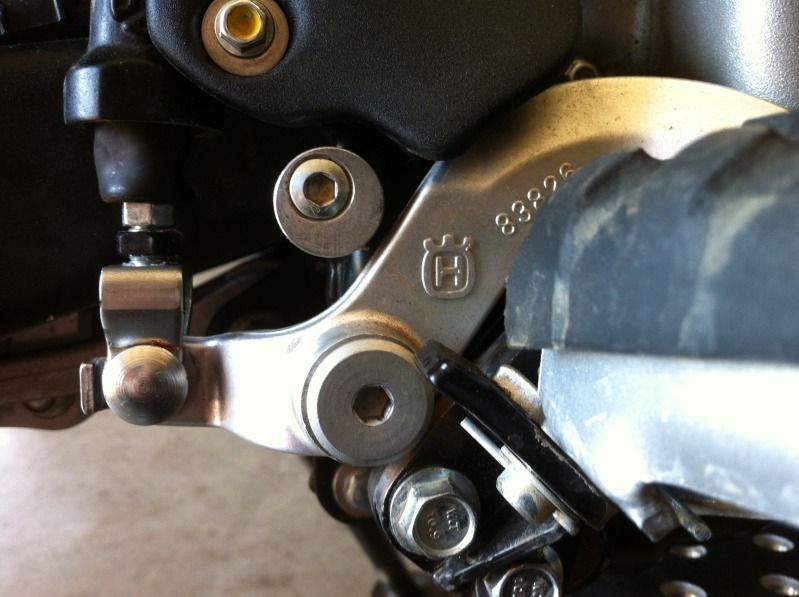
Has anyone come up with a solution to lower the rear brake foot pad height? Fit an aftermarket foot pad or?

Even after turning the adjusting cam to max on the brake arm I still need to gain additional drop on the foot pad and about the only solution I am aware of would be to replace the foot pad with aftermarket. The height may be more pronounced and an issue with larger foot pegs.

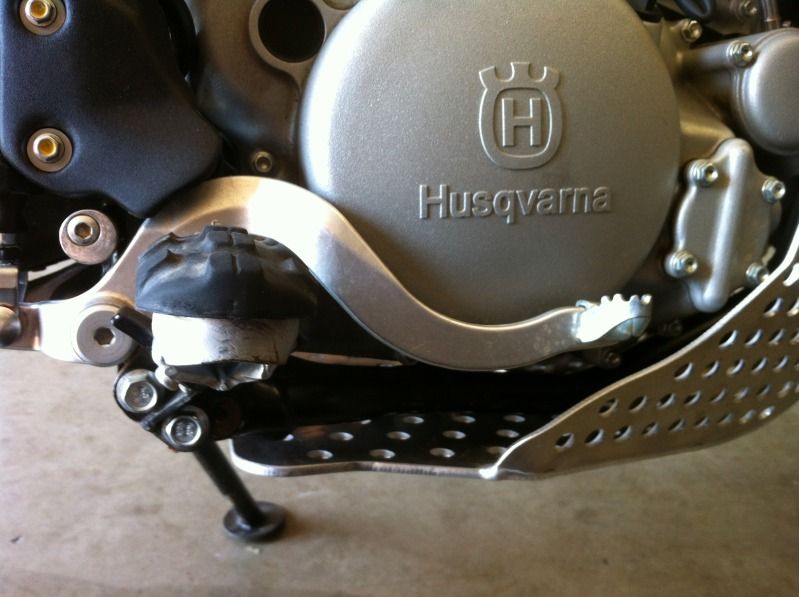
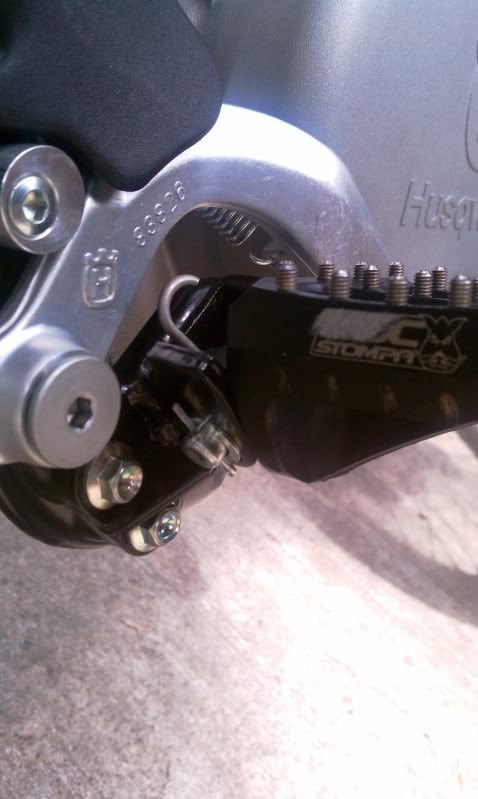
Running Roc-Stompa pegs

IMAG0179.jpg
 
I lowered my footpegs approx 3/4 in. I used a master cylinder clevis from a Honda XR 650 (original held along side), it had to be spread and the hole filed to accept the stock pin. The new clevis is threaded correctly for the mastercyclinder rod so only one locknut was used. The master cylinder push rod had to be shortened using a Dremel tool and some Visegrips to hold it (shortened just above the flattend end of the rod. The offcenter brake pedal stop I had to increase in diameter with a piece of steel tube glued around the original aluminum stop. The brake pedal foot pad is from Touratech BMW G650X and then a little bit of grinding and filing to fit the arm and shortening of the pad so my toe did not have to point outward so far. Also used Pivot Pegz Mk3.

By using only to offcenter stop to adjust the pedal lower you are only appying the brakes a little bit all the time once you have taken the slope from the slot in the original clevis. You need to adjust at the clevis of the master cylinder. There is very little adjustment here because the pushrod is too long and will hit the arm, it really needs to be shortend to get any adjustment.

I have not tried riding with this set up yet as my bike is still being transformed into my back country machine.

Kirk
 

Attachments

  • DSCF5458.JPG
    DSCF5458.JPG
    58.7 KB · Views: 276
  • DSCF5457.JPG
    DSCF5457.JPG
    57.2 KB · Views: 280
Haha, you're tall like me aren't you...
I maxed out the adjustment on mine and it's about enough, but it's still a bit difficult to cover the brake wearing boots on one wheel while still sitting in my normal position...
 
6'4", 36in inseam, size 14 boots. Also adding 1/2 foam to the seat. So far stand over height has not been a problem. :D
 
I picked up the foot peg lowering kit from Husky666 and it made a huge difference. Size 15 boots don't fit very well stock either!
 
I picked up the foot peg lowering kit from Husky666 and it made a huge difference. Size 15 boots don't fit very well stock either!


Correct me if I'm wrong but would this not just make the rear brake pedal/pad even higher in relation to the foot peg and require additional lowering?
 
Correct me if I'm wrong but would this not just make the rear brake pedal/pad even higher in relation to the foot peg and require additional lowering?

Exactly what I was thinking :confused: Foot is rivetted to lever and only real solution I can see would be to fit an adjusting plate (maybe slotted) that would allow some vertical adjustment of the foot once all other adjustment is taken up at the master.
 
Everyone who's ridden my bike has asked me why I have the brake pedal adjusted so high.
I did much the same as kirbybikes, cuttingg the push rod shorter, elongating the clevis holes.
Also have the 666 lowering plates and will soon have Kenneth's side stand, so there will be more
work to do to get things sorted out.
 
Correct me if I'm wrong but would this not just make the rear brake pedal/pad even higher in relation to the foot peg and require additional lowering?
You know... I guess you're right! I'm not sure then why it seems easier to hit that rear brake? Maybe just a placebo effect ro something? Maybe the extra space makes it easier to hit? Closer to the toe of the boot rather than the ball of my foot?
Only thing I know is next time I ride, I'm going to be thinking about it way to much!
 
It's a pita, you have to lift your boot to apply the brake, even adjusted all the way down.
It does work pretty good when standing though, and that's where I find I need critical control. The rest the time I just deal with it.

Subscribed for a possible fix. Even a quarter to a half an inch would help.

Your fix is 8 posts up in this thread.

_
 
Would it be easier to just find a brake pad that could replace the stock pad and have some adjustablity to move down on the end of the brake arm?

I realize utilizing a shorter clevis and adding material to the cam adjustment works but is it the easiest method?

Also with a adjustable pad you could easily change the height to accomodate full fledged moto boots or alternative use with around town boots.
 
Kirbybikes? The honda clevis? Why doesn't it look any lower? And he sz he hasn't tried it yet.

:excuseme:

I dunno, sometimes I'm just slow. :D

Yes that post and he already completed it and has photos. Remember that he had already lowered his footpegs 3/4". If stock footpeg height then the brake lever would look lower.

I also found this post with a Hammerhead brake foot installed. Sure looks to sit a lot lower than my stock brake foot.
http://www.cafehusky.com/threads/post-your-last-purchase-for-your-630.20390/page-2#post-180627

_


_

_
 
Would it be easier to just find a brake pad that could replace the stock pad and have some adjustablity to move down on the end of the brake arm?

I realize utilizing a shorter clevis and adding material to the cam adjustment works but is it the easiest method?

Also with a adjustable pad you could easily change the height to accomodate full fledged moto boots or alternative use with around town boots.

What I saisd above as well ...

I have fitted a Hamerhead foot but ground down the top teeth of the OEM one so it would bolt on. That is when I thought that the real solution would be an adjusting plate.
 
I looked and thought about many options. The new clevis seemed like the easiest and cheapest method ($5.31 at the Honda dealer) and about a hour with the dremel tool and file to make it work. If you look at the photos, the brake pedal is about the bottom of the ignition cover and I still have some adjustment left. From photo's in the service manual the pedal is about the bottom right of the Husky "H" in the center of the ignition cover.

The brake stop probably would not need to be enlarged if the foot pegs are close to stock position. Mine are lowered 3/4" and I needed the extra adjustment.

I adjusted the pedal level with the peg to start with, I am a novice at off road and did not know where to set it for best use. Any suggestions, slightly up? Down?

On bike testing this weekend, weather permiting.
 
On my SMS, I set it as low as it would go with the factory clevis, since I'm 6'3" and spend a bit of time with less than 2 tires on the ground and would like to be able to comfortably cover the rear brake while seated.
 
Okay, time to update my mod report after some use and testing. Works great, size 14 Crossfires with Pivot Pegz and lowered pegs and brake pedal. See post 2 for a description and pics. I just use it and don't even have to think about it. The other benifit of the lowered pegs is when standing on the pegs the Rox Risers on the stock bars are in about the correct position, so I a fairly vertical ( close to 8 feet when standing on the bike!).
 
Another Zombie thread! I finally got off my butt and snapped a few crappy photos of the Honda Clevis I installed as well. Take a look. Remember I also have the foot peg lowering kit on my bike, so You could get a little more if you're pegs are at factory height.


Notice the lever no longer rests against the stop. Helps to give and idea of how much lower the lever rests. I know that this could be an issue with premature wear on the master cylinder, but I'd rather use my rear brake and wear out the master cylinder than have trouble ever using the brake.

IMG_2457.jpg


Here's a look at where the tip of the lever rests compaired to the height of the foot peg with the factory rubber installed.
IMG_2458.jpg
 
Thanks for posting the photos.. I still need to fix mine. Would it be possible to add some type of shim material to the brake arm (some JB Weld?) so that the stop would be functional?

Is that the XR650 clevis?
 
Back
Top