• Hi everyone,

    As you all know, Coffee (Dean) passed away a couple of years ago. I am Dean's ex-wife's husband and happen to have spent my career in tech. Over the years, I occasionally helped Dean with various tech issues.

    When he passed, I worked with his kids to gather the necessary credentials to keep this site running. Since then (and for however long they worked with Coffee), Woodschick and Dirtdame have been maintaining the site and covering the costs. Without their hard work and financial support, CafeHusky would have been lost.

    Over the past couple of weeks, I’ve been working to migrate the site to a free cloud compute instance so that Woodschick and Dirtdame no longer have to fund it. At the same time, I’ve updated the site to a current version of XenForo (the discussion software it runs on). The previous version was outdated and no longer supported.

    Unfortunately, the new software version doesn’t support importing the old site’s styles, so for now, you’ll see the XenForo default style. This may change over time.

    Coffee didn’t document the work he did on the site, so I’ve been digging through the old setup to understand how everything was running. There may still be things I’ve missed. One known issue is that email functionality is not yet working on the new site, but I hope to resolve this over time.

    Thanks for your patience and support!

Spinning insert solution

bm36

Husqvarna
AA Class
Bike: TE 450 ’08 with only 13 hours on the meter.
Tank insert threads lubricated after every wash and the bolts gently tightened
Two tank inserts started to spin when I tried to disassemble the bolts for lubrication.
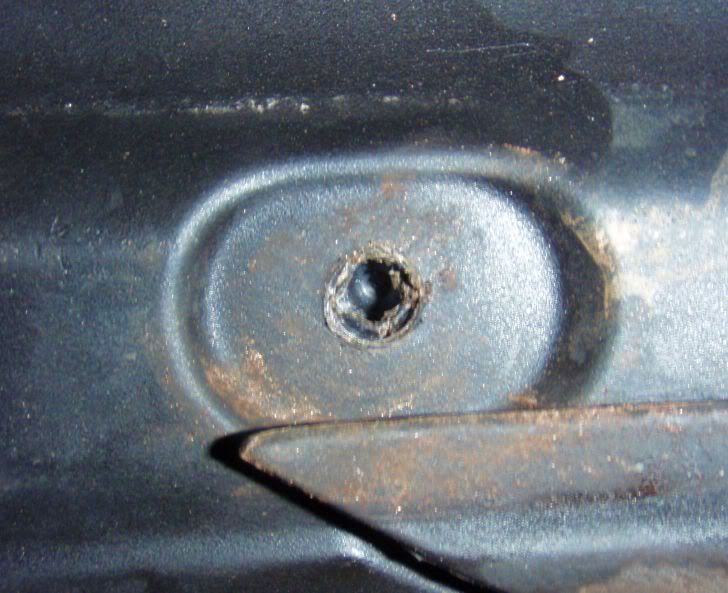
Inserts removed with a drill (spin and pull until insert comes out of the tank)
The threads looked just fine. The problem seems to be the material combination brass and steel. The alignment surfaces seem to easily get stuck to each other.

Solution:
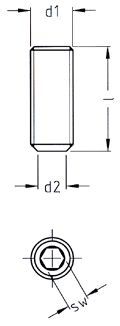
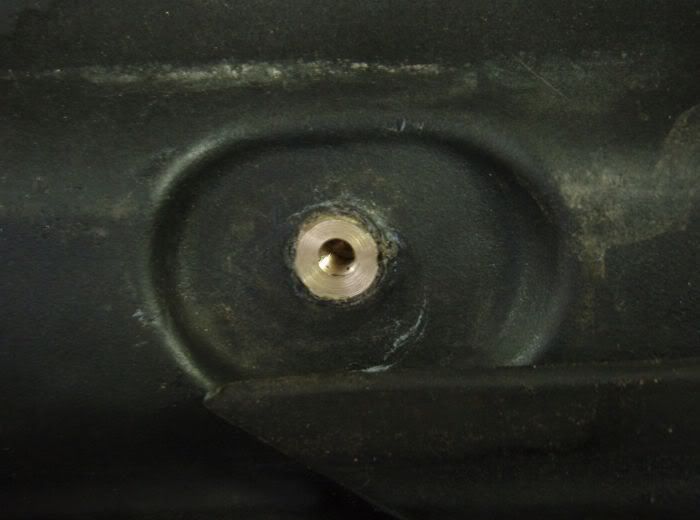
Hole after removal of insert had a diameter of approx. 9mm.

Hole-1.jpg


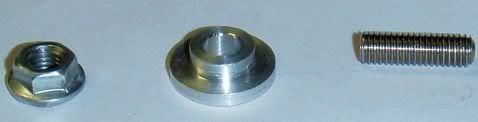
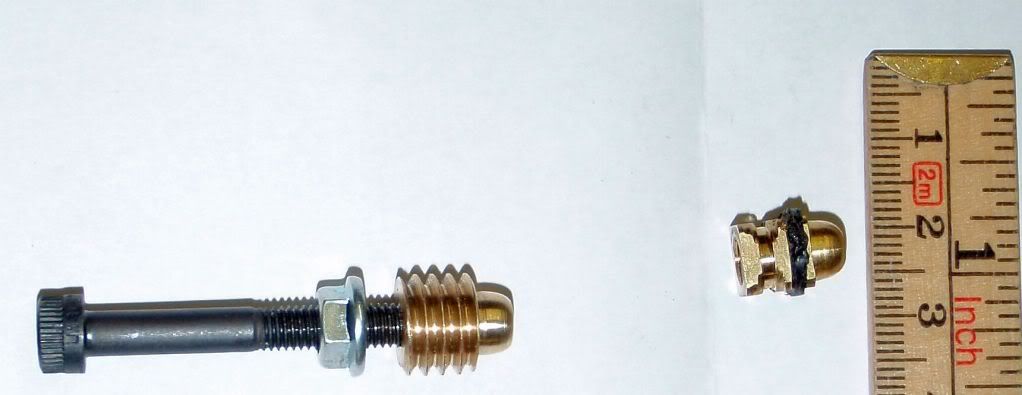
A new insert was made with a suitable outer thread with a outer diameter of approx. 11mm (UNC 7/16-14) and the M5-iso inside. The old insert to the right.

insert.jpg


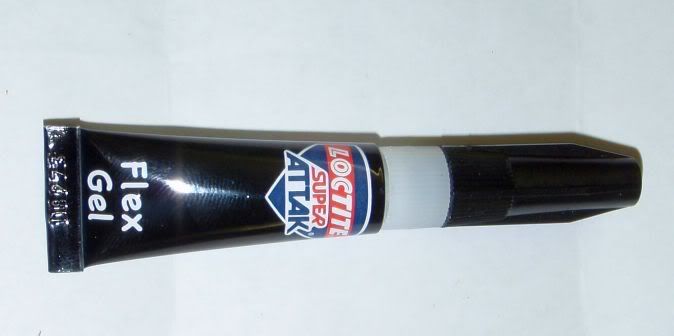
The hole and new insert were cleaned and rubber reinforced glue were added.

glue.jpg


A bolt and lock nut was used for the assembly

lock.jpg


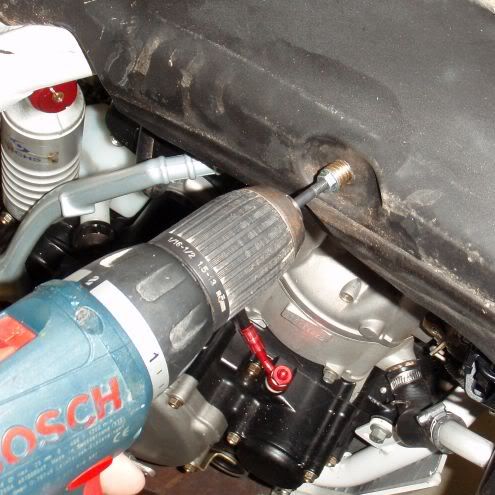
A drill was used for the tank assembly in order to get a proper alignment

install.jpg


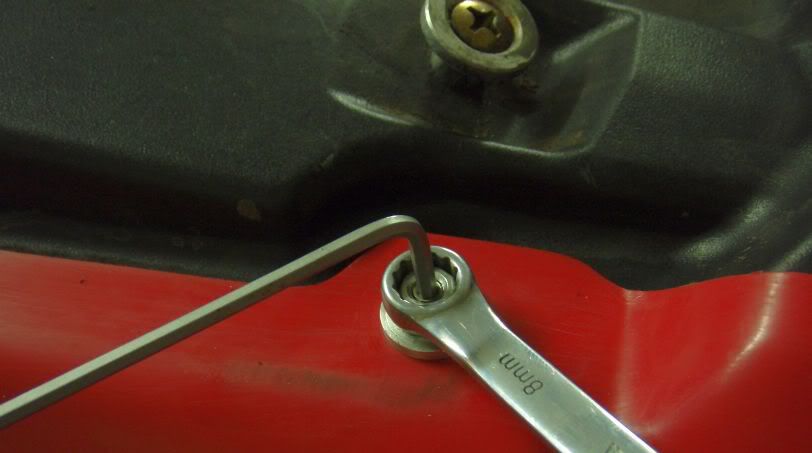
Drill removed, use a wrench an a allen key to unlock an disassemble bolt.

intalled.jpg


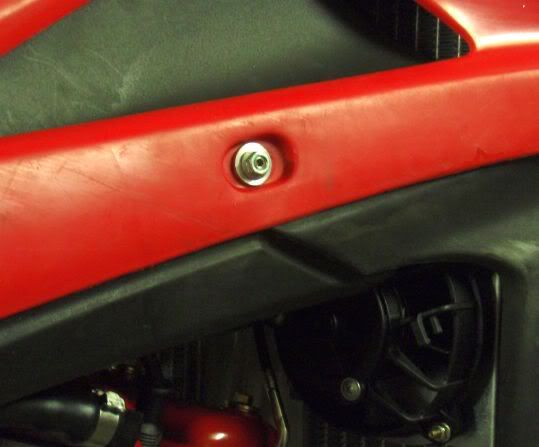
All done! If the insert starts to spin it will now come out of the tank and could be reused.

done.jpg
 
Nice! I've not had the spinning insert isue yet but I read a lot about people who have, so I recently ran a plug tap down through mine to ease the tightness that a few were showing.

I wonder if there would be a market here for your repair mate. :)
 
bm36;46722 said:
The problem seems to be the material combination brass and steel. The alignment surfaces seem to easily get stuck to each other.

I think your theory is correct.When dissimilar metals are exposed to water they act as a tiny battery. Current flows and the movement of metal ions can fuse the parts together. It's called electrolytic corrosion. The solution is to use identical metal for both parts, or select metals with similar electrical properties, or have an insulating finish on the metal surfaces. Keeping water away from stuff isn't really an option on a dirtbike... [/geek reply]
 
Looks very thorough, although when I had an insert spin, I managed to spin it out and just JBWeld it back in the hole. It never spun again.:)
 
When dissimilar metals are exposed to water they act as a tiny battery

It does not stop there. For example when using stainless steel bolts and nuts together they could easily seize if not lubricated properly.

I friend of mine with the same problem came up with a good idea to keep the inserts that are OK to start spinning.

The idea is to exchange the bolts for the plastics with stop screws. See drawing

din916-stoppskruv-insex.jpg


I have ordered stainless stop screws (M5x16) that I will assemble in the inserts. The plastics will be attached by adding a washer and nut on the stop screw. If the stop screw gets stuck in the insert it is then possible to hold the stop screw in position with an allen wrench as you disassemble the nut.
 
just curious about why anyone ever takes those shrouds off? when i take the tank off , the entire unit tank and shroud lifts off in one piece. is there any reason for taking them off at all?
 
is there any reason for taking them off at all?
Well, normally I'd say no. But I have ordered aftermarket plastics and would like to be able to change back when I like without having any damage done to the assembly.
 
bm36;46873 said:
Well, normally I'd say no. But I have ordered aftermarket plastics and would like to be able to change back when I like without having any damage done to the assembly.

aha ok ..i was curious in case taking them off made some other task easier. :thumbsup:
 
tadgh;46865 said:
just curious about why anyone ever takes those shrouds off? when i take the tank off , the entire unit tank and shroud lifts off in one piece. is there any reason for taking them off at all?

No, except to change them out.
 
I put a dab of RTV silicone on the threads all bodywork fasteners before assembly. Keeps moisture, etc. out and provides a mild form of 'loctite'.

I've done this for years. Works great.
 
So, now I've recieved the stop screws I ordered. I also made some washers with the same dimensions as the original bolts. This picture below shows the parts.

assembly.jpg


This is how it looks like when assembled

assembly2.jpg


Finally this is how it is safely disassembled

disassembly.jpg


Seems to work fine actually. Don't think I ever have to worry about the poor design of the inserts.:thumbsup:
 
I like your solution, using the studs.

IMO using a power drill or electric wrench on delicate fasteners, is asking for trouble.
 
IMO using a power drill or electric wrench on delicate fasteners, is asking for trouble.

You will most likely end up with spinning inserts even if gently tightened. Like I did.

A more simple solution to this "problem" could be to install a soft washer on the original bolts (plastic or similar). I have not tried this and it would not be as bulletproof as the solution I am trying, but it would most certainly be an improvement.:thumbsup:
 
is there somewhere i can order these online because one stripped out on my 610

I'll guess no. I made them myself. A simple version would be to buy a UNC 7/16-14 bolt and drill and cut a M5 thread in the centre of the bolt.

Perhaps a manfacturer could start making these for us? Motosportz?:notworthy:
 
You should manufacture a batch and sell them! We have stripped one too.
I shared this solution to you fellow husky owners as a fix to a irritating problem. I have no intention to try to earn money from you. I also live in Sweden (the origin country for husky :sweden:). To make these rather simple components and transport them halfway around the earth.....:confused:

I'll guess I could post a drawing here at the forum if someone is interested?
 
With only 813 miles logged so far, I managed to spin one insert when the plastic tank was warm.

Envious of those machined shouldered washers :notworthy: I looked around and found a similar shouldered washer. Hoonda p/n 90520-134-000. Not perfect but it works with a correct diameter washer underneath and a stainless bolt cut to length....

Sure would be cool to be able to buy those shouldered washers
 

Attachments

  • Copy of PB180069.JPG
    Copy of PB180069.JPG
    27.1 KB · Views: 105
Back
Top