chris1261
Husqvarna
AA Class
Yesterday, I installed the Power Commander V and an Autotune unit on my TR 650 Strada. I took some pictures, so hopefully, they'll be helpful to anyone else who decides to try this for themselves.
First thing I did was to remove all the plastic. That's been covered in other threads, so I won't waste your time describing it. (suffice to say, a 1/4" air ratchet is your friend!)
Next up, I unplugged the fuel injector connector. The fuel injector is in the gap between the "tank" and fuel pump. Ordinarily, this connector is situated at 5 o'clock, but that gets in the way. Pull the connector off, and you will find that it swivels. I moved it down to 6 o'clock, so i could thread the TPS connector and Crank Position Sensor wires downwards.
There is metal clip on the connector. Push it inwards, and the connector slips off. here's a pic:
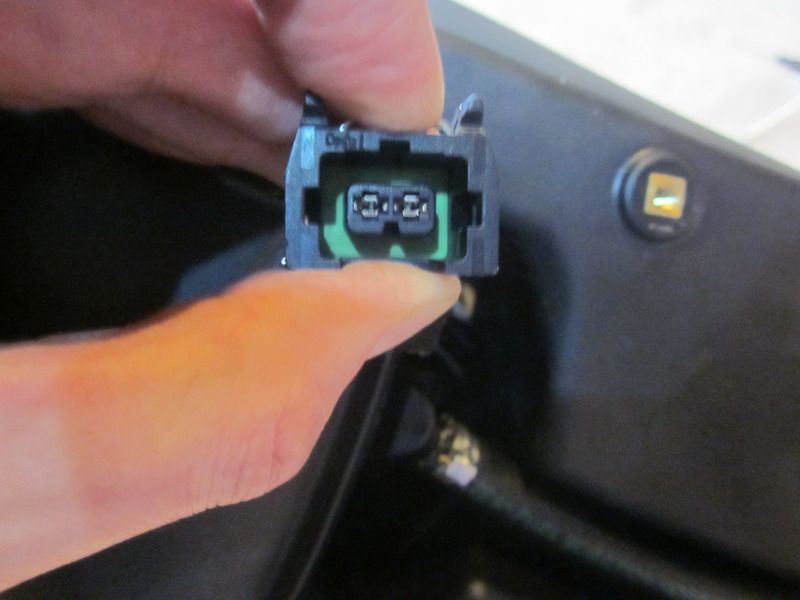
my finger is depressing the clip at the top. once it's pressed in (I used a screwdriver) it slides off easily.
Now, thread the PowerCommander Harness down through the newly created opening on the right side of the fuel injector. The TPS Connector is kinda big, so it'll need some jiggling to get down.
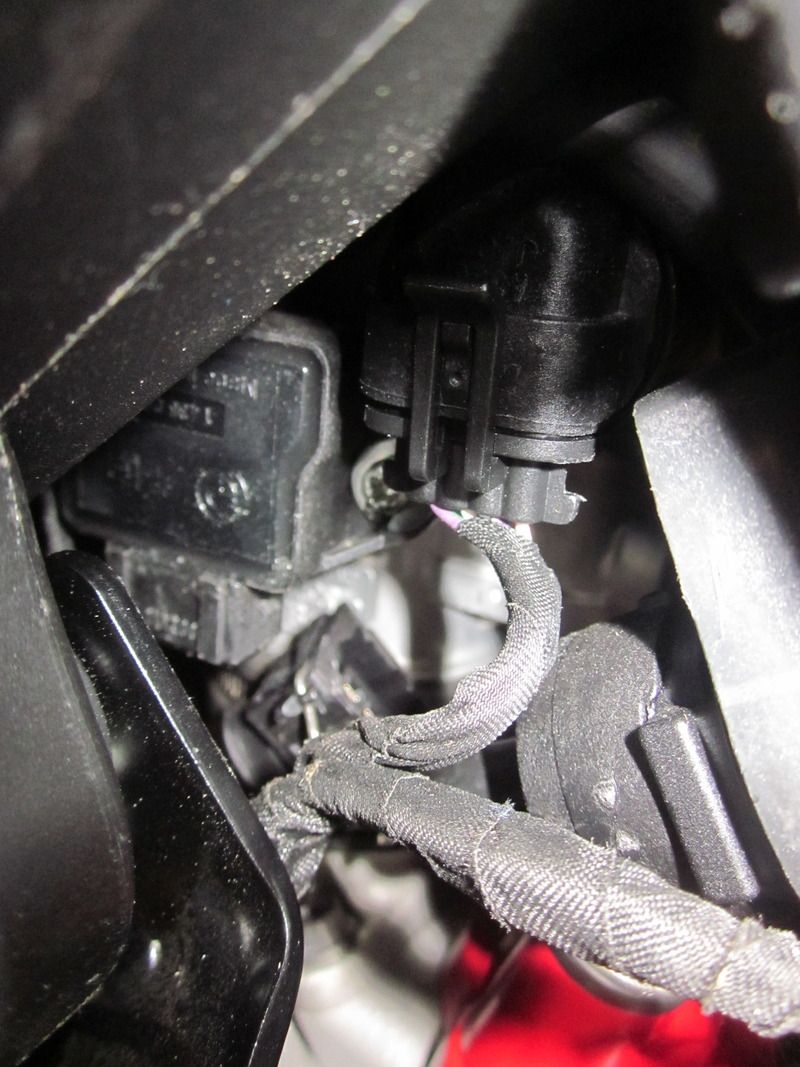
Now, onto the TPS connector. This one gave me the most trouble. Using a small prybar and a screwdriver, I managed to get this off.
This is what you're looking for:
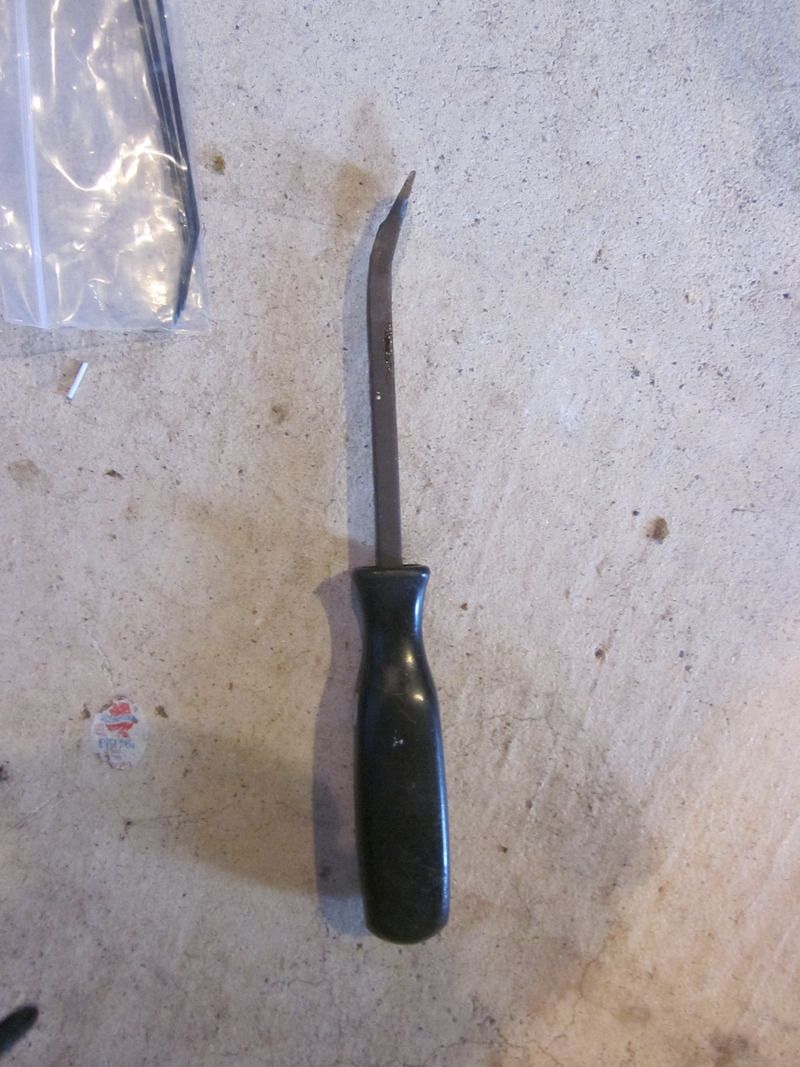
Push in the clip. I found the bend in this small prybar was the best way to get to it. a straight screwdriver didn't have the right angle
then, while the clip is pushed in, take a long thin screwdriver and gently push the connector down. Once it slides off, comes the fun part. The stock connector needs to mate with the male connector on the PCV harness, and the PCV female goes over the stock TPS. You'll be able to get it, just have patience. A long screwdriver will allow you to manipulate it into place. I used the prybar to depress the clip again, and it went on pretty easily.
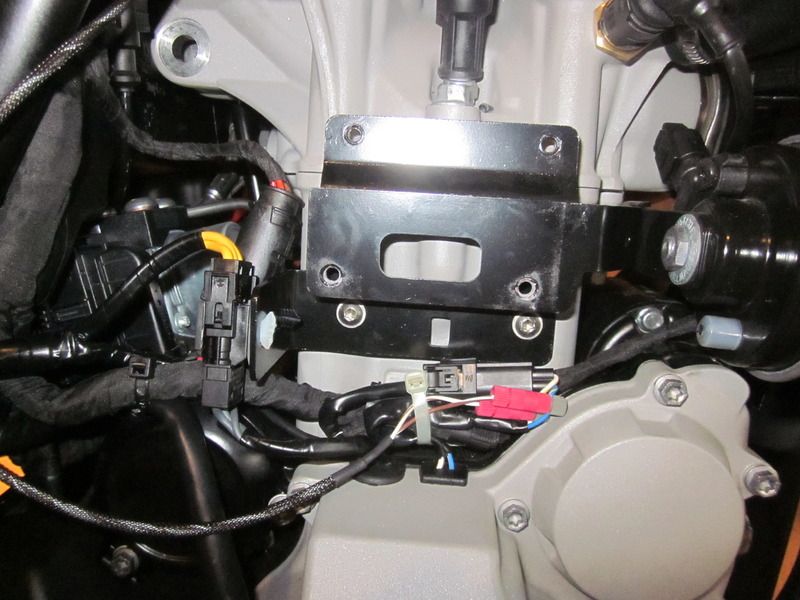
Now, onto the Crank Position Sensor. Remove the regulator to gain access to the harness down there:

you see that neatly tied bundle of connectors? you're looking for this one:

Connect the powercommander wires to the crank position sensor (the instructions tell you which colors go to which, I don't have them in front of me so i don't want to steer you wrong)
Here's a pic of mine installed:
I zip-tied them all up and put the regulator back on
Now, you can go back up top and connect the fuel injection harness. The stock plug goes into the powercommander female, and the powercommander male goes into the fuel injector.
If you don't have the auto-tune, then all that's left is to hook up the negative lead on the PC, and unplug the O2 sensor.
Next, I took off the heat-shield from the front pipe, and removed the O2 sensor.
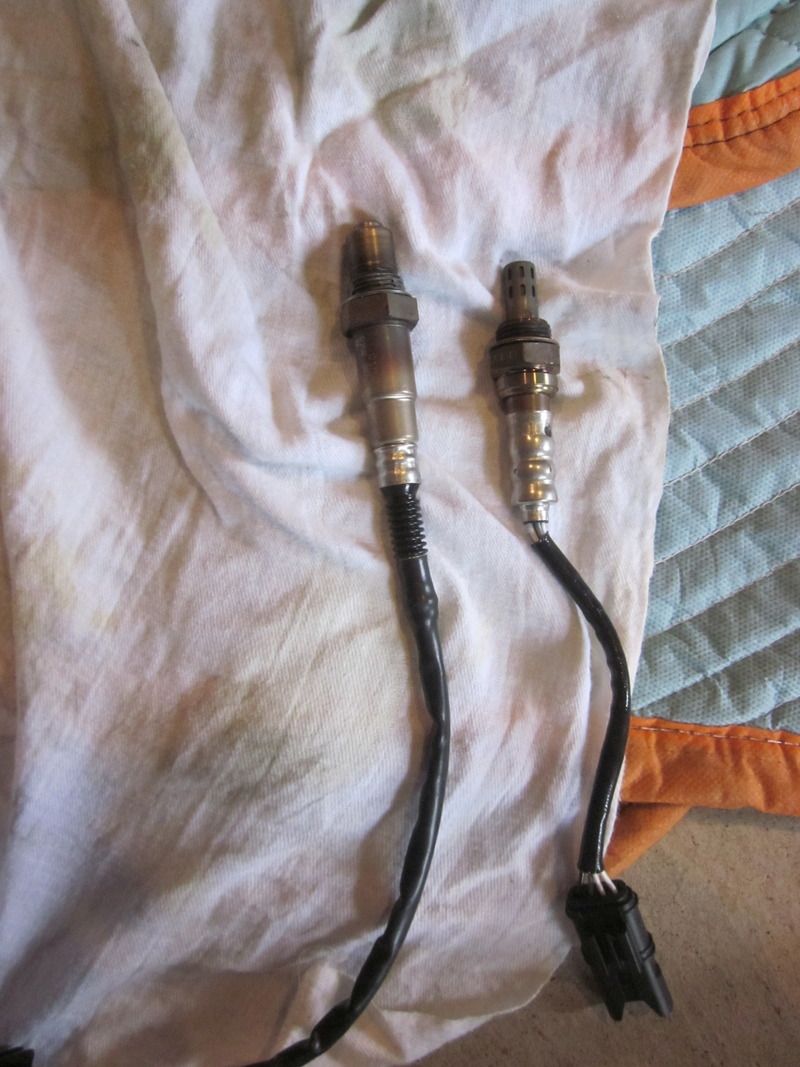
here you can see the 2 sensors side by side. the Autotune sensor is on the left.
The connector on the Autotune O2 sensor is kinda big, and wont' go between the frame too easily. believe it or not, the O2 sensor is smaller in width than the connector, so (keeping the protective cover on) I threaded it sensor first between the frame and airbox, near the fuel inejctor. then, i moved the connector north and zip tied it to the frame near the coolant catch tank.

Before zip-tying, plug in the autotune cable (the one with the bare wires) and push the catch home.
I mounted the PC and the autotune on the battery. Thread the autotune cable back towards the battery area, and connect all of the bare wires to their respective color terminators.
Each termination point has a small set-screw that holds the wire, perpendicular to the hole that the wire goes in. Loosen that screw and push the wire in. There is a rubber diaphragm that gets punctured once you put the wires in, then tighten the set screw. do this for all 6 wires.
Edit: Be very careful where you put the excess auto-tune wire. the left side of the throttle body is where the throttle cable is. don't stuff the cable down there or your throttle will get stuck. (don't ask me how I know!)
Next, you need a source of switched power. I used the tail-light. Dynojet supplies a posi-tap. It's the green/(white i think) wire.
ground the black wire. Make sure that you plug in the bus connector for the power commander into both the auto tune unit and the PC. also, make sure that the CANBUS terminator is in place on the autotune. the autotune should have no open ports.
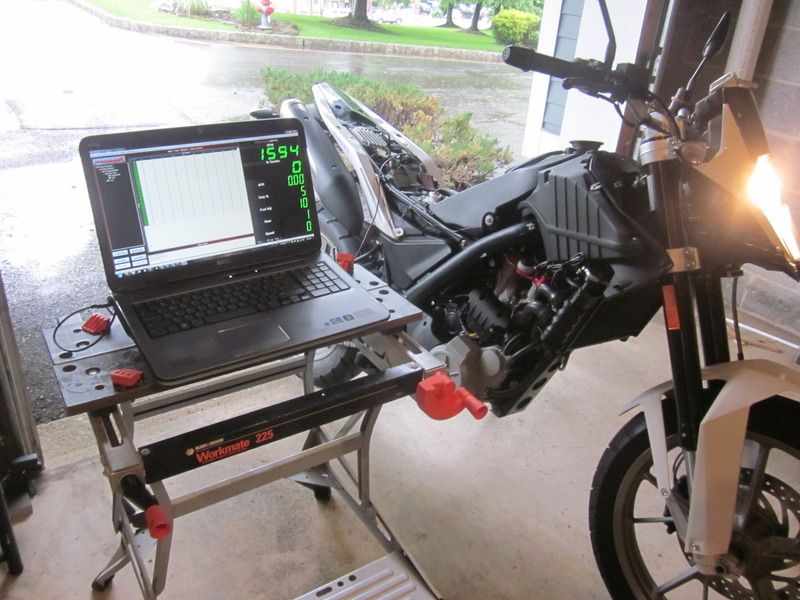
Next, I hooked up the Power commander to my laptop:
and enabled the auto-tune in the powercommander software.
There are no AFR targets in the stock map. I was on a call with dynojet tech support, and the tech copied/pasted 13.2 into the AFR target table. we'll see how that works out. The tech also updated the firmware on my power commander (kinda surprised it was out of date, considering that this is such a new offering, but whatever)
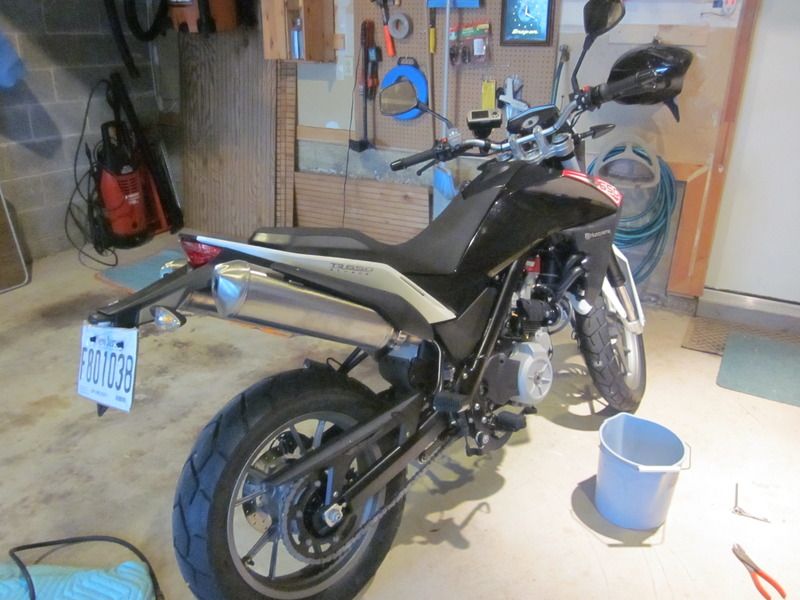
Now, all that's left is to button up the bike, and take it for a ride. (as you may have noticed, the weather isn't cooperating in my neck of the woods. it's either raining, or i have to work.)
As an aside, I know you guys all discuss what racks to add onto your bikes, but i gotta say, I kinda dig the look without any racks.
But, I do appreciate the utility, so I put my rack back on.")
Hope this helps anyone who wants to do this for themselves.
--Chris
First thing I did was to remove all the plastic. That's been covered in other threads, so I won't waste your time describing it. (suffice to say, a 1/4" air ratchet is your friend!)
Next up, I unplugged the fuel injector connector. The fuel injector is in the gap between the "tank" and fuel pump. Ordinarily, this connector is situated at 5 o'clock, but that gets in the way. Pull the connector off, and you will find that it swivels. I moved it down to 6 o'clock, so i could thread the TPS connector and Crank Position Sensor wires downwards.
There is metal clip on the connector. Push it inwards, and the connector slips off. here's a pic:
my finger is depressing the clip at the top. once it's pressed in (I used a screwdriver) it slides off easily.
Now, thread the PowerCommander Harness down through the newly created opening on the right side of the fuel injector. The TPS Connector is kinda big, so it'll need some jiggling to get down.
Now, onto the TPS connector. This one gave me the most trouble. Using a small prybar and a screwdriver, I managed to get this off.
This is what you're looking for:
Push in the clip. I found the bend in this small prybar was the best way to get to it. a straight screwdriver didn't have the right angle
then, while the clip is pushed in, take a long thin screwdriver and gently push the connector down. Once it slides off, comes the fun part. The stock connector needs to mate with the male connector on the PCV harness, and the PCV female goes over the stock TPS. You'll be able to get it, just have patience. A long screwdriver will allow you to manipulate it into place. I used the prybar to depress the clip again, and it went on pretty easily.
Now, onto the Crank Position Sensor. Remove the regulator to gain access to the harness down there:
you see that neatly tied bundle of connectors? you're looking for this one:
Connect the powercommander wires to the crank position sensor (the instructions tell you which colors go to which, I don't have them in front of me so i don't want to steer you wrong)
Here's a pic of mine installed:
I zip-tied them all up and put the regulator back on
Now, you can go back up top and connect the fuel injection harness. The stock plug goes into the powercommander female, and the powercommander male goes into the fuel injector.
If you don't have the auto-tune, then all that's left is to hook up the negative lead on the PC, and unplug the O2 sensor.
Next, I took off the heat-shield from the front pipe, and removed the O2 sensor.
here you can see the 2 sensors side by side. the Autotune sensor is on the left.
The connector on the Autotune O2 sensor is kinda big, and wont' go between the frame too easily. believe it or not, the O2 sensor is smaller in width than the connector, so (keeping the protective cover on) I threaded it sensor first between the frame and airbox, near the fuel inejctor. then, i moved the connector north and zip tied it to the frame near the coolant catch tank.
Before zip-tying, plug in the autotune cable (the one with the bare wires) and push the catch home.
I mounted the PC and the autotune on the battery. Thread the autotune cable back towards the battery area, and connect all of the bare wires to their respective color terminators.
Each termination point has a small set-screw that holds the wire, perpendicular to the hole that the wire goes in. Loosen that screw and push the wire in. There is a rubber diaphragm that gets punctured once you put the wires in, then tighten the set screw. do this for all 6 wires.
Edit: Be very careful where you put the excess auto-tune wire. the left side of the throttle body is where the throttle cable is. don't stuff the cable down there or your throttle will get stuck. (don't ask me how I know!)
Next, you need a source of switched power. I used the tail-light. Dynojet supplies a posi-tap. It's the green/(white i think) wire.
ground the black wire. Make sure that you plug in the bus connector for the power commander into both the auto tune unit and the PC. also, make sure that the CANBUS terminator is in place on the autotune. the autotune should have no open ports.
Next, I hooked up the Power commander to my laptop:
and enabled the auto-tune in the powercommander software.
There are no AFR targets in the stock map. I was on a call with dynojet tech support, and the tech copied/pasted 13.2 into the AFR target table. we'll see how that works out. The tech also updated the firmware on my power commander (kinda surprised it was out of date, considering that this is such a new offering, but whatever)
Now, all that's left is to button up the bike, and take it for a ride. (as you may have noticed, the weather isn't cooperating in my neck of the woods. it's either raining, or i have to work.)
As an aside, I know you guys all discuss what racks to add onto your bikes, but i gotta say, I kinda dig the look without any racks.
But, I do appreciate the utility, so I put my rack back on.
Hope this helps anyone who wants to do this for themselves.
--Chris


