• 4 Stroke Husqvarna Motorcycles Made In Italy - About 1989 to 2014
    TE = 4st Enduro & TC = 4st Cross

  • Hi everyone,

    As you all know, Coffee (Dean) passed away a couple of years ago. I am Dean's ex-wife's husband and happen to have spent my career in tech. Over the years, I occasionally helped Dean with various tech issues.

    When he passed, I worked with his kids to gather the necessary credentials to keep this site running. Since then (and for however long they worked with Coffee), Woodschick and Dirtdame have been maintaining the site and covering the costs. Without their hard work and financial support, CafeHusky would have been lost.

    Over the past couple of weeks, I’ve been working to migrate the site to a free cloud compute instance so that Woodschick and Dirtdame no longer have to fund it. At the same time, I’ve updated the site to a current version of XenForo (the discussion software it runs on). The previous version was outdated and no longer supported.

    Unfortunately, the new software version doesn’t support importing the old site’s styles, so for now, you’ll see the XenForo default style. This may change over time.

    Coffee didn’t document the work he did on the site, so I’ve been digging through the old setup to understand how everything was running. There may still be things I’ve missed. One known issue is that email functionality is not yet working on the new site, but I hope to resolve this over time.

    Thanks for your patience and support!

New look with the IMS Tank 2

HuskyDude

Moderator
Staff member
Not hearing from Hall’s Cycle or anyone else on new decals for the IMS tanks.
And with the old gas tank side panel just staring me in the face,
begging to be part of my bike again, I thought I’d try something.

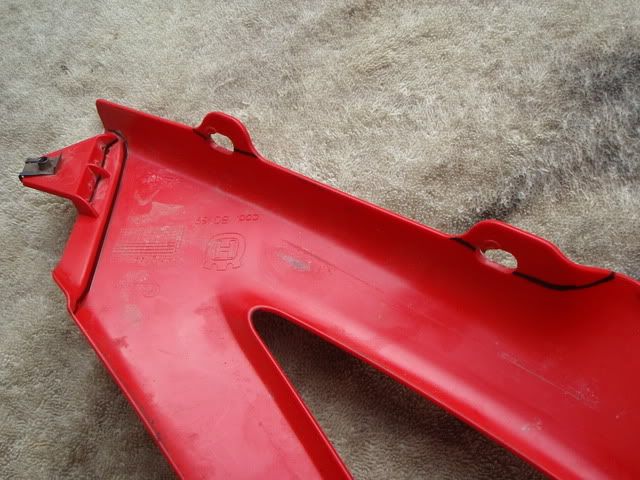
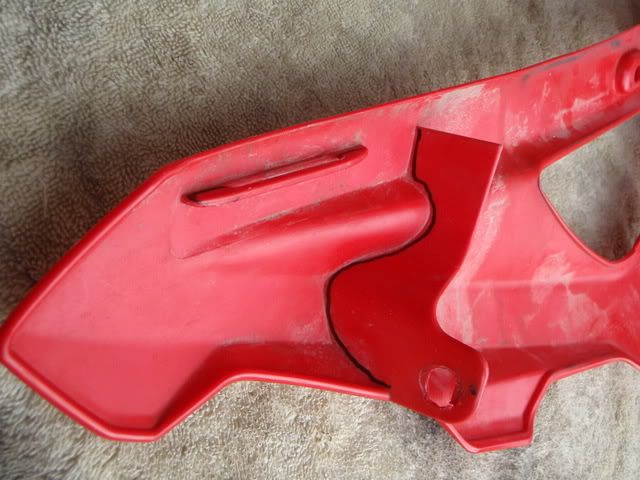
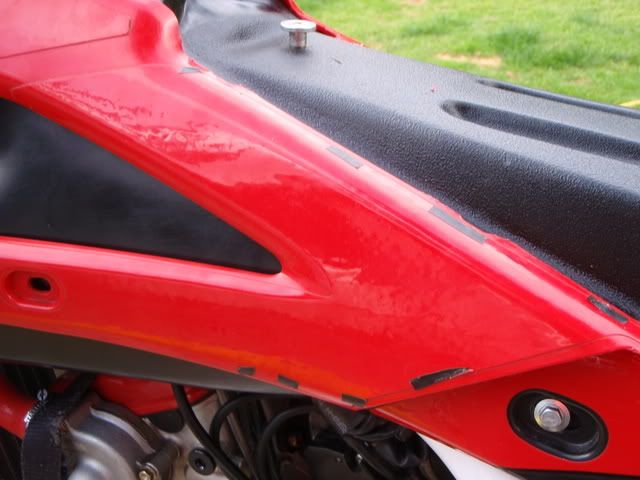
First I marked the parts of the panels that I had to get rid of.
Did a lot of dry fits to make sure.
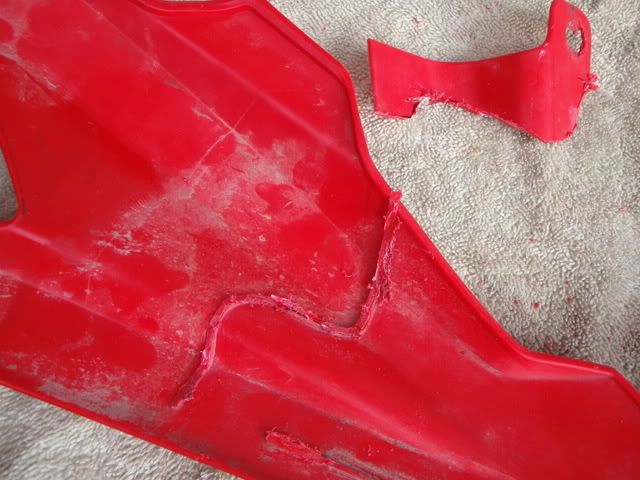
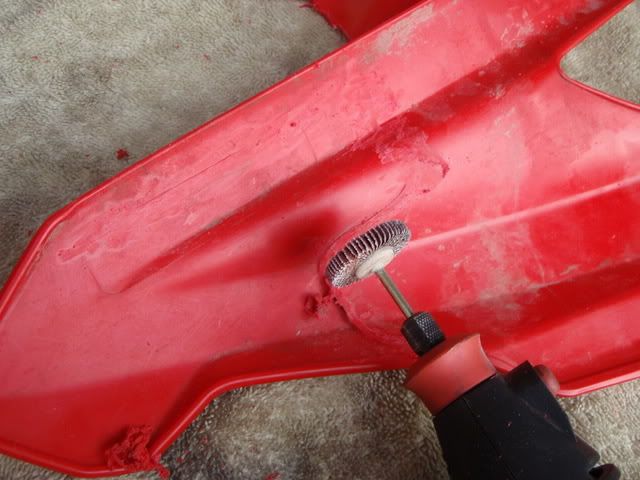
Cut out pieces of panel not needed…test fit some more.
I used electrical tape to mark where the side panels touched the tank.
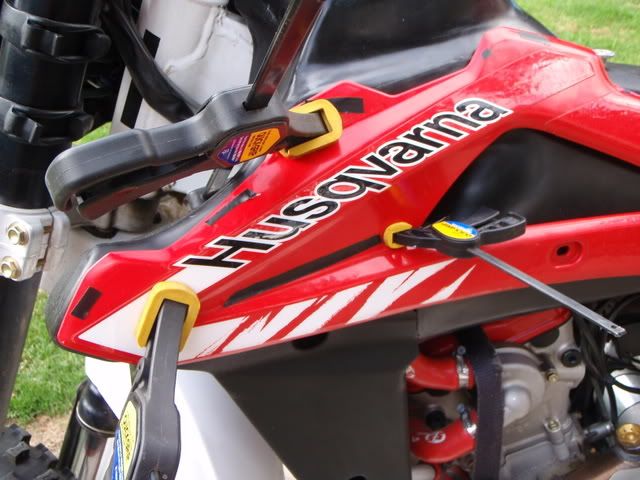
Applied lots of “Goop” glue to the panels and fitted them to the tank with clamps and old tie down straps. Let dry over night.

Sidepanels1.jpg

Sidepanels2.jpg

Sidepanels4.jpg

Sidepanels5.jpg

Sidepanels6.jpg

Sidepanels7.jpg

Sidepanels010.jpg

Sidepanels011.jpg

Sidepanels009.jpg


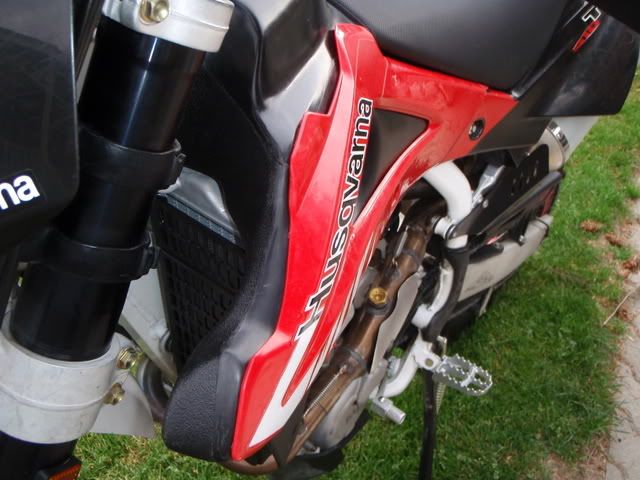
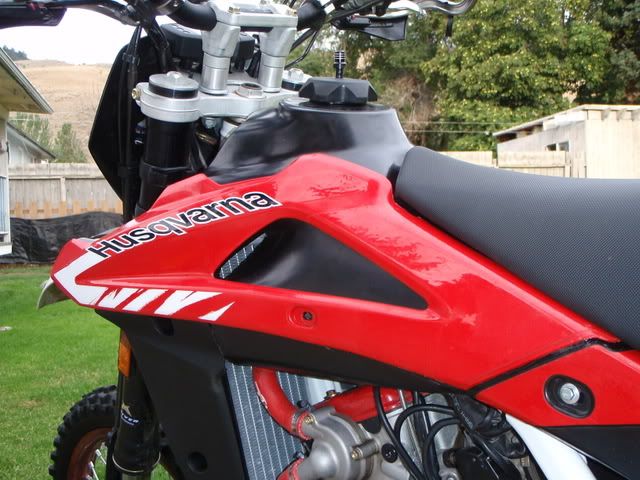
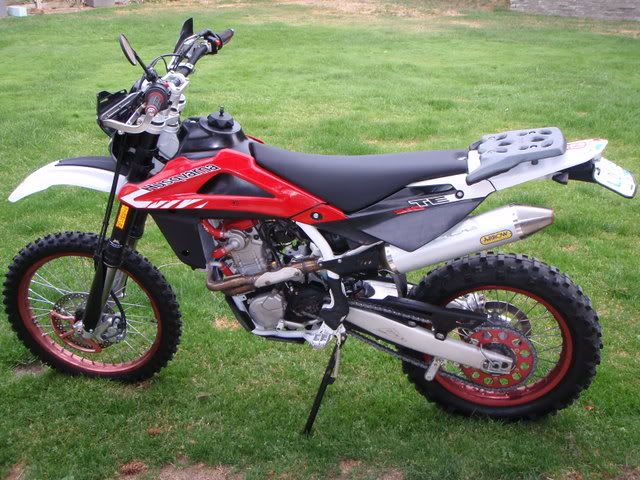
Hard to tell I have a New IMS Tank.
 
I had the same idea when I first saw the IMS tank. Great job, thank's.

Gas for you................ ooops, wrong forum.
 
That's fantestical !!!

Why didn't IMS think of that? Graphics are bound to stick to that better than the tank.
 
I'd wager you just started a run on black tanks and a new trend to sweeten the
cosmetics of the IMS tank.

Can I send you mine and the side panels for the same?

Seriously, very nice job and I'd be curious if you find "goop" being the adhesive to use with the exposure to petroleum. Is this the same "goop" that is marketed for shoe sole gluing?
 
Yes it is ....although it's very hard to see the word "Goop" is "Hyperlinked" here and in the first.
I think Coffee is working on it so we can see them better...
 
I would think PRC an aviation fuel tank sealent would work. That stuff sticks to anything. TW
 
Great job, very nice. Let us know if the "goop" you used hold out for the long hall. I think if IMS was on top of things they would/could of put some mounting screw lugs on the tank so we could have mounted them directly without glue. Looks good.

Gary
 
HuskyDude

I've had my black tank here collecting dust trying to decide if I should return it for the white but after your post I ripped open the box and started the fabrication. Your install was impressive.

Mounted the tank today and cut some of the mounting tabs off the red OEM gas tank covers. Getting ready for the adhevise step.

- Which type of "goop" did you purchase? They make several different types.

- Did you put the adhesive on prior to ever putting fuel in the tank?

- Did you roughen up the texture of the side of the tank with sand paper or file to provide a better surface
for the glue to adhere to?

Unfortunately my OEM tank removal did not go as smoothly as planned. Three of my factory bolts were just spinning in the plastic tank and had to be pryed out. Two were holding the red plastic cover and one was holding the fuel pump. My dealer replaced my fuel pump under warranty and the chimp that worked on it overtighted the fasteners causing the problem. I'll be having a few words with them tomorrow.
 
Fast1;4139 said:
HuskyDude

I've had my black tank here collecting dust trying to decide if I should return it for the white but after your post I ripped open the box and started the fabrication. Your install was impressive.

Mounted the tank today and cut some of the mounting tabs off the red OEM gas tank covers. Getting ready for the adhesive step.

- Which type of "goop" did you purchase? They make several different types.

I went with the "Marine Goop" it's suppose to have some UV protective
quality to it.


- Did you put the adhesive on prior to ever putting fuel in the tank?
No I've been running the tank for a couple of weeks pondering what to do....


- Did you roughen up the texture of the side of the tank with sand paper or file to provide a better surface?
for the glue to adhere to?
No I decided not to in case I go with decals in the future...
But it turned out so well...it would not be a bad idea to roughen up first.


Unfortunately my OEM tank removal did not go as smoothly as planned. Three of my factory bolts were just spinning in the plastic tank and had to be pried out. Two were holding the red plastic cover and one was holding the fuel pump.That's another reason I did what I did one of my bolts spun also wrecking both old tank and panel...My dealer replaced my fuel pump under warranty and the chimp that worked on it overtighted the fasteners causing the problem. I'll be having a few words with them tomorrow.

Good luck.
 
HuskyDude;4141 said:
Good luck.


Thanks!

I'll hope to have a photo of your twin in a week or so.

I thought about trying this stuff for the adhesive step.
Might also work for gluing in those factory tank insert nuts too.

waterweld_lrg.jpg


detail here

http://jbweld.net/products/water.php

Use WATER WELD for:
gas tanks
water & fuel cans
oil pans
thread locking
metal & plastic pipes
ruptured radiators
swimming pools & spas
gutters & downspouts
heating & A/C coils
auto body repairs


..
 
If it helps - several thousand Lb lead sail boat keels are held on with 3M 5200. Lead to fiberglass connection - takes a LOT of work to take off a keel after that.

That is available around here at hardware stores.

If you want to peruse an on-line boat supplier www.westmarine.com might be good.

.
 
I've used the 3M 5200 to seal the ride shoe into the hull of my Yamaha GP1300R PWC hull.

I'm not sure if it can sustain petroleum products however??
 
The ugly black tank was keeping me from getting one. I am onboard now. Awesome post. Now all we need is a tank, some plastic paint primer, and a can of flat black (to take the shine out) and no one would ever be the wiser.
 
Here is what that link had to say about it. I've used it before and spent $$ trying to break the connection between lead & fiberglass - lead could be cut, fiberglass could be cut, but to break the actual connection took a lot of men chiseling, cutting, and prying. A little fuel won't touch it once it is dry.

You guys really want something that permanent? Maybe just glue a stud of plastic to the tank and screw into that?

Cures tack-free in just two hours

The fast cure version of 3M Marine Adhesive Sealant 5200 becomes tack-free in just 1-2 hours and completely cures within 24 hrs. Ideal for applications where a fast long-term seal is needed above or below the waterline, such as hull to deck seams, wood to fiberglass, marine hardware and hull and stern joints. Remains flexible, allowing structural movement and has excellent resistance to weathering in the marine environment. White.

* Formulation: One-part polyurethane adhesive/sealant
* Recommended Usage: Permanent bonding, above or below water
* Extremely strong & flexible
* Material Incompatibilities: Acrylics Some plastics (ABS, Lexan)
* Cure Time: Tack free: 1-2 hrs; complete cure: 24 hrs
* Cleanup: Mineral spirits or kerosene
* Removal: Mechanical removal
* Tensile strength: 600psi
 
Back
Top