• 4 Stroke Husqvarna Motorcycles Made In Italy - About 1989 to 2014
    TE = 4st Enduro & TC = 4st Cross

  • Hi everyone,

    As you all know, Coffee (Dean) passed away a couple of years ago. I am Dean's ex-wife's husband and happen to have spent my career in tech. Over the years, I occasionally helped Dean with various tech issues.

    When he passed, I worked with his kids to gather the necessary credentials to keep this site running. Since then (and for however long they worked with Coffee), Woodschick and Dirtdame have been maintaining the site and covering the costs. Without their hard work and financial support, CafeHusky would have been lost.

    Over the past couple of weeks, I’ve been working to migrate the site to a free cloud compute instance so that Woodschick and Dirtdame no longer have to fund it. At the same time, I’ve updated the site to a current version of XenForo (the discussion software it runs on). The previous version was outdated and no longer supported.

    Unfortunately, the new software version doesn’t support importing the old site’s styles, so for now, you’ll see the XenForo default style. This may change over time.

    Coffee didn’t document the work he did on the site, so I’ve been digging through the old setup to understand how everything was running. There may still be things I’ve missed. One known issue is that email functionality is not yet working on the new site, but I hope to resolve this over time.

    Thanks for your patience and support!

KYB 48mm, replace bushings and seals, 2 questions

OlderHuskyRider

Husqvarna
Pro Class
2010 TE 450

Do I have to Remove the nut, the spring guide, the O-ring and the collar bushing, all that stuff on top, just to separate the fork tube and the fork leg?

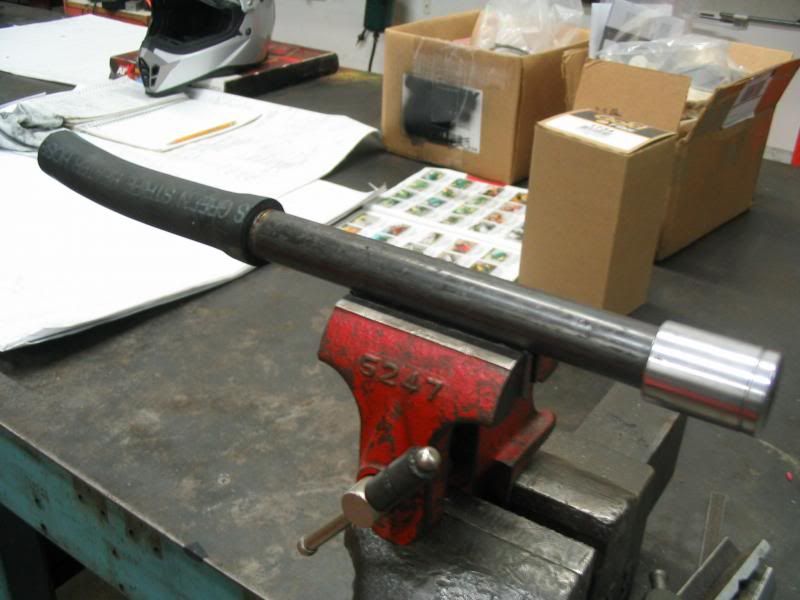
How do I Lock the upper end of the cartridge unit into place so I can Loosen and remove the bottom valve unit?

Also, how do I Loosen and remove the bottom valve unit? The 14mm allen doesn't seem to be the answer here..
 
I found this guy used a rattle-gun and just held the rod.

""Don't you love power tools use a rattle gun on this but be careful you may have to pull hard on the cartridge to stop it turning. If worst comes to worst even put the spring and cap on and push hard to hold it.""
DSCN2264.jpg
 
If I could get that cartridge to hold still, I could do this I think.

I guess this is the cartridge holding tool, anybody have one of these, to take some measurements for me

736680531_pGk9B-O.jpg


tfch-01-1.jpg
 
Try dumping the oil then replacing the spring and top cap, turn forks upside down, compress the springs as much as you can and then try crack the bottom valve assembly.
The compressed spring should hold the cartridge still enough to get it undone :)
 
Try dumping the oil then replacing the spring and top cap, turn forks upside down, compress the springs as much as you can and then try crack the bottom valve assembly.
The compressed spring should hold the cartridge still enough to get it undone :)


I can try that this morning before I go to get some fork oil and a piece of 1" PVC to make a holder.
 
I made a holder tool for the Zokes out of a piece of 3/4" heater hose and a pipe nipple. The hose and nipple slide over the damper rod and inside the inner tube. there is a 3/4' socket forced onto the pipe nipple so it can be held with a ratchet.
Forktooldelete006-Copy2_zpsbfca2745.jpg
 
I don't know what "nut, the spring guide, the O-ring and the collar bushing" refer to exactly, but you do need to remove the fork cap and disconnect it from the damping rod in order to separate the fork leg. HOWEVER: I am not convinced that you need to remove the cartridge via the bottom nut to change seals. Basically, I think you can do one or the other; just removing the cap, unscrewing the damper rod, and removing the spring (not "necessary" but way neater/cleaner) should allow you to pop the legs apart. It will take some whacking/yanking. Be sure to remove the dust wiper and fork seal circlip first!!!

I might be totally forgetting something (haven't done fork seals in a while), but I can't remember ever having to pull the cartridge out, nor can I come up with a reason why that would be necessary. You really only need to pull the cartridge out of the lower leg if you want to completely empty it of oil or change the valving.

Do you have an impact gun? With an impact gun, they should come out right quick. They will try to spin when once you pop them loose, what I do it just apply a bit of sideways pressure to the damper rod to keep them from rotating. Caution: the threads on the top of the damper rod are SHARP, use a rag, glove, etc to protect your finger or you will get sliced.

Without an impact, by far the best way is with a cartridge holding tool. I've done the trick with compressing the spring, but I had to compress the spring A LOT to get it to hold, and I didn't like it one bit.

Yes, you need a 14mm allen to do this.

The key measurements on that tool are the OD of the tool, the ID of the tool, and the size/spacing of those 4 "lugs" that engage with the cartridge. There is not a lot of extra space in there, just FYI. I made a tool to unscrew the cartridge cap (same thing you'd need to unscrew it), but I take the spring seat off first (which you can't do with the cartridge in the fork), so my measurements wouldn't be of any use. Sorry.
 
Like I said, you shouldn't need to go through any of that to change the seals and bushings, unless I was mistaken.
 
Like I said, you shouldn't need to go through any of that to change the seals and bushings, unless I was mistaken.

On the 2nd fork today, I MIGHT try to separate the leg and the tube without taking the the damper apart, but I've never seen a video where that was done, they always take the damper assembly out to get to the seals and bushings.
 
Like I said, you shouldn't need to go through any of that to change the seals and bushings, unless I was mistaken.


Any input from anybody on refilling with oil, below is the text from the service manual, which seems to be alot of oil, filling up to the top edge of the outer fork tube.


Refilling to the specific level

Refill the shock absorber unit with oil until the upper limit of the outer tube.

Move the outer tube up and down slowly to distribute the oil between the inner
and outer tubes.

Then move the piston rod slowly up and down to evenly distribute the oil in the
entire cartridge.
(N.B.: add oil if the level in the shock absorber unit is too low).

Finally, refill with oil until the upper limit of the outer tube.

Leave to settle until any air bubbles have disappeared completely, then refill up
to the specific level.

Insert the inner push rod into the piston rod.

Insert the spring, the spring guide cap and tighten the cap.
 
((edited to show TE310 / EU))

OIL FORK LEVEL
For the regular fork operation, both legs must be provided
with the necessary oil quantity. Remove the forkrods form the
fork to check the oil level inside the forkrods. Work as follows:
- remove the power rod caps;
- remove springs from the stems letting the oil drop into the
latter;
- bring forks to stroke end;
- check that the level is at distance “A” below the upper limit
of rods.

OIL QUANTITY IN EACH FORK LEG
- TE: 725 cm3 (44.2 cu. in.) = 24.5 ounces (TE 310 / EU number)
- SMR: 740 cm3 (45.1 cu. in.)
A=100mm (3.94 in.) - SMR
A=120mm (4.72 in.) - TE
 
I'd go 120mm oil level, springs out (and spacers if any), fully compressed forks and cartridge.


I rewrote the owners manual text, is it correct?

OIL FORK LEVEL
To check or refill a completely emptied fork,
- Remove the fork leg assemblies from the bike.
- remove the top cap;
- remove spring from the black fork tube letting the oil drop into the latter;
- bring fork to fully compressed state;
- check that the level is 120mm below the black fork tube edge
 
That reads better :)
Use the quantity as a guide to how much oil to purchase and use the measurement,120mm, as your final setting :)
 
Hi,

No special tools needed.
I pull KYB forks apart all the time. Don't pull the cap off first, leave the fork ass'y together and use an impact wrench to spin out the compression stack at the bottom, that way the spring tension will keep the cartridge from spinning.
Once that's out, you can take off the fork cap, remove the spring, pull off the dust seal, then remove the snap ring that holds in the seal. The seal assembly will pop right out with a few good hard yanks to separate the top from the bottom tubes.

Interestingly enough, the 50mm marzocchi forks on my 09 TE310 come apart the exact same way - but instead of an allen at the bottom of the forks they use a nut.


120mm is also what I set my KYB fork oil to on my jap bikes.
On my zook forks I'm running a lighter oil (amsoil light 5 wt) which is actually about a 2.5 wt at 120 mm and they work well (120 seems to work for a lot of off-road applications). Based on my fork travel though, I bet I could decrease my oil level to 125mm with the zooks to get a little more.
 
Back
Top