dfeckel
Husqvarna
AA Class
COFFEE EDIT - Link to discussion thread:
http://www.cafehusky.com/forums/showthread.php?p=35988
I posted up a little how-to on TT a while ago, but I didn't take pictures at the time. I had the head off recently to have my intake valves redone by Dave Hopkins (thanks, Dave!), and I took a few pictures to make that old how-to a lot clearer. Here ya go!
I finished reinstalling the head yesterday, and I have a couple more observations about assuring the cam timing is correct. It turns out you don't need to mark anything before pulling it all apart--all the marks are there for you already.
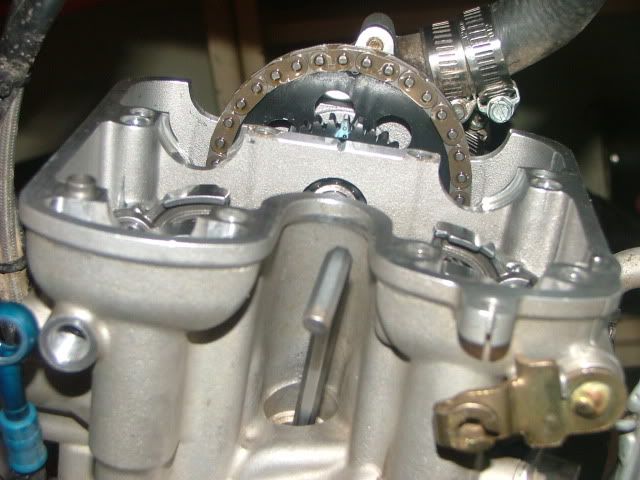
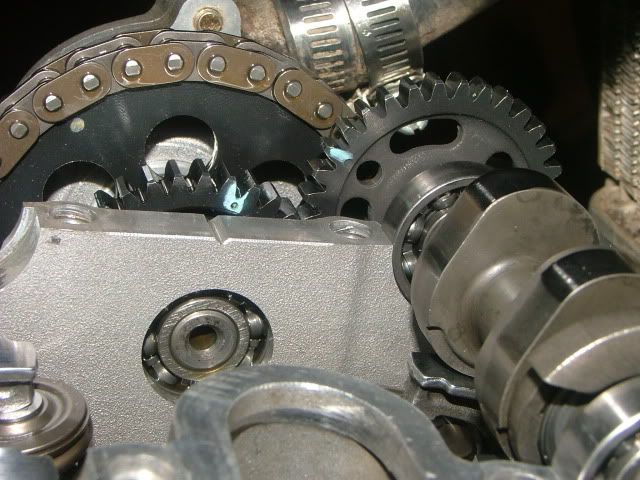
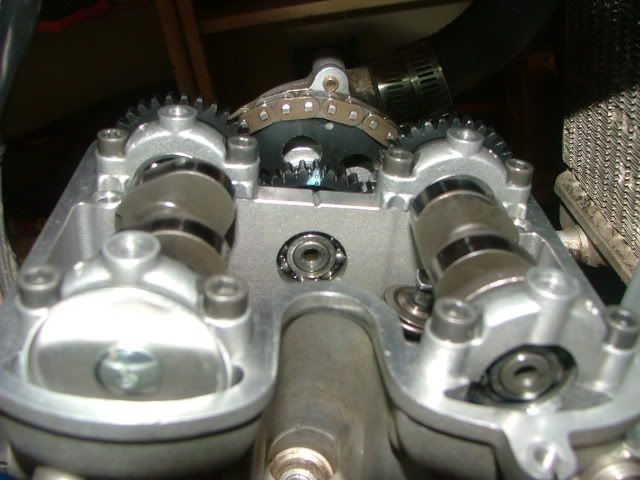
There are already some marks on the cam sprocket. The TWO marks on the gear portion of the cam sprocket align with the line on the head to indicate TDC.
Here is the tricky bit I figured out. When at TDC, the OTHER marks on the gear portion of the cam sprocket align with the marks on the cam gears!! The thing is, you can't SEE them aligning at TDC--your vision is obstructed by the head casting. Here's how to use those marks.
1. With the cams out, get the cam sprocket and timing chain reinstalled with the front chain slider and tensioner installed. You probably don't need the tensioner installed for this, but I wanted the maximum accuracy when verifying TDC. With the spark plug out, put something with a long, smooth, thin handle (like an hex wrench) into the spark plug hole so it is resting on the top of the piston. This is your TDC indicator.
Carefully move the engine through a few revolutions to verify the TWO marks align with the mark on the head when the hex wrench stops moving upwards. When you are satisfied that the cam sprocket and timing chain are properly installed, move on to step 2.
2. Use the kickstarter to carefully inch the engine to just before TDC.
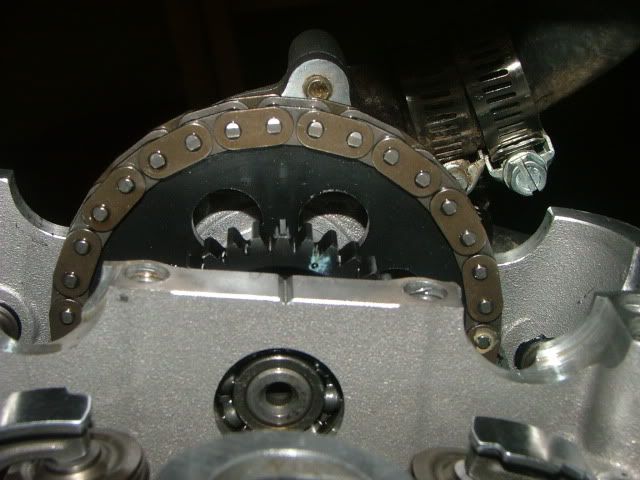
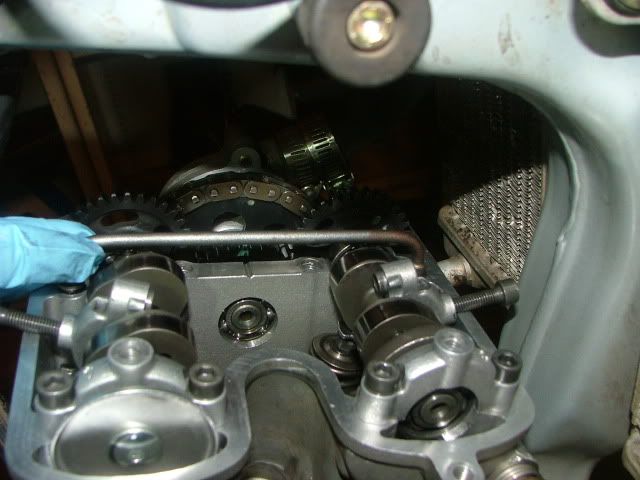
When you do this, you will see another mark on the gear portion of the cam sprocket come into view. If the TWO marks are at the 12 o'clock postion, then this mark is at about 2 o'clock. You couldn't see it before since it was obscured by the head casting.
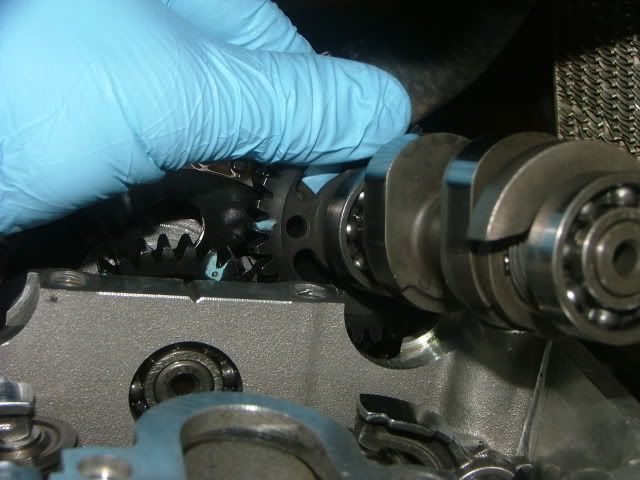
3. Grab the exhaust cam and find the mark on the gear.

While holding the exhaust cam in your hands, mesh the teeth together with the cam sprocket at the marks.
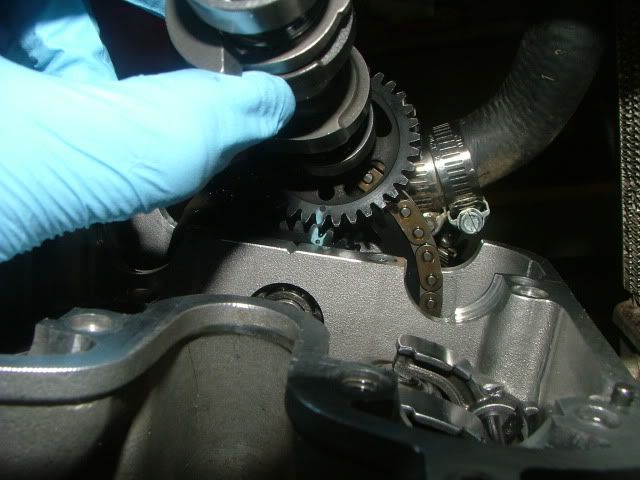
The tooth on one is marked to mesh with the valley on the other.
Now, you can't FULLY mesh the gears at the marks because the cam isn't aligned with its recesses in the head. But, with your hands tilting the cam up a little, you can mesh the edges of the cam teeth. (confused, yet? Good thing I don't write instruction manuals!) When you're sure the marked tooth meshes with the marked valley, "walk" the cam down to its recesses in the head without unmeshing the gears.
You're rolling the cam gear around the gear portion of the cam sprocket until the cam rests in its proper place in the head.
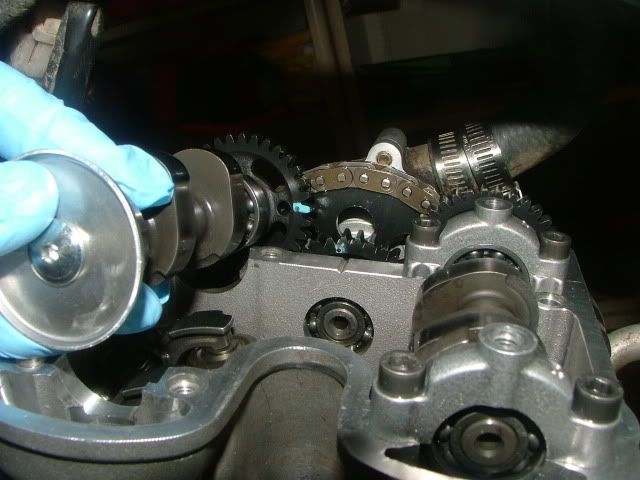
4. Snug down the exhaust cam retaining caps.

5. Carefully turn the engine over with the kickstarter a few times. There should be no interference.
6. Turn the engine over to just AFTER TDC. You should still see the mark on the gear portion of the cam sprocket that aligns with the mark on the intake cam. This mark is at about the 10 o'clock position relative to the two marks.
7. Repeat step 3 with the intake cam.
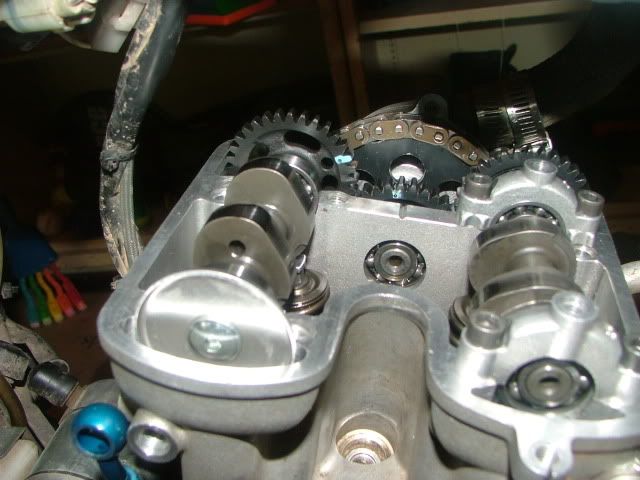
Snug down the caps.
8. Turn the engine over a few times and put it back to TDC.
9. Remove the left side cam caps so you can reinstall the oil line.
10. Torque the cam caps.
There! Guaranteed cam timing!!
http://www.cafehusky.com/forums/showthread.php?p=35988
I posted up a little how-to on TT a while ago, but I didn't take pictures at the time. I had the head off recently to have my intake valves redone by Dave Hopkins (thanks, Dave!), and I took a few pictures to make that old how-to a lot clearer. Here ya go!
I finished reinstalling the head yesterday, and I have a couple more observations about assuring the cam timing is correct. It turns out you don't need to mark anything before pulling it all apart--all the marks are there for you already.
There are already some marks on the cam sprocket. The TWO marks on the gear portion of the cam sprocket align with the line on the head to indicate TDC.
Here is the tricky bit I figured out. When at TDC, the OTHER marks on the gear portion of the cam sprocket align with the marks on the cam gears!! The thing is, you can't SEE them aligning at TDC--your vision is obstructed by the head casting. Here's how to use those marks.
1. With the cams out, get the cam sprocket and timing chain reinstalled with the front chain slider and tensioner installed. You probably don't need the tensioner installed for this, but I wanted the maximum accuracy when verifying TDC. With the spark plug out, put something with a long, smooth, thin handle (like an hex wrench) into the spark plug hole so it is resting on the top of the piston. This is your TDC indicator.

Carefully move the engine through a few revolutions to verify the TWO marks align with the mark on the head when the hex wrench stops moving upwards. When you are satisfied that the cam sprocket and timing chain are properly installed, move on to step 2.
2. Use the kickstarter to carefully inch the engine to just before TDC.

When you do this, you will see another mark on the gear portion of the cam sprocket come into view. If the TWO marks are at the 12 o'clock postion, then this mark is at about 2 o'clock. You couldn't see it before since it was obscured by the head casting.
3. Grab the exhaust cam and find the mark on the gear.
While holding the exhaust cam in your hands, mesh the teeth together with the cam sprocket at the marks.
The tooth on one is marked to mesh with the valley on the other.
Now, you can't FULLY mesh the gears at the marks because the cam isn't aligned with its recesses in the head. But, with your hands tilting the cam up a little, you can mesh the edges of the cam teeth. (confused, yet? Good thing I don't write instruction manuals!) When you're sure the marked tooth meshes with the marked valley, "walk" the cam down to its recesses in the head without unmeshing the gears.
You're rolling the cam gear around the gear portion of the cam sprocket until the cam rests in its proper place in the head.
4. Snug down the exhaust cam retaining caps.
5. Carefully turn the engine over with the kickstarter a few times. There should be no interference.
6. Turn the engine over to just AFTER TDC. You should still see the mark on the gear portion of the cam sprocket that aligns with the mark on the intake cam. This mark is at about the 10 o'clock position relative to the two marks.
7. Repeat step 3 with the intake cam.
Snug down the caps.
8. Turn the engine over a few times and put it back to TDC.
9. Remove the left side cam caps so you can reinstall the oil line.
10. Torque the cam caps.
There! Guaranteed cam timing!!