I did that on mine but only put a thread on the outside of the combustion chamber end and screwed it in first before I had it welded.
Probably don't need to do that but I like to overdo things.
Also I tidy'd up the inside of the water jacket/head with a pencil grinder before I fitted it in so I would have a good water flow.
I also drilled down the centre , but smaller , to have it lined up for the final drilling.
Also make the combustion chamber end of the hole smaller than the valve , as per the way NZ does it , just in case.
There is another idea on this forum somewhere but I can't find it but I did copy it.
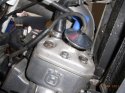
Note the stay which calms the vibration down a lot.
")
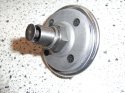
Ignore the date , photo was taken just now.
Cheers Mike


")
