dartyppyt
Husqvarna
Pro Class
I thought I'd share with you how I remove those dang tank dents and the tools I use to get down inside tank, with out damaging the gas cap spout, and creating more damage, etc....
This is my 6th tank that I am working on and I only spent about 15 mins on this one last night. It will probably take me a 1/2 hour to remove this one.
I have picked up most of these tanks smashed and pretty reasonable.I don't think I've had one yet that couldn't be fixed. This tank was creased about an 1/8 of an inch deep that I am removing. I started with my long reach clamp with swivel pads and a piece of angle iron, to start pressing it out. I start by getting it as level a possible. Angle iron is good to start off with because you can use the flat side and it will not flex as you clamp it, as a backing plate.
Then I thought, hey maybe I can help some of you.
I've tried freezing, panel adhesive, heating, etc......
Freezing expands the whole tank and your freezer ends up stinking. I tried one and thought I ruined it cause whole tank started expanding, but after thawing, the dent is still there. I used expensive body panel adhesive and gluing pull studs to tank. Using a dent puller, most studs just popped right off. The alloy is strong and is not as easy the budge like regular auto body panels. It was very expensive and frustrating. Nah, too much trouble. It's also hard to tell how much force to use and you can get a dent going outward instead of inward. So, why not use a technique that works great and you can take your time slowly, with results. Meaning, turning the screw on the clamp, little by little. It's really easy and you'll get the hang of it in a short period of time.
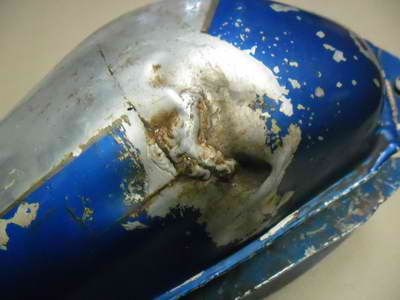
On this particular tank, I have a long crease dent about 1/8 of an inch deep/long.
Step 1
Using a paint stirring stick (Thicker one, free from home improvement store), I wrap 120 grit sand paper around it and sand around dent area to highlight the dent to remove. The stirring stick keeps the sand paper level. You could also spray the area with a light coat of dark grey primer/sand area to highlight your dent's low or high spots.
Step 2
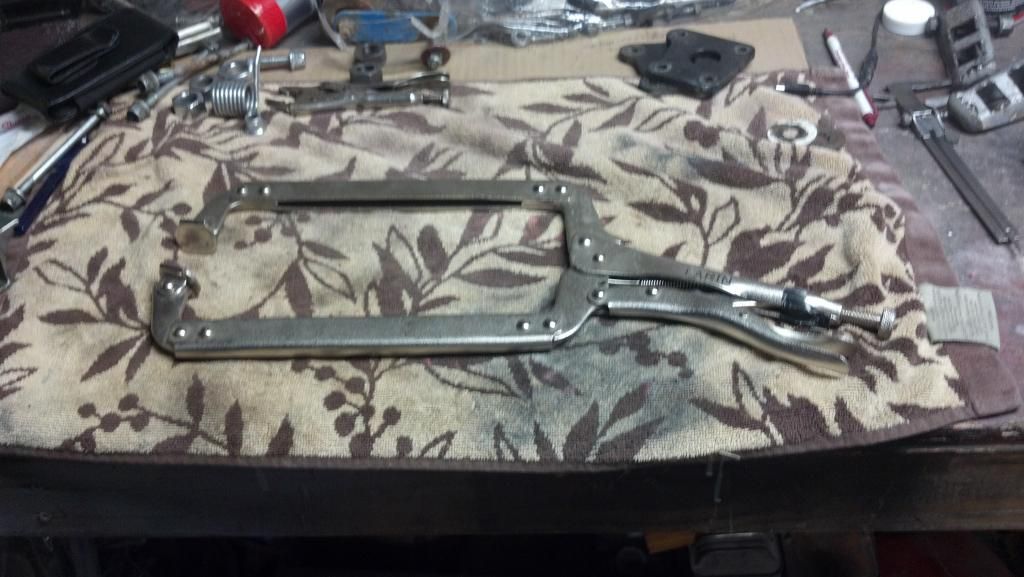
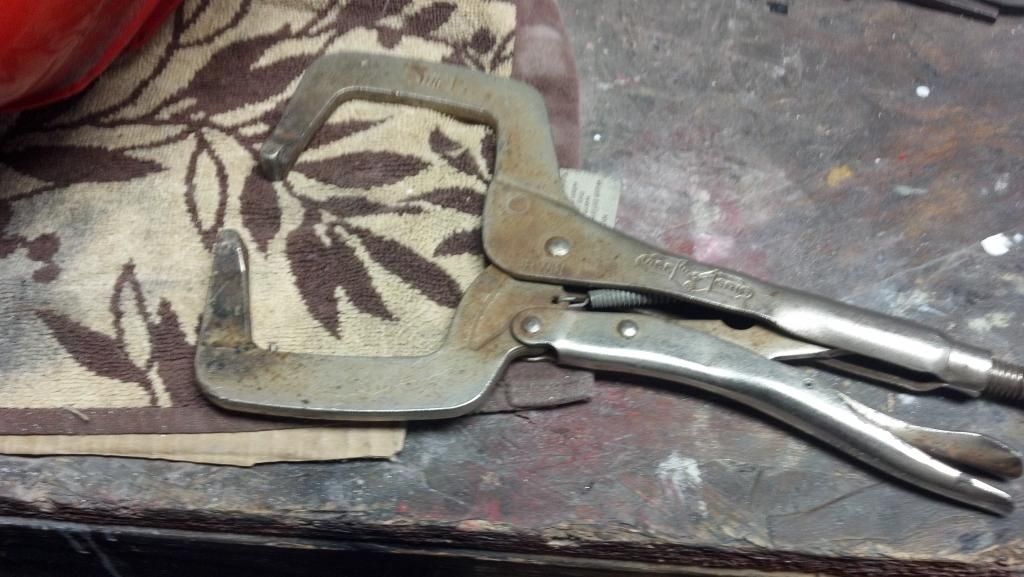
These are some of the tools I use. 18" long reach swivel, vise grip clamp (Good for pushing from behind and leveling dent). Another set of vise grip clamps with rounded ends (Good for removing creases/bulls eye dents).
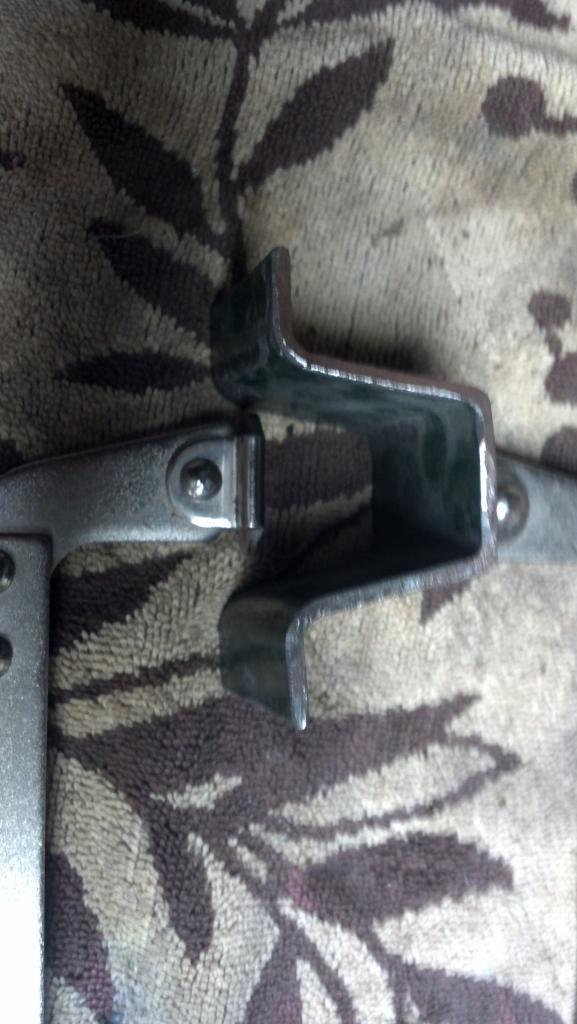
I use a piece I cut out of a farm fencing brace ( It enables me to clamp and push dents out from behind while keeping a level surface that is existing).
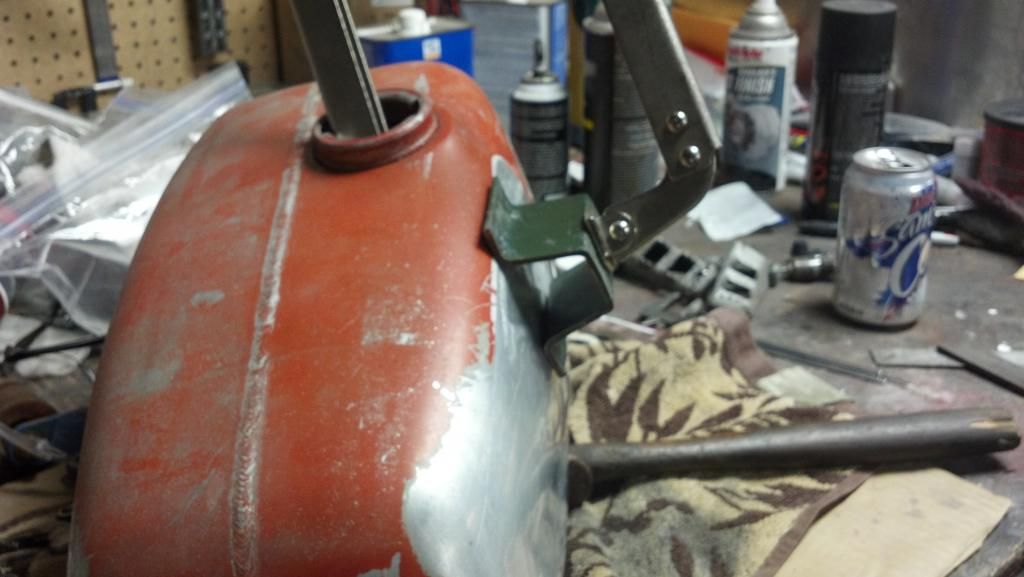
First pic is fencing brace and swivel clamp in use.
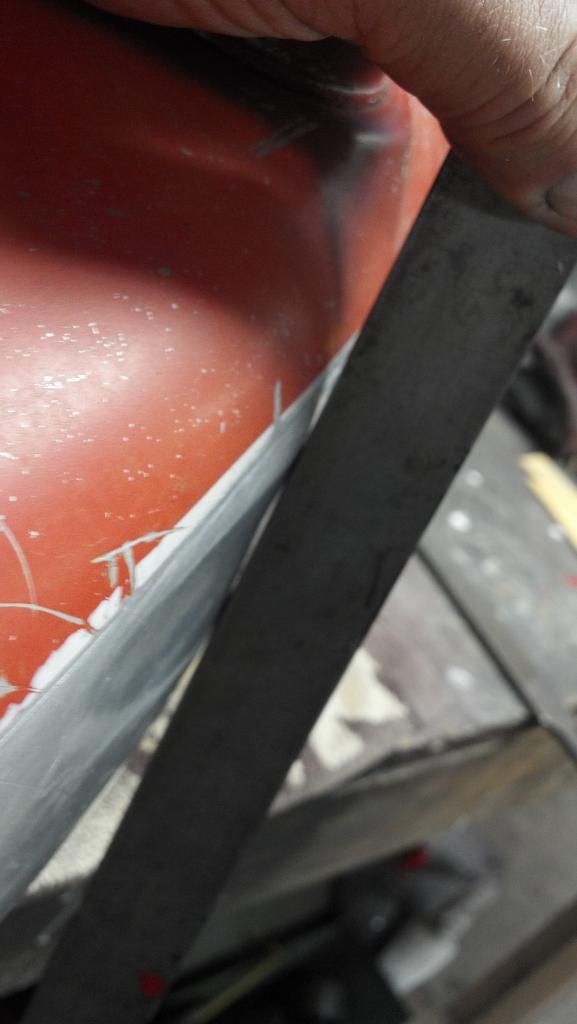
Here is the tools in use and you can see through metal fence brace how much you are pushing dent out to overstretch metal.
This one is good for pushing dent out and leveling metal flush.
This one is good for removing creases.
Shows concept of clamp used behind metal to push the dent out a little each time/ plus keeping existing metal even. The concept behind this is to overstretch the metal a little to get it back to being flush. Just clamping it to a solid background, still makes the dent low.
Step 3
Using a straight edge, review your progress with each pass of your clamp. I also sand each pass, with the paint stirring stick/sand paper, to re highlight dent area, as it's being removed slowly.
Step 4
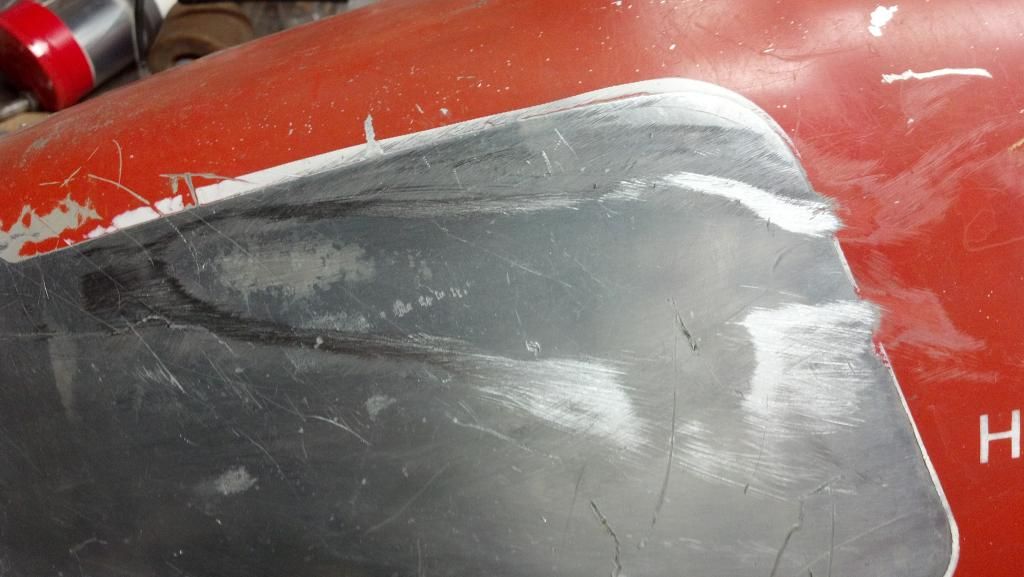
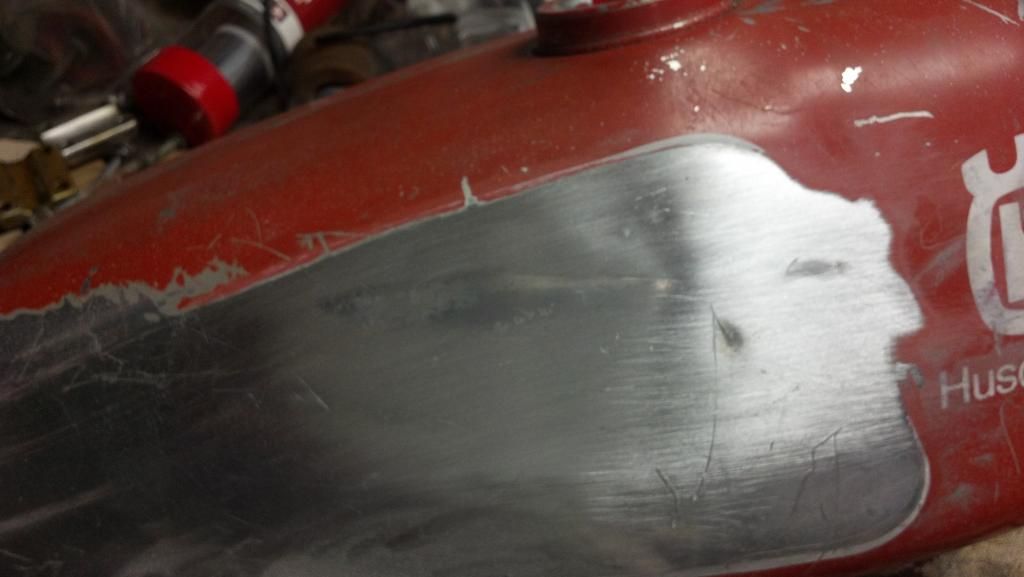
This shows my progress after about 15 mins of work and sanding to re-highlight my progress. I am after getting the whole dent out first, then I will come back for little dimples, etc... I use a ball bearing duct taped to my saddle clamp for dimples and little creases.
Step 5
Take your time pressing the dent out from behind. Using the clamp as a press, you can turn the vice grip screw a little each time (making a new pass). Do this so you will not over stretch metal, getting dent flush with existing metal. You get to aggressive with turning the screw and you will have your dent outward instead of being flush. As you squeeze the clamp you can watch how much you are pushing the dent out visually.
I work on removing a dent at the deepest point, and slowly working outward.
For removing a dimple or bulls eye. You can duct tape a ball bearing to the swivel clamp, used inside to push dimple out slowly. Then you can use the saddle pads (After bearing is removed) on clamp to help level it out flush.
I also use the rear axle with the nut attached. I can slide it inside of tank used as a backing tool for my body hammer. This helps level any outward impressions in metal making them flush.
Another tip: If you have a stubborn dent that doesn't want to move. You can attach your clamp, wrap the clamping end (screw end that you squeeze to lock)with duct tape, and using a slide hammer/j hook, attach it to the outer clamp tip and pull it out that way, as well. I use duct tape to keep the clamp handle from springing open when pulling with my slide hammer.
I hope this helps you and gives you an idea of how easy this works. Next week I will try to add to this thread and show you how to make a tank cut and reach a dent that is unaccessible. Then weld it up for you. If you don't have a tig welder. you can take it to one and have it welded.
Does this work! Well works good for me and is reasonable.
This is my 6th tank that I am working on and I only spent about 15 mins on this one last night. It will probably take me a 1/2 hour to remove this one.
I have picked up most of these tanks smashed and pretty reasonable.I don't think I've had one yet that couldn't be fixed. This tank was creased about an 1/8 of an inch deep that I am removing. I started with my long reach clamp with swivel pads and a piece of angle iron, to start pressing it out. I start by getting it as level a possible. Angle iron is good to start off with because you can use the flat side and it will not flex as you clamp it, as a backing plate.
Then I thought, hey maybe I can help some of you.
I've tried freezing, panel adhesive, heating, etc......
Freezing expands the whole tank and your freezer ends up stinking. I tried one and thought I ruined it cause whole tank started expanding, but after thawing, the dent is still there. I used expensive body panel adhesive and gluing pull studs to tank. Using a dent puller, most studs just popped right off. The alloy is strong and is not as easy the budge like regular auto body panels. It was very expensive and frustrating. Nah, too much trouble. It's also hard to tell how much force to use and you can get a dent going outward instead of inward. So, why not use a technique that works great and you can take your time slowly, with results. Meaning, turning the screw on the clamp, little by little. It's really easy and you'll get the hang of it in a short period of time.
On this particular tank, I have a long crease dent about 1/8 of an inch deep/long.
Step 1
Using a paint stirring stick (Thicker one, free from home improvement store), I wrap 120 grit sand paper around it and sand around dent area to highlight the dent to remove. The stirring stick keeps the sand paper level. You could also spray the area with a light coat of dark grey primer/sand area to highlight your dent's low or high spots.
Step 2
These are some of the tools I use. 18" long reach swivel, vise grip clamp (Good for pushing from behind and leveling dent). Another set of vise grip clamps with rounded ends (Good for removing creases/bulls eye dents).
I use a piece I cut out of a farm fencing brace ( It enables me to clamp and push dents out from behind while keeping a level surface that is existing).
First pic is fencing brace and swivel clamp in use.
Here is the tools in use and you can see through metal fence brace how much you are pushing dent out to overstretch metal.
This one is good for pushing dent out and leveling metal flush.
This one is good for removing creases.
Shows concept of clamp used behind metal to push the dent out a little each time/ plus keeping existing metal even. The concept behind this is to overstretch the metal a little to get it back to being flush. Just clamping it to a solid background, still makes the dent low.
Step 3
Using a straight edge, review your progress with each pass of your clamp. I also sand each pass, with the paint stirring stick/sand paper, to re highlight dent area, as it's being removed slowly.
Step 4
This shows my progress after about 15 mins of work and sanding to re-highlight my progress. I am after getting the whole dent out first, then I will come back for little dimples, etc... I use a ball bearing duct taped to my saddle clamp for dimples and little creases.
Step 5
Take your time pressing the dent out from behind. Using the clamp as a press, you can turn the vice grip screw a little each time (making a new pass). Do this so you will not over stretch metal, getting dent flush with existing metal. You get to aggressive with turning the screw and you will have your dent outward instead of being flush. As you squeeze the clamp you can watch how much you are pushing the dent out visually.
I work on removing a dent at the deepest point, and slowly working outward.
For removing a dimple or bulls eye. You can duct tape a ball bearing to the swivel clamp, used inside to push dimple out slowly. Then you can use the saddle pads (After bearing is removed) on clamp to help level it out flush.
I also use the rear axle with the nut attached. I can slide it inside of tank used as a backing tool for my body hammer. This helps level any outward impressions in metal making them flush.
Another tip: If you have a stubborn dent that doesn't want to move. You can attach your clamp, wrap the clamping end (screw end that you squeeze to lock)with duct tape, and using a slide hammer/j hook, attach it to the outer clamp tip and pull it out that way, as well. I use duct tape to keep the clamp handle from springing open when pulling with my slide hammer.
I hope this helps you and gives you an idea of how easy this works. Next week I will try to add to this thread and show you how to make a tank cut and reach a dent that is unaccessible. Then weld it up for you. If you don't have a tig welder. you can take it to one and have it welded.
Does this work! Well works good for me and is reasonable.

 , i've got a few with some minor dings i'll try it out out, once i get some of those type clamps.