-
Hi everyone,
As you all know, Coffee (Dean) passed away a couple of years ago. I am Dean's ex-wife's husband and happen to have spent my career in tech. Over the years, I occasionally helped Dean with various tech issues.
When he passed, I worked with his kids to gather the necessary credentials to keep this site running. Since then (and for however long they worked with Coffee), Woodschick and Dirtdame have been maintaining the site and covering the costs. Without their hard work and financial support, CafeHusky would have been lost.
Over the past couple of weeks, I’ve been working to migrate the site to a free cloud compute instance so that Woodschick and Dirtdame no longer have to fund it. At the same time, I’ve updated the site to a current version of XenForo (the discussion software it runs on). The previous version was outdated and no longer supported.
Unfortunately, the new software version doesn’t support importing the old site’s styles, so for now, you’ll see the XenForo default style. This may change over time.
Coffee didn’t document the work he did on the site, so I’ve been digging through the old setup to understand how everything was running. There may still be things I’ve missed. One known issue is that email functionality is not yet working on the new site, but I hope to resolve this over time.
Thanks for your patience and support!
You should upgrade or use an alternative browser.
630 Rear Brake Foot Pad Adjustment
- Thread starter Fast1
- Start date
kirbybikes
Husqvarna
AA Class
It is an XR clevis. I think it set me back about $7.Thanks for posting the photos.. I still need to fix mine. Would it be possible to add some type of shim material to the brake arm (some JB Weld?) so that the stop would be functional?
Is that the XR650 clevis?
As for fattening up the stop- I guess some JB would work.... maybe lay a bunch on there and then sand it down to size/ shape?
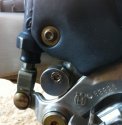
I think that's a MUCH better answer than JB weld! Nice call!If you look close at the photo's I posted above, I put a sleeve around the pedal stop to increase the diameter. Still makes for an adjustable stop just a larger diameter.
Stolenfant
Husqvarna
A Class
BiG DoM
Husqvarna
AA Class
I have done a clevis mod without using the Honda part and it works really well.
Essentially very simple: You cut off the lower flattened part of the threaded plunger rod, remove the top nut and replace with a 2mm thick washer (the handbook states to retain this gap - additional washers can be inserted if neded), and reuse the bottom nut in the clevis as before. This gives enough lower adjustment without the brake lever contacting the footrest bracket (standard bracket not lowered). I added a small piece of high density rubber to increase and cushion the lever stop gap. See pics.
I have also some time back fitted a HH break lever tip which helps me with contacting it = I ground down the OEM tip on the top to allow the HH tip to fit level and clamp in place. See pic.


mike54
Husqvarna
A Class
Honda clevis, top nut and washer on the upper side of the push rod. I've been using a modded lever which has a hammerhead tip welded on and overall the lever is straighter.
So, I want a once and for all solution to this. Does anyone have access to or has a friend who can do CNC? I want a new lever where the arm is 10 mils lower overall and is straight. If no one can do this I'll talk to my local shop and get a price for say, 10. Thoughts?
RDTCU
Husqvarna
Pro Class
If you get TOO low on the tip of the lever, you might snap it off or pull apart your master cylinder in a low-side, or be more prone to catch it on stuff offroad.
For those with minimal tools you can fab up a larger adjusting stop with a hacksaw, file and drill. The key is find a thick piece of aluminum plate or easier, a section of aluminum solid rod. If using rod you just slice off the rod end to the right thickness then drill an off-center hole to fit your bolt. If using plate, hacksaw a square piece and cut the corners off it then file it down. Not much harder than wood. I found bar and plate stock of all thickness/diameters at the local metal salvage yard. Lots of machine shop recycle pieces there.
For the brake pedal tip: I ground off the stock rivet, drilled a countersunk hole for the engine facing side of the brake arm and used a countersunk bolt. This lessens the sharp point of contact against your clutch cover when you inspect the hardness of the ground on the right side. I also put on a KLM replacement brake tip.
BaronVonDarrin
Husqvarna
A Class
Joe Schmoez
Husqvarna
Haha, you're tall like me aren't you...
I maxed out the adjustment on mine and it's about enough, but it's still a bit difficult to cover the brake wearing boots on one wheel while still sitting in my normal position...
Ha yeah 6'2" over here I think its the same problem you're having.
Joe Schmoez
Husqvarna
Does your rear tire turn freely without any pressure on the brake peddle?
Lift up the back end and spin the rear tire while off the ground.
It does turn freely. There is about 3mm of play before the rod hits whatever it does in the cylinder before it applies the brakes.


