highdez1981430cr
Husqvarna
AA Class
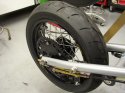
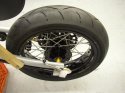
Where did you get your chain adjuster nuts at?
Those are really clean looking and no dirt on the threads, nice
Those are really clean looking and no dirt on the threads, nice
As you all know, Coffee (Dean) passed away a couple of years ago. I am Dean's ex-wife's husband and happen to have spent my career in tech. Over the years, I occasionally helped Dean with various tech issues.
When he passed, I worked with his kids to gather the necessary credentials to keep this site running. Since then (and for however long they worked with Coffee), Woodschick and Dirtdame have been maintaining the site and covering the costs. Without their hard work and financial support, CafeHusky would have been lost.
Over the past couple of weeks, I’ve been working to migrate the site to a free cloud compute instance so that Woodschick and Dirtdame no longer have to fund it. At the same time, I’ve updated the site to a current version of XenForo (the discussion software it runs on). The previous version was outdated and no longer supported.
Unfortunately, the new software version doesn’t support importing the old site’s styles, so for now, you’ll see the XenForo default style. This may change over time.
Coffee didn’t document the work he did on the site, so I’ve been digging through the old setup to understand how everything was running. There may still be things I’ve missed. One known issue is that email functionality is not yet working on the new site, but I hope to resolve this over time.
Thanks for your patience and support!
schimmelaw;63228 said:Second go round w/ the knife on the seat foam and I can't post photos - what gives? I'll try tomorrow.
Still no go - "exceeded quota". Can't post up any more photos? HELP by management - please


schimmelaw;63752 said:Thanks, boys.
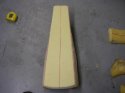
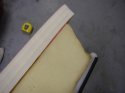
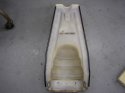
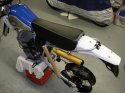
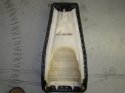
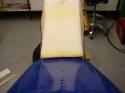
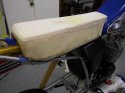
Rear inner fender? Seat base or fender? Fender is a modified yz and stock seat base tirelessly cleaned.
If I a had a do over - coulda/shoulda painted the underside of stock seat foam before re-glue. Thats where a majority if the discoloration comes from. Yes, the plastic seat base is stained but the foam exacerbates the discoloration/staining problem.
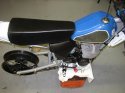
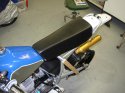
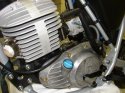
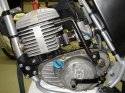
I love the Black on Silver on Nickel on Magnesium on Grey that you have going on here...... Les , Bruno and CarrieAnn would give it 10's****************************************schimmelaw;65245 said:Clutch cover resto (prior post) and installation. Was garred upped, faded/cloudy paint, dirty, greasy and rusting w/ mismatched hardware.
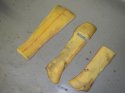
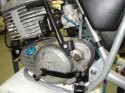
Photos 1 thru 3: Chemically stripped in the garage over a wkend. The bare aluminum is so stained and ugly its staying just like it is. No paint. No powder. No ano. No nothing. Bare it is. Nickled kickstart knuckle w/ ssteel attachment bolt. Anod kicker and fill cap. Moose shifter w/ ssteel mounting hardware. Anod allens for fun and I had them to use.
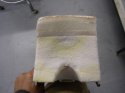
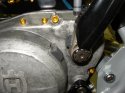
Photo 4: Doubled up on the rubber kickback pad. Keeps this nonstock kicker off the fins and offers a little more "cush" at the static position. (The rubber bumper were found at a local hardware store - times 2) Drilled the cover and used an NPT nipple for venting the crankcase.