-
Hi everyone,
As you all know, Coffee (Dean) passed away a couple of years ago. I am Dean's ex-wife's husband and happen to have spent my career in tech. Over the years, I occasionally helped Dean with various tech issues.
When he passed, I worked with his kids to gather the necessary credentials to keep this site running. Since then (and for however long they worked with Coffee), Woodschick and Dirtdame have been maintaining the site and covering the costs. Without their hard work and financial support, CafeHusky would have been lost.
Over the past couple of weeks, I’ve been working to migrate the site to a free cloud compute instance so that Woodschick and Dirtdame no longer have to fund it. At the same time, I’ve updated the site to a current version of XenForo (the discussion software it runs on). The previous version was outdated and no longer supported.
Unfortunately, the new software version doesn’t support importing the old site’s styles, so for now, you’ll see the XenForo default style. This may change over time.
Coffee didn’t document the work he did on the site, so I’ve been digging through the old setup to understand how everything was running. There may still be things I’ve missed. One known issue is that email functionality is not yet working on the new site, but I hope to resolve this over time.
Thanks for your patience and support!
You should upgrade or use an alternative browser.
08 emissions canister?
- Thread starter 04asphalt
- Start date

 so walk me through it please
Muddy Waters
Husqvarna
AA Class

I still haven't done mine so a walk through could be nice
It shouldn't be complicated from what I've herd, It's just nice to know what you're doing

tlking6
Husqvarna
AA Class
One line goes to the manifold. remove and plug the brass nipple with an automotive vacuum plug, or you can try to pull the nipple (I'm Chicken) and put in a bolt.
The other line goes to the top of the tank so just route it down the frame tube next to the other line that is already running down there. Route it away from the exhaust header or it'll get smoked.
Your done. (since it already fell off I dont need to tell you how to unbolt it) I can take a picture of what my bike looks like with it gone if you like.
Mine is in a box in case some California wacko decides that my bike is causing global warming and makes me put it back on.
brisendines
Husqvarna
A Class
tlking6
Husqvarna
AA Class
brisendines;24355 said:Just a quick question... What is the benefit of removing the canister?
Beyond being a dumb looking device hanging off the frame ruining the lines of an awesome looking machine just begging to get torn off by any number or natural hazards?
I guess I'd say its like a controlled intake manifold leak.
brisendines
Husqvarna
A Class
meijerclassics
Husqvarna
AA Class
I'm getting ready to ditch the canister, and am wondering what people are doing with the hose that goes from the fuel tank to to canister? Is everyone just running it down the frame and leaving it to drain to the ground?
Joliet
Husqvarna
AA Class
meijerclassics;24635 said:I'm getting ready to ditch the canister, and am wondering what people are doing with the hose that goes from the fuel tank to to canister? Is everyone just running it down the frame and leaving it to drain to the ground?
http://www.thefind.com/cars/browse-billet-anodized-gas-cap-vents
http://www.faster-minis.com/gas-cap-vent-t3-billet-anodized.html
04asphalt
Husqvarna
AA Class


glangston
Husqvarna
Pro Class
Poke around Rick's site, probably the pics and info you want.
04asphalt
Husqvarna
AA Class
I really like his TE610 review, waiting for more updatesglangston;25127 said:http://www.rickramsey.net/TE610mods.htm
Poke around Rick's site, probably the pics and info you want.

seems to me all I would have to do is "tie" the three hoses together as the canister has no valving anyway
Muddy Waters
Husqvarna
AA Class
All you need is the automotive vacuum cap
The whole process takes about five minutes
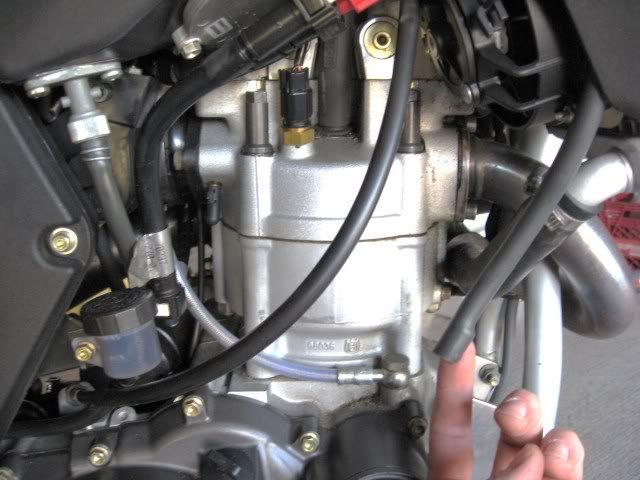
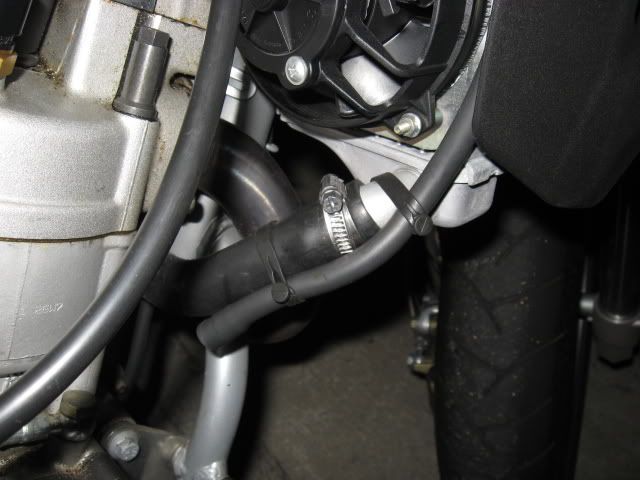
#1; Inspect the culprit - big hose comes from the top of the tank to the canister, small hose connect to the engine and one medium hose comes out of the bottom of the canister and goes to the back, it's open at the end
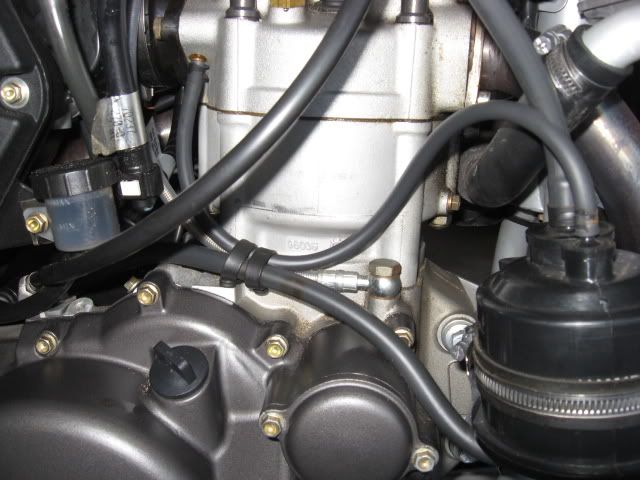
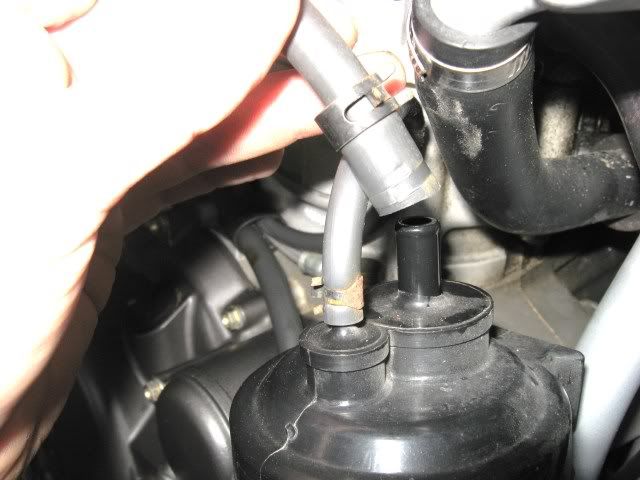
#2; Pull the bigger hose off the canister
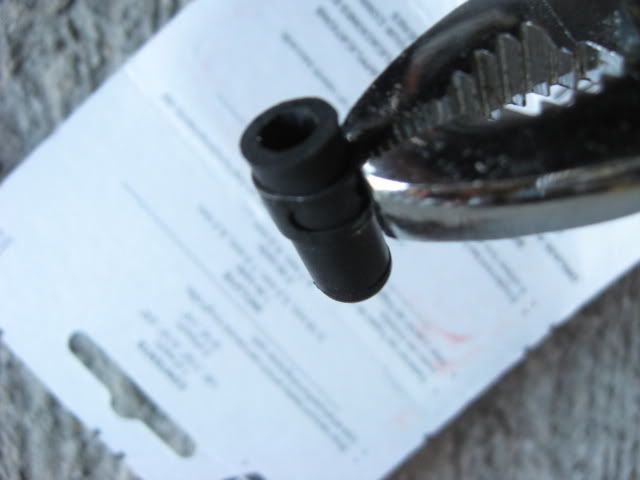
#3; Pull the hose off the engine brass nipple, save the hose clamp
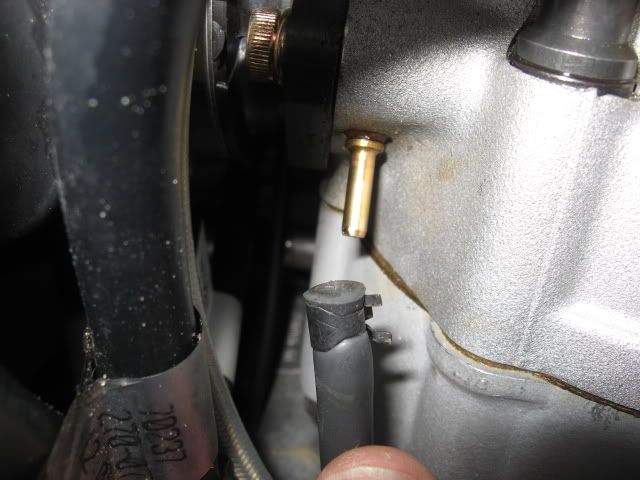
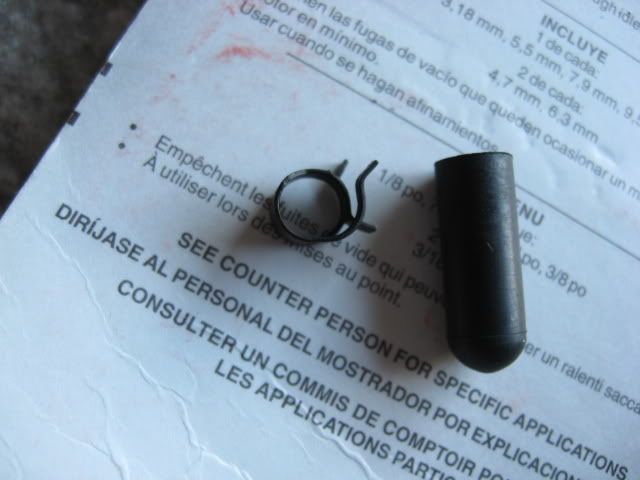
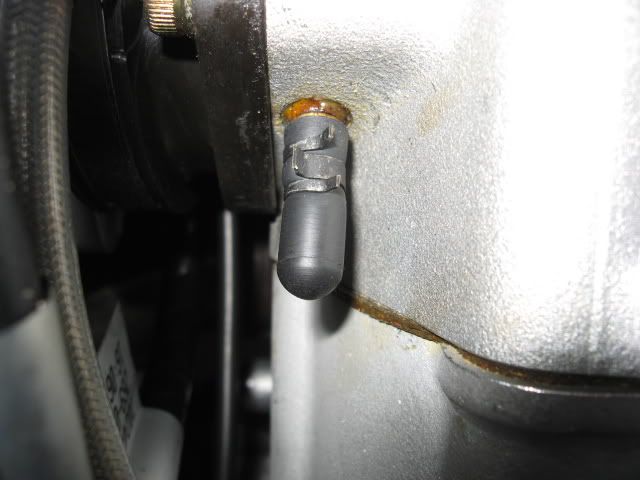
#4; Put the hose clamp on the vacuum plug and plug the engine nipple
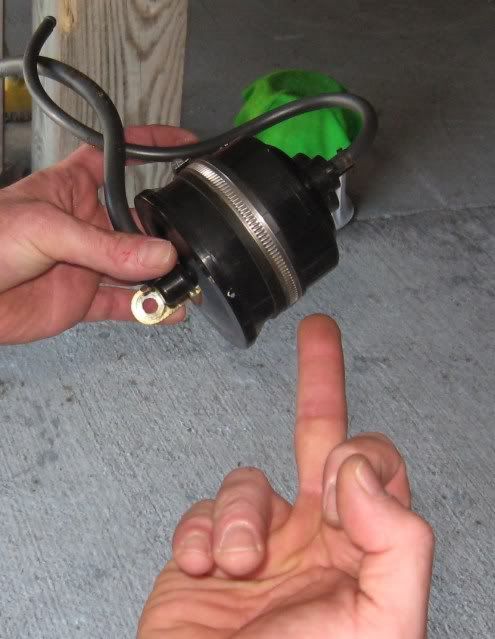
#5; Remove the canister
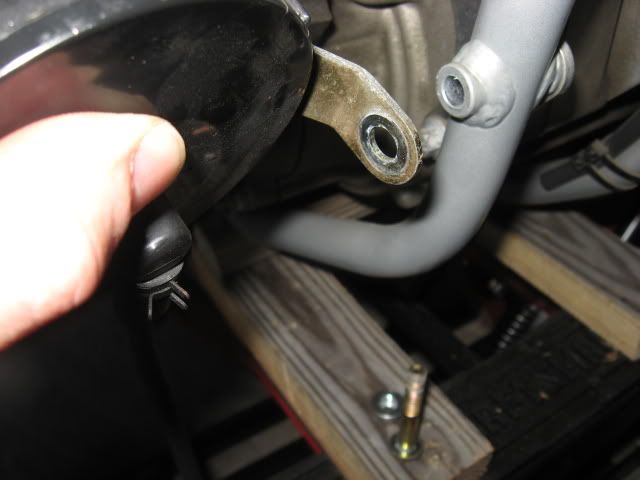
#6; What you end up with is the bigger hose dangling
#7; What to do with that hose?
Well here's what I did and I'll need some input from you guys cause I'm not sure if this is the "right" thing to do
I just used the rubber hose clamps to attach it to the radiator hose (the lower clamp will need to be replaced, it look a bit stressed )
#8; The last thing you'll need to do is a symbolic gesture (or an ADVRider "hello"...) to the establishment and you're done
I'm going to ride now so if you hear a big BOOOOM I probably did something wrong here.... so just ask somebody else how to do it
04asphalt
Husqvarna
AA Class
Muddy Waters;28693 said:All you need is the automotive vacuum cap
The whole process takes about five minutes
#1; Inspect the culprit - big hose comes from the top of the tank to the canister, small hose connect to the engine and one medium hose comes out of the bottom of the canister and goes to the back, it's open at the end
#2; Yank the bigger hose off the canister
#3; Yank the hose off the engine brass nipple, save the hose clamp
#4; Put the hose clamp on the vacuum plug and plug the engine nipple
#5; Remove the canister
#6; What you end up with is the bigger hose dangling
#7; What to do with that hose?
Well here's what I did and I'll need some input from you guys cause I'm not sure if this is the "right" thing to do
I just used the rubber hose clamps to attach it to the radiator hose (the lower clamp will need to be replaced, it look a bit stressed )
#8; The last thing you'll need to do is a symbolic gesture
I'm going to ride now so if you hear a big BOOOOM I probably did something wrong here.... so just ask somebody else how to do it
love pics with instructions
Muddy Waters;28693 said:The whole process takes about five minutes
Thanx for the pictures

It makes it so much easier to understand.

Muddy Waters
Husqvarna
AA Class
dwhsd--> (over at Supermotojunkie);873632 said:I removed my emissions cannister a week ago or so per this excellent link:
http://www.cafehusky.com/forums/showthread.php?t=2265
Today, when I got to work I smelled gas . . . on my right shoe. I had been doing some hard braking prior to this.........This is the hose that Muddy Waters in his final photo has clipped to his radiator hose..........
First off a quick disclaimer;
The only reason I’ve ran the line on the radiator was it was getting dark and I really wanted to ride it, hence the easiness of the not so holy match between the two lines.

Having said that I did ran the bike hard and there was no fuel leakage to speak of what so ever
Only thing I can think of is either you run your bike way harder then me or you fill your tank more then I do…..?
(probably both
) I believe the “correct” way to run the line is to reroute it (on the other side of where it is now ) straight down the front down tube along the other line that is already there possibly even splicing it to said (other) line, away from the exhaust, therefore if any leakage occur it will happen away from you
My bike is at the dealer right now for that never ending oil leak problem but as soon as I’ll get it back I will update this thread with a revised routing
Till then, for anyone who’s going to follow my pictorial;
Please route it “correctly”
Even for the soul purpose of not making our bikes look all hoejohnny up….
I mean seriously, we have all that heritage to think of you know?
Make it look nice guys
It’s not a freaking suzuki…..