dfeckel
Husqvarna
AA Class
The bike runs, the electrons flow, and the lights light up--ALL AT THE SAME TIME! Here's the background.
Just bought as '08 CR125 for a song, but I want it for northeast enduros--that means head and tail lights. The WR ignition, lights, wiring et. al. was super expensive. Norman Foley mentioned in one of the copious 125 threads that a KTM 125 lighting stator can be made to work in the CR125 with a little soldering. This promised to save some coin, so, undaunted (well, somewhat daunted), I proceeded.
Overall, the project was fairly straightforward. The backing plates for the stators are incompatible between the bikes, so you have to switch the coils from KTM plate to the Husky's, and you need to snip and splice a couple of wires to do that.
The KTM stator I used came from Moose Racing, part number 2112-0214, list price $139.95.
I used the Moose Racing Trailsport Fitting wiring harness. It comes all set up for headlight and taillight, complete with hi-lo-off-kill switch and AC voltage regulator.
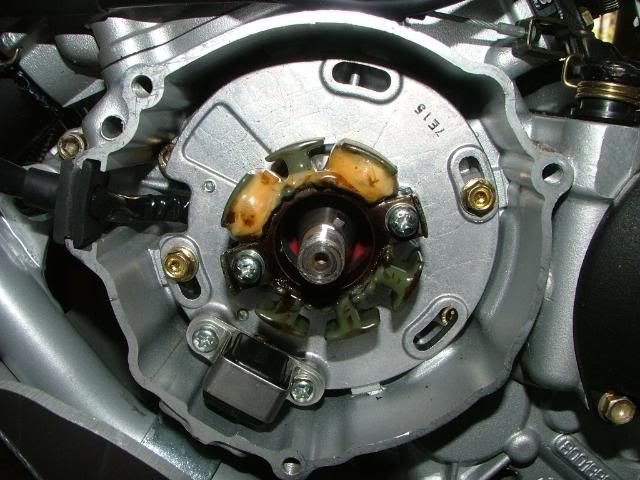
Here is the stock CR coil with the flywheel removed. Note only two of the posts are wound.
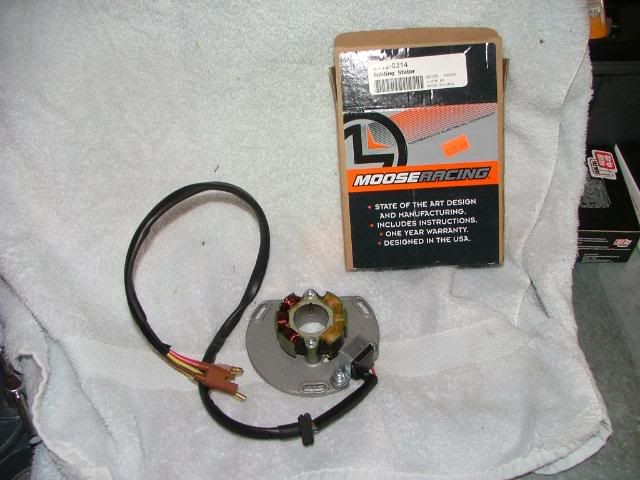
The Moose Racing KTM 125 stator.
Note all the posts are wound. This unit is rated for 55W.
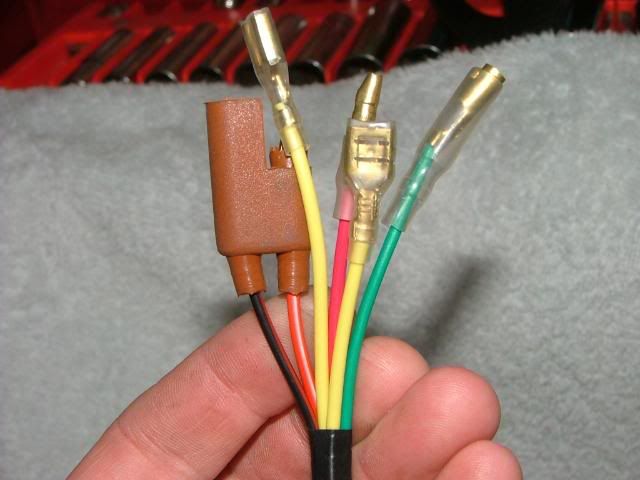
The KTM stator connections. The stator comes equipped to plug right into a KTM, so obviously the connections are all wrong for this application. However, look at the wire colors and compare to the Husky colors in the next photo.
Except for the yellows on the KTM stator, the colors are the same, and they all lead to the same parts of the coils, so they are compatible. The yellows power the lights; one to the harness, the other to ground.
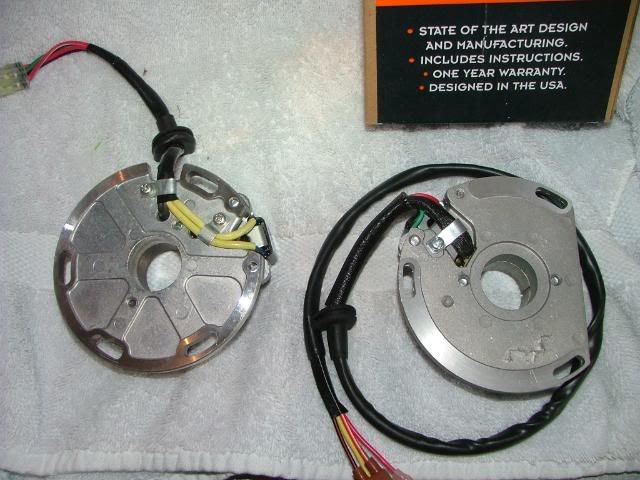
The Husky's is on the left--the plates are totally different.
You don't need to snip the crank position sensor's wires. I did, but I'm dumb. You need only snip the wires leading to the coil (black with red stripe and red with white stripe), remove the coil from the Husky plate and splice in the KTM coil. The wire colors match right up. Just make sure you screw the coil onto the plate in the right orientation.
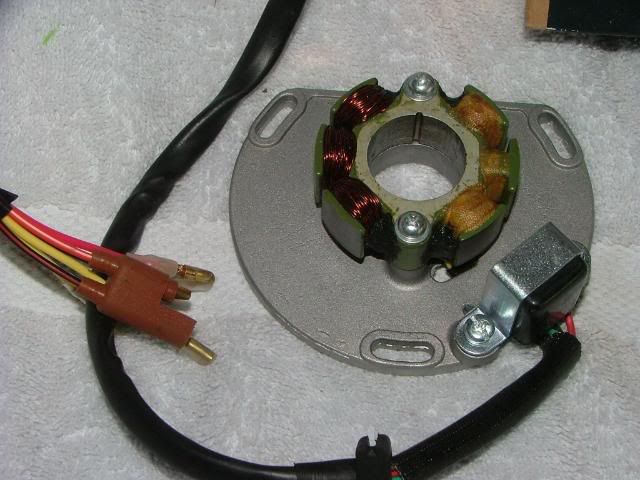
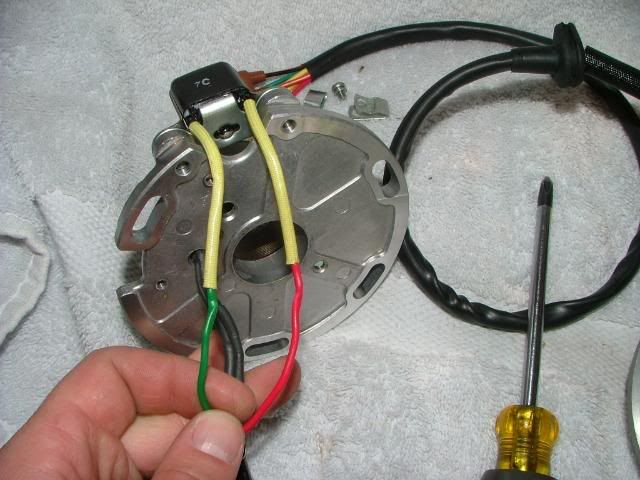
KTM stator on the Husky plate.
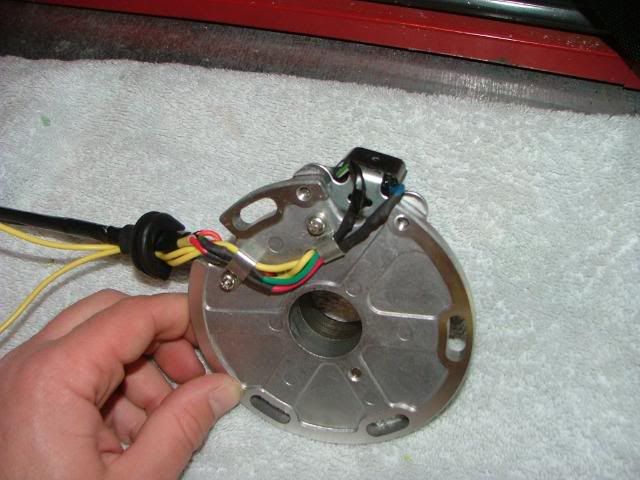
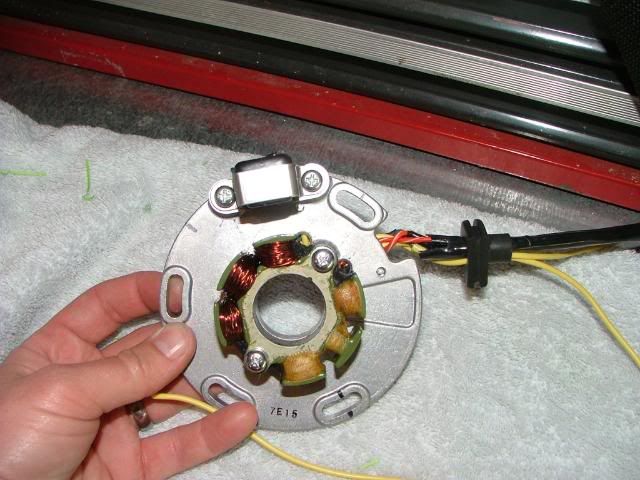
Wires all soldered up and shrink-tubed.
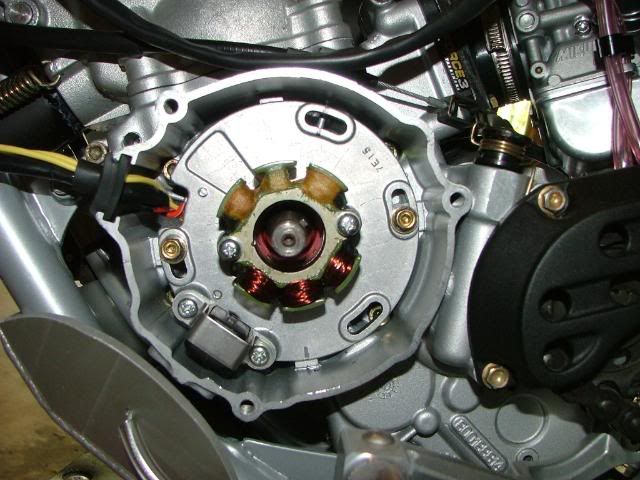
Mounted up. I ran the yellow wires through the original grommet, but not through the harness wrap--I'm lazy that way.
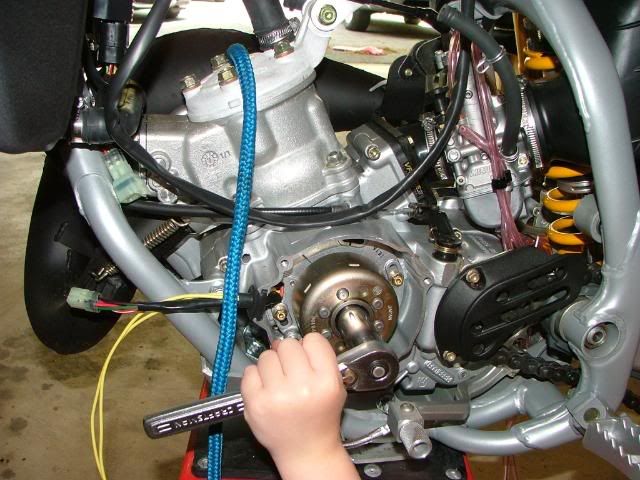
Torquing down the flywheel using my favorite piece of nylon rope to lock things up. My seven-year-old's hand makes the 125 look like a 500...
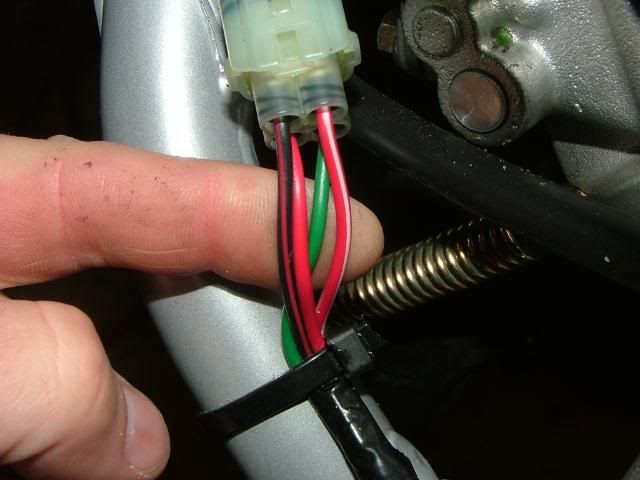
Wiring all zip-tied.
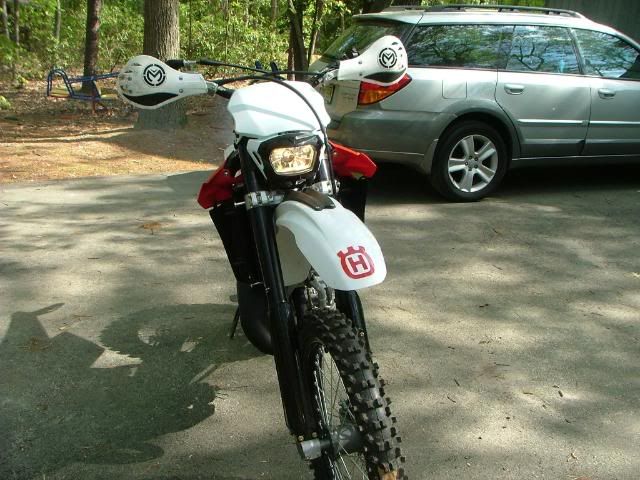
And on the 15th day, there was light...
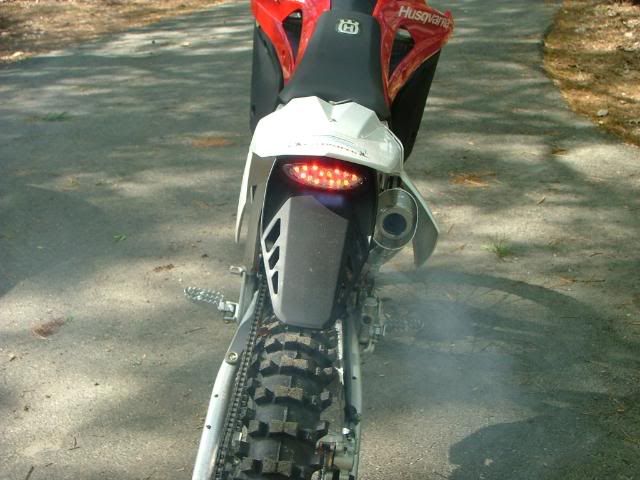
...and smoke.
It went very smoothly, and it works like a charm. Thanks for the tip, Norm!
Just bought as '08 CR125 for a song, but I want it for northeast enduros--that means head and tail lights. The WR ignition, lights, wiring et. al. was super expensive. Norman Foley mentioned in one of the copious 125 threads that a KTM 125 lighting stator can be made to work in the CR125 with a little soldering. This promised to save some coin, so, undaunted (well, somewhat daunted), I proceeded.
Overall, the project was fairly straightforward. The backing plates for the stators are incompatible between the bikes, so you have to switch the coils from KTM plate to the Husky's, and you need to snip and splice a couple of wires to do that.
The KTM stator I used came from Moose Racing, part number 2112-0214, list price $139.95.
I used the Moose Racing Trailsport Fitting wiring harness. It comes all set up for headlight and taillight, complete with hi-lo-off-kill switch and AC voltage regulator.
Here is the stock CR coil with the flywheel removed. Note only two of the posts are wound.
The Moose Racing KTM 125 stator.
Note all the posts are wound. This unit is rated for 55W.
The KTM stator connections. The stator comes equipped to plug right into a KTM, so obviously the connections are all wrong for this application. However, look at the wire colors and compare to the Husky colors in the next photo.
Except for the yellows on the KTM stator, the colors are the same, and they all lead to the same parts of the coils, so they are compatible. The yellows power the lights; one to the harness, the other to ground.
The Husky's is on the left--the plates are totally different.
You don't need to snip the crank position sensor's wires. I did, but I'm dumb. You need only snip the wires leading to the coil (black with red stripe and red with white stripe), remove the coil from the Husky plate and splice in the KTM coil. The wire colors match right up. Just make sure you screw the coil onto the plate in the right orientation.
KTM stator on the Husky plate.
Wires all soldered up and shrink-tubed.
Mounted up. I ran the yellow wires through the original grommet, but not through the harness wrap--I'm lazy that way.
Torquing down the flywheel using my favorite piece of nylon rope to lock things up. My seven-year-old's hand makes the 125 look like a 500...
Wiring all zip-tied.
And on the 15th day, there was light...
...and smoke.
It went very smoothly, and it works like a charm. Thanks for the tip, Norm!


