• Hi everyone,

    As you all know, Coffee (Dean) passed away a couple of years ago. I am Dean's ex-wife's husband and happen to have spent my career in tech. Over the years, I occasionally helped Dean with various tech issues.

    When he passed, I worked with his kids to gather the necessary credentials to keep this site running. Since then (and for however long they worked with Coffee), Woodschick and Dirtdame have been maintaining the site and covering the costs. Without their hard work and financial support, CafeHusky would have been lost.

    Over the past couple of weeks, I’ve been working to migrate the site to a free cloud compute instance so that Woodschick and Dirtdame no longer have to fund it. At the same time, I’ve updated the site to a current version of XenForo (the discussion software it runs on). The previous version was outdated and no longer supported.

    Unfortunately, the new software version doesn’t support importing the old site’s styles, so for now, you’ll see the XenForo default style. This may change over time.

    Coffee didn’t document the work he did on the site, so I’ve been digging through the old setup to understand how everything was running. There may still be things I’ve missed. One known issue is that email functionality is not yet working on the new site, but I hope to resolve this over time.

    Thanks for your patience and support!

Valve Adjustment Tutorial?

rockitdoc

Husqvarna
C Class
Started to do a valve adjustment on my '09 TE610. I thought English vehicles were supposed to be the hard-to-work-on vehicles. It looks like you have to completely disassemble this thing to get to the valves!

Does anyone have a tutorial that explains what needs to come off? I hate to take off the tank and radiator if it's not really necessary, but alas, it looks like it is!

Thanks for any help.

S
 
You definatly have to remove the tank however you can move the radiators without draining them check out rick ramsey's website don't have a link but google rick ramsey te610
 
BeefCurtain;119867 said:
You definatly have to remove the tank however you can move the radiators without draining them check out rick ramsey's website don't have a link but google rick ramsey te610

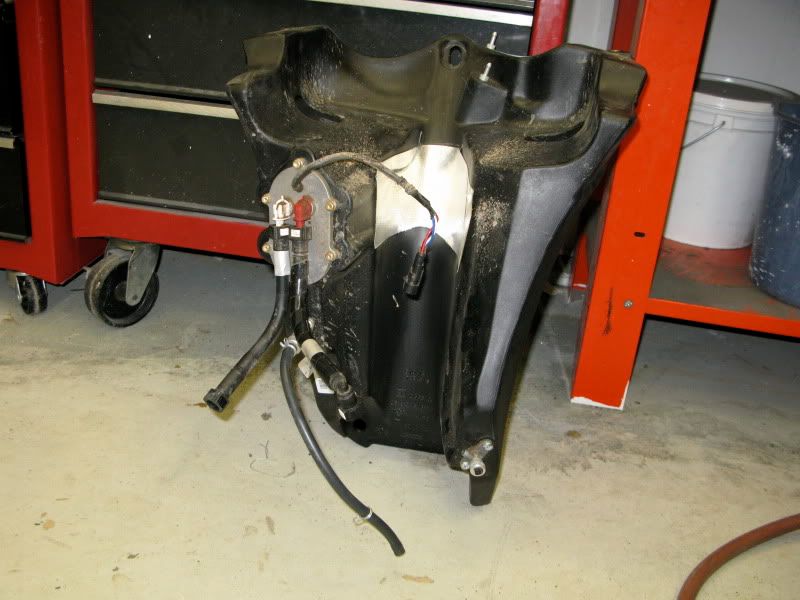
Gas tank off! Took an hour this time, but next time, maybe 15-20 mins. Had to drain it, though some say you don't have to. One of the quick connectors didn't leak, the other one did, even though I didn't disconnect at the fuel pump. I dunno.

Anyway, it's off.

IMG_2065.jpg
 
BeefCurtain;119867 said:
You definatly have to remove the tank however you can move the radiators without draining them check out rick ramsey's website don't have a link but google rick ramsey te610

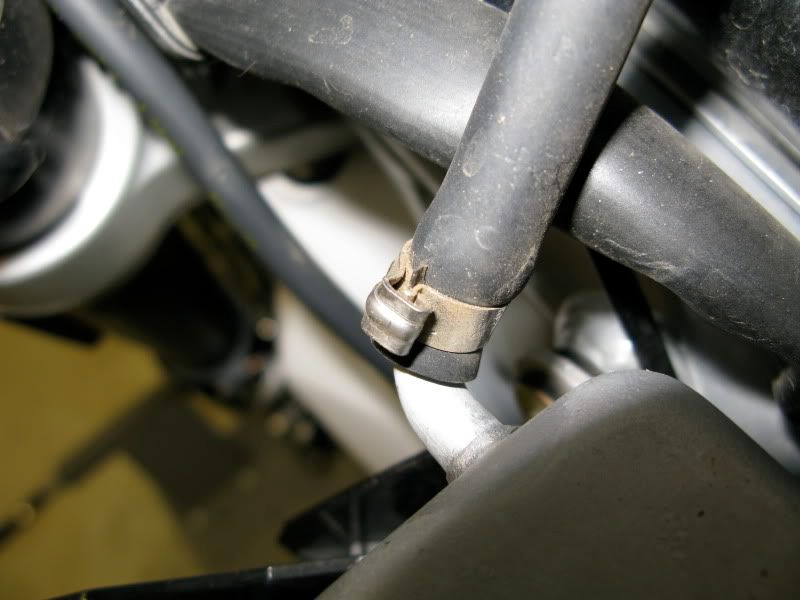
I went ahead and removed the radiators, too. Gives me a chance to replace the little crushed-looking hose clamps on the small hoses with some that can actually be removed more than once.

These things:

HoseClamp.jpg


Also, I'd like to know how to remove the tank without draining it. One of the quick release connectors didn't leak, (the red one), but the white one did. Any ideas?

IMG_2065.jpg


Now it's on to actually adjust some valves. I called my local dealer and the gaskets for the valve covers are on backorder; so are the copper washers under the machine screws. I'll get them from somewhere else. I can't see making gaskets for a $6000 '09. I reserve that excersize for my 50 yr old bikes!

Got the machine to TDC-Compression after removing spark plug and rotating rear wheel while in top gear. Put a small piece of solder in the plug hole so I could see when the piston was at the top. I like solder, cuz it's metal and flexible in case of pinching. Doesn't splinter like some materials. Anyway, valves were loose. I used the 1/12-turn method on the adjusting screws to estimate the gaps. Exhausts were gapped to about 0.006", right side intake was 0.008", but left side intake was 0.012"! That's after 1000 miles! I then got the feeler gauge under each and re-adjusted to the proper 0.002".

Now, if I just had some gaskets and copper washers I could button up and ride. I wonder what the local dealer does when they don't have gaskets and washers after doing a valve adjustment? Makes you wonder, hey?
 
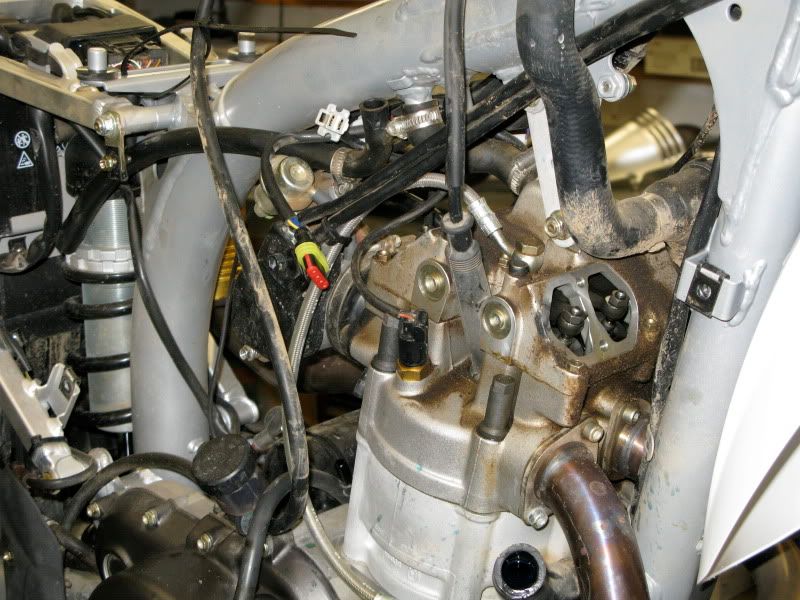
Here's what it looks like with all the barriers out of the way and the valve covers off. Onward!!

IMG_2066.jpg


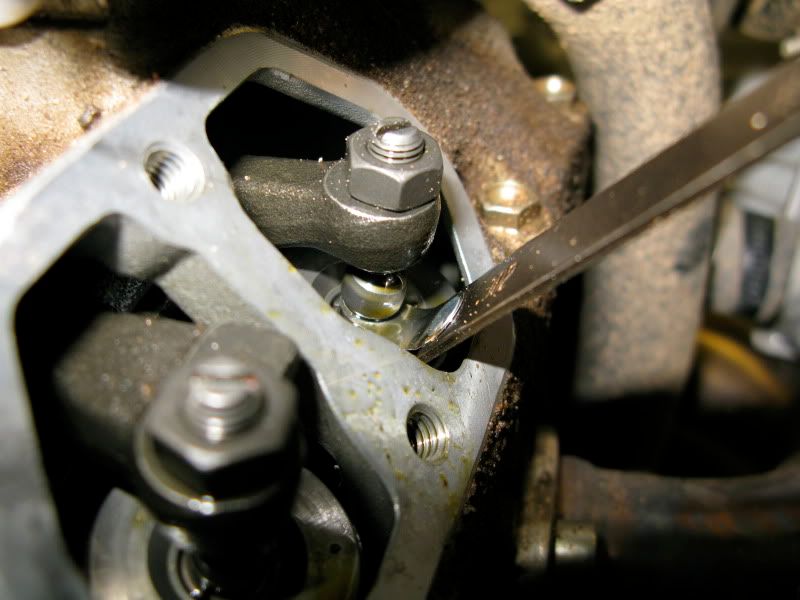
With the feeler gauge between the rocker and the top of the valve:
IMG_2069.jpg


I found it easiest to adjust the rockers with the 0.003" gauge a little tight. The 0.002" gauge is just that much more foil-like and bends really easy. It's hard to get it just right. I figure with the 0.003" gauge a bit snug, the gap is probably under 0.003" and should be close to spec. I wouldn't want it under on the 0.002" gauge since I don't know how much room there is between the valves and the piston.

Now, to button it back up and go for a ride.
 
Excellent write up! Saw your post on adv rider good idea replacing those hose clamps. Where in co are you? I'm in fort collins maybe we could ride sometime
 
BeefCurtain;120089 said:
Excellent write up! Saw your post on adv rider good idea replacing those hose clamps. Where in co are you? I'm in fort collins maybe we could ride sometime

Definitely. I'm in Golden, but I work at the U.

Scott
 
Crankcase vent reroute

I did the 'Rick Ramsey' ventectomy as shown below. The hose connected to the little filter used to go into the back of the airbox, AFTER the filter, so oily gases were going into the throttle body. No more! Thanks, Rick.

IMG_2070.jpg
 
BeefCurtain;120122 said:
Where did you pick up the little filter? PM me when ever you feel like riding :cheers:

Checker. You need a plastic barbed connector with 1/2" on one end and about 1/4" on the other to connect to the hose.
 
I just fired her up and she's idling at 1500 and MUCH quieter around the rockers. This all started becuz she was idling at 2000 with the Leo Vince installed. George at UpTite told me to turn the screw on the throttle body behind the airbox to reduce the idle, but nothing happened even after turning the screw all the way in. Could have been that one intake valve that wasn't opening all the way. I dunno. Now it works as it should!
 
Dirt

Looks like it need a bit of cleaning befor you pulled the rocker covers. Sure looks like dirt on the rocker arms and you feeler gauge.
 
rockitdoc;120064 said:
Exhausts were gapped to about 0.006", right side intake was 0.008", but left side intake was 0.012"! That's after 1000 miles! I then got the feeler gauge under each and re-adjusted to the proper 0.002".


Just checked mine after 1000 miles and found similar measurements. I suspect that they were loose from the factory as the engine was noisy on day 1. Now that they are set at 0.002", the bike is very quiet.
 
ghedunk;120280 said:
Looks like it need a bit of cleaning befor you pulled the rocker covers. Sure looks like dirt on the rocker arms and you feeler gauge.

You beat me to it! I was staring at all that dirt/sand on the feeler gauge and on the valve train and around the rocker cover edges.

Yep, it's a dirt bike but that doesn't mean the dirt's got to end up inside needlessly. Just give it a quick blast of shop air or wipe it off or hose it off or something before exposing the innards and inviting a big chunk of crap to fall in there.

Nice tutorial, regarless:thumbsup:
 
rockitdoc;120064 said:
Also, I'd like to know how to remove the tank without draining it. One of the quick release connectors didn't leak, (the red one), but the white one did. Any ideas?

I don't have a 610 style tank but when I remove my style of tanks I disconnect the fuel line at the pump and stick some slip-on automotive vacuum caps to keep the fuel from dribbling out if the tank's not empty. Works like a champ after many tank removals! You'll still get a few drops before slipping the caps on but after that, nada.
 
Back
Top