My lighting lead on my stator went bad as well as my regulator. So I started doing some research on using the Trail Tech stator kit for a KTM.
Let me say right here that in retrospect I feel bad now for not going through Kelly. I called Trail Tech on Thursday to ask some questions. I was really bummed that I was not going to be able to ride this weekend now. A really helpful representative Liz gave me a great deal on next day shipping and I pulled the trigger on a whim. So I will say straight up I am sorry to you Kelly, you have my word when I get some more toy funds available I will be looking to you for a rekluse.
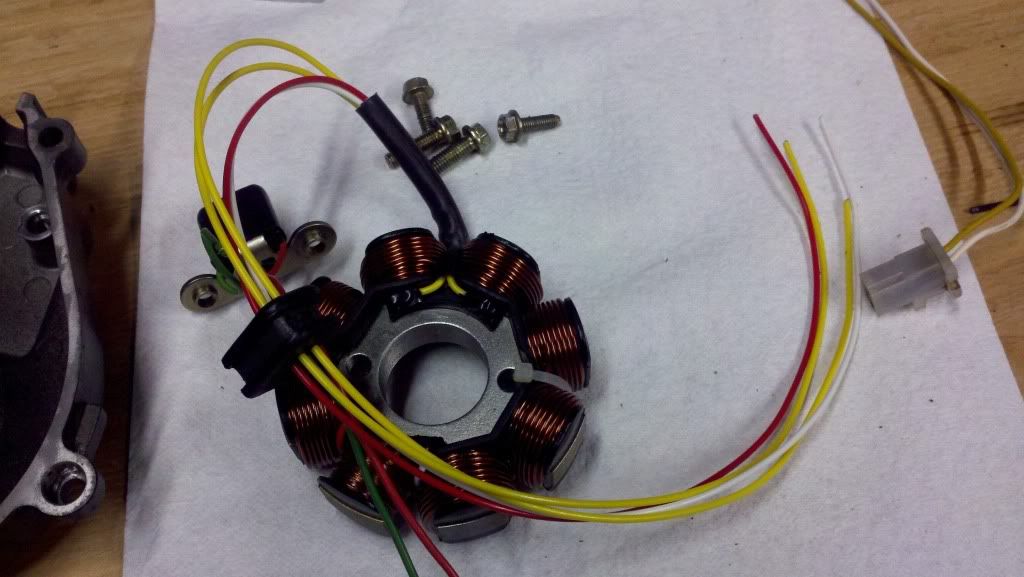
The kit I used was a Trail Tech SR-8310 for KTM. The install is not very hard at all. You need to know how to solder wires, and a understanding of how your electrical system works is very helpful.
Since I didnt my searching didnt come up with anything from start to finish I thought I would document what I did. I am not say this is the 100% right way to do it. Its just what I thought was the best way. If anyone see something I did wrong, or should have done different please chime in.
As far as the stator goes, it bolts right up, and has 4 wires from it just like the Husky stator. All you have to do is cut the old stator off. Only the 4 that go to the stator, not the red or green wire that goes to the pick up.
I cut them about 6" down from the plugs. The tricky part is that you have to pull the old wires out of the rubber oil seal, and thread the new ones through. A good wiggle and yank with a needle nose plier pulled them right out with no issues. Then I threaded the new wires back through, and put some epoxy in once I got them to their final position(dont do this until you mount the stator and pick up back in).

Once the coil and pick up are mounted back in, then I put the cover back on. Then I was able to solder the 4 new stator leads back into the stock harness.
The stock stator has a 4 wires, yellow, white, red/white, black/red.
-White is your charging lead(hot even when motor is NOT running via the battery).
-Yellow is your lighting lead(only hot when motor is running).
-Red/black, and red/white run back to the cdi.
The Trail Tech stator also has 4 leaks, just the colors are slightly different
-2 yellow hot leads
-A Red, and a black.
I wired them together like this
Stock --- Trail Tech
White ---- Yellow(does not matter which yellow goes to the white)
Yellow ---- Yellow
Red/white --- White
Red/black --- Red
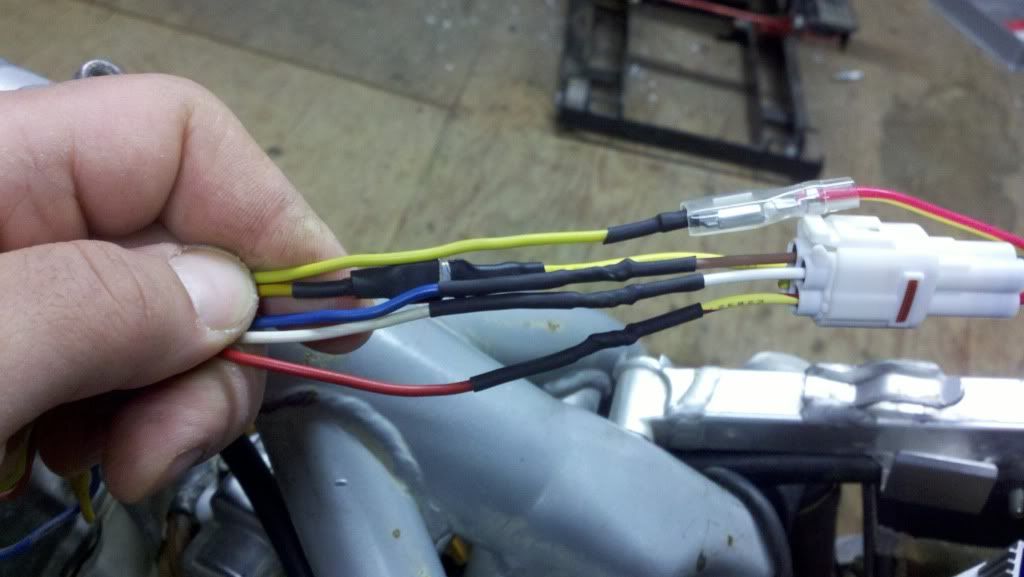
Stock connectors
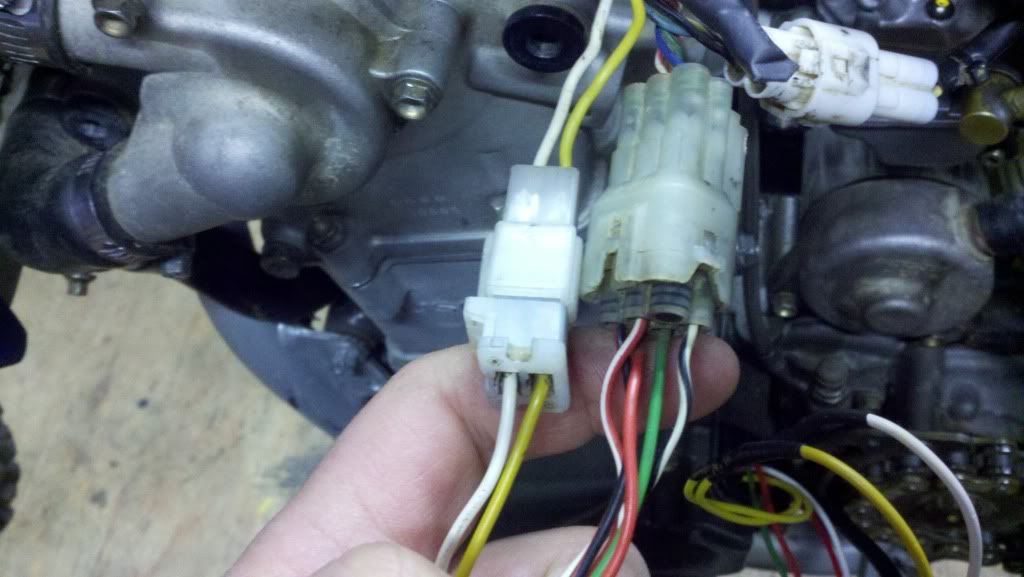
New stator wired into the stock harness
Once that is done you can button up the wiring harness from the stator to the above plugs. I cut the stock covers off and wrapped mine with some wiring loom tape.
Ok so thats the easy part. This part is a little more involved, but not bad by any means.
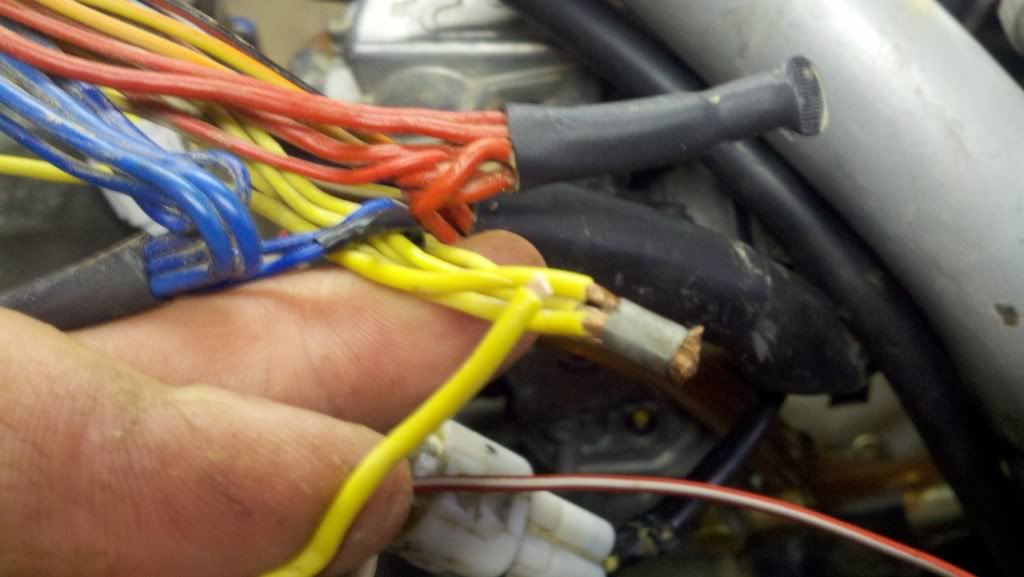
I removed the stock wiring looms for a few reasons. 1. I wanted to understand where each wire went, 2. I am anal about wiring and wanted to rewrap everything and pull out all the unnecessary wires that used to go to the IC(dont have), and 3. in order to access some of the wires you need to.
So you now have the stator wired into the stock harness just as the old one was.
A few things to understand.
The stock regulator only converts the AC out of the stator to DC for the charging system. The Lighting lead is AC.
The Trail Tech reg/rectifier converts both stator leads to DC.
The stock regulator harness has 4 wires.
-white(lead from stator to the regulator for the charging system)
-yellow(lead from stator to lighting system, run inline with rest of system)
-red(output from regulator to the charging system)
-blue(ground)
Trail tech has a 3 wire plug they supply for the charging side of the system into their regulator, plus two indiviual wires which are the stator input and output for the lighting system. This output is not live when the motor is not running(controlled by a internal relay).
The charging side gets hooked up like this
white --- white
red --- red/yellow
blue -- brown
The lighting side is a little more complicated.
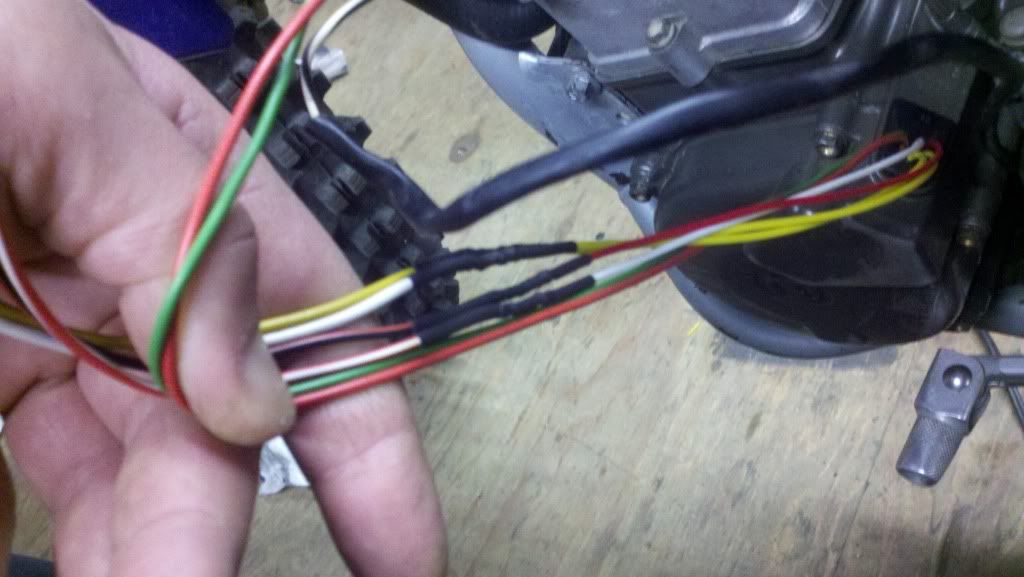
On the stock system the yellow lighting lead comes from the stator and pigtails together spreads out to all the parts of the system. It runs through the regulator as well. All these wires collect at a pigtail under the plastic wiring shroud.
It looks like this
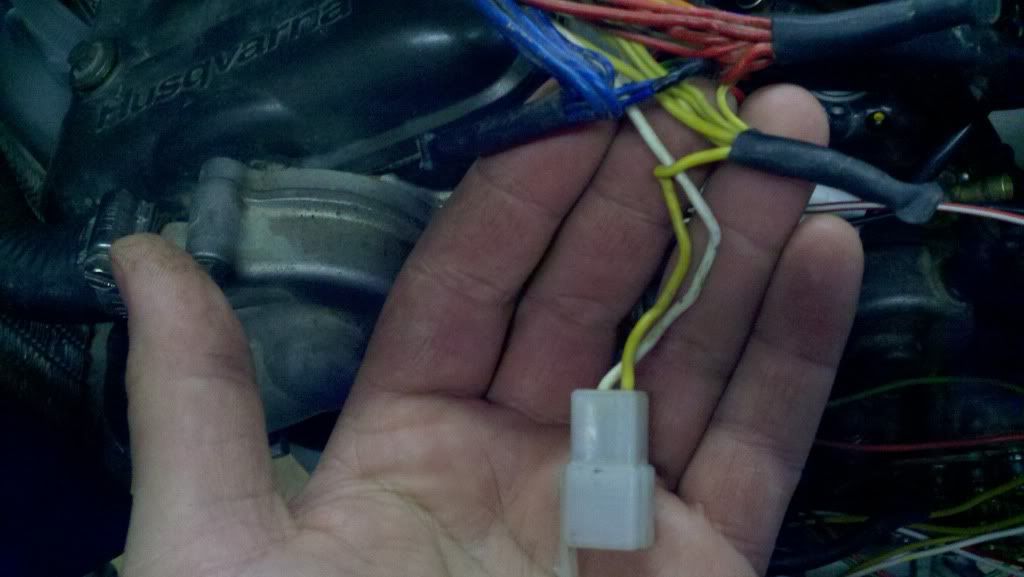
I cut the yellow wire coming out of the stator where it connects to the pigtail and sealed the pigtail back up.
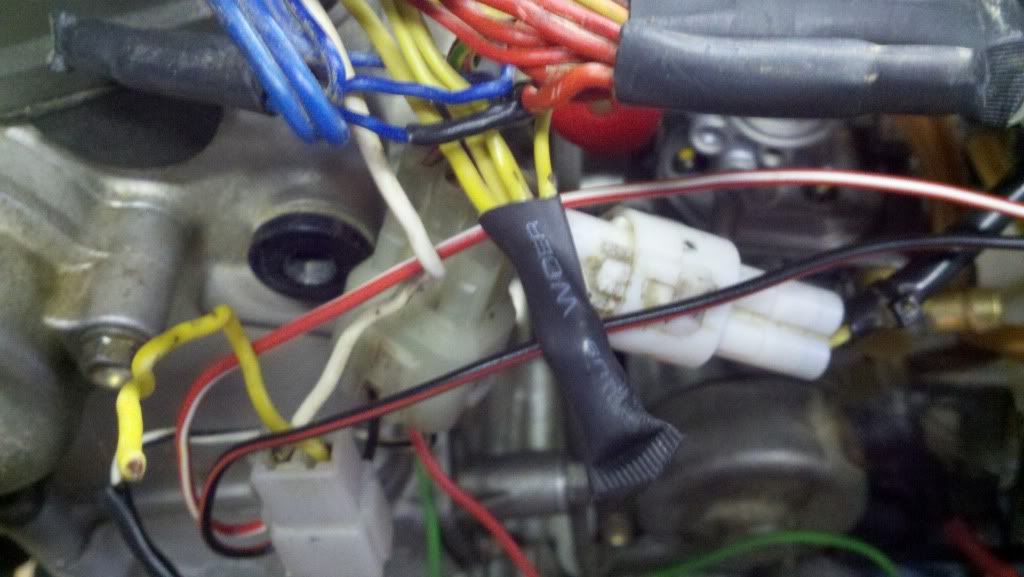
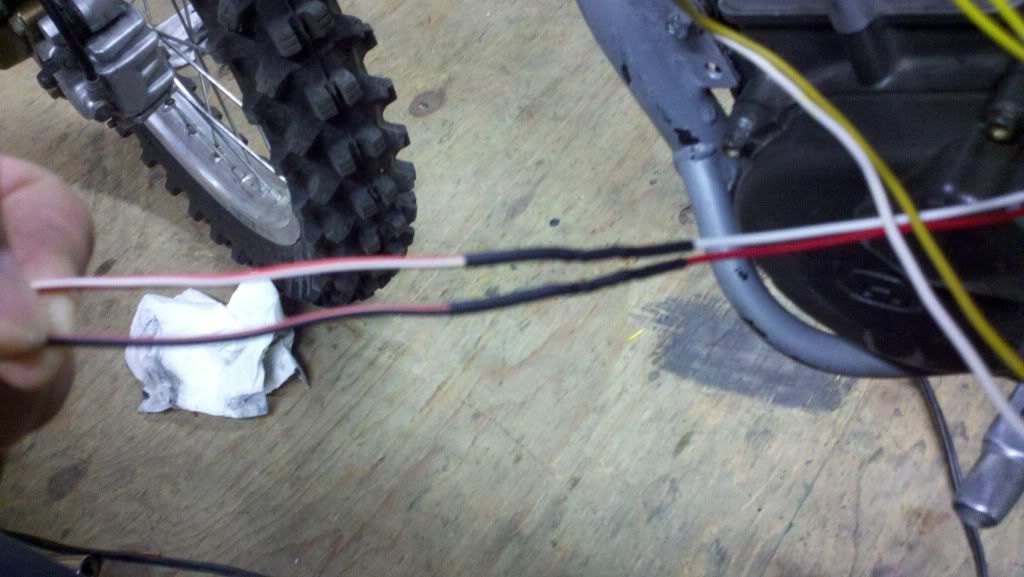
Now the wire which I clipped then needs to be extended, run up to the regulator and connected to the single yellow wire. Then the original yellow wire that was connected to the stock regulator is connected to the red/yellow wire coming from the Trail Tech regulator(this outputs to the entire lighting system).
Be sure to insulate these two connections, I had not done that yet in the picture below.
Then thats it, your now running full DC voltage. Anything connected to that Red/yellow coming out of the regulator will only be live when the motor is running.
It sounds complicated, but its really just a matter of soldering a few wires.
I tried to make this as concise as possible to aid anyone who wants to do this.
Now this is on a 2006 TE450, I have no idea if it is the same with other years.
Let me say right here that in retrospect I feel bad now for not going through Kelly. I called Trail Tech on Thursday to ask some questions. I was really bummed that I was not going to be able to ride this weekend now. A really helpful representative Liz gave me a great deal on next day shipping and I pulled the trigger on a whim. So I will say straight up I am sorry to you Kelly, you have my word when I get some more toy funds available I will be looking to you for a rekluse.
The kit I used was a Trail Tech SR-8310 for KTM. The install is not very hard at all. You need to know how to solder wires, and a understanding of how your electrical system works is very helpful.
Since I didnt my searching didnt come up with anything from start to finish I thought I would document what I did. I am not say this is the 100% right way to do it. Its just what I thought was the best way. If anyone see something I did wrong, or should have done different please chime in.
As far as the stator goes, it bolts right up, and has 4 wires from it just like the Husky stator. All you have to do is cut the old stator off. Only the 4 that go to the stator, not the red or green wire that goes to the pick up.
I cut them about 6" down from the plugs. The tricky part is that you have to pull the old wires out of the rubber oil seal, and thread the new ones through. A good wiggle and yank with a needle nose plier pulled them right out with no issues. Then I threaded the new wires back through, and put some epoxy in once I got them to their final position(dont do this until you mount the stator and pick up back in).
Once the coil and pick up are mounted back in, then I put the cover back on. Then I was able to solder the 4 new stator leads back into the stock harness.
The stock stator has a 4 wires, yellow, white, red/white, black/red.
-White is your charging lead(hot even when motor is NOT running via the battery).
-Yellow is your lighting lead(only hot when motor is running).
-Red/black, and red/white run back to the cdi.
The Trail Tech stator also has 4 leaks, just the colors are slightly different
-2 yellow hot leads
-A Red, and a black.
I wired them together like this
Stock --- Trail Tech
White ---- Yellow(does not matter which yellow goes to the white)
Yellow ---- Yellow
Red/white --- White
Red/black --- Red
Stock connectors
New stator wired into the stock harness
Once that is done you can button up the wiring harness from the stator to the above plugs. I cut the stock covers off and wrapped mine with some wiring loom tape.
Ok so thats the easy part. This part is a little more involved, but not bad by any means.
I removed the stock wiring looms for a few reasons. 1. I wanted to understand where each wire went, 2. I am anal about wiring and wanted to rewrap everything and pull out all the unnecessary wires that used to go to the IC(dont have), and 3. in order to access some of the wires you need to.
So you now have the stator wired into the stock harness just as the old one was.
A few things to understand.
The stock regulator only converts the AC out of the stator to DC for the charging system. The Lighting lead is AC.
The Trail Tech reg/rectifier converts both stator leads to DC.
The stock regulator harness has 4 wires.
-white(lead from stator to the regulator for the charging system)
-yellow(lead from stator to lighting system, run inline with rest of system)
-red(output from regulator to the charging system)
-blue(ground)
Trail tech has a 3 wire plug they supply for the charging side of the system into their regulator, plus two indiviual wires which are the stator input and output for the lighting system. This output is not live when the motor is not running(controlled by a internal relay).
The charging side gets hooked up like this
white --- white
red --- red/yellow
blue -- brown
The lighting side is a little more complicated.
On the stock system the yellow lighting lead comes from the stator and pigtails together spreads out to all the parts of the system. It runs through the regulator as well. All these wires collect at a pigtail under the plastic wiring shroud.
It looks like this
I cut the yellow wire coming out of the stator where it connects to the pigtail and sealed the pigtail back up.
Now the wire which I clipped then needs to be extended, run up to the regulator and connected to the single yellow wire. Then the original yellow wire that was connected to the stock regulator is connected to the red/yellow wire coming from the Trail Tech regulator(this outputs to the entire lighting system).
Be sure to insulate these two connections, I had not done that yet in the picture below.
Then thats it, your now running full DC voltage. Anything connected to that Red/yellow coming out of the regulator will only be live when the motor is running.
It sounds complicated, but its really just a matter of soldering a few wires.
I tried to make this as concise as possible to aid anyone who wants to do this.
Now this is on a 2006 TE450, I have no idea if it is the same with other years.