• Husqvarna Motorcycles Made In Sweden - About 1988 and older

  • Hi everyone,

    As you all know, Coffee (Dean) passed away a couple of years ago. I am Dean's ex-wife's husband and happen to have spent my career in tech. Over the years, I occasionally helped Dean with various tech issues.

    When he passed, I worked with his kids to gather the necessary credentials to keep this site running. Since then (and for however long they worked with Coffee), Woodschick and Dirtdame have been maintaining the site and covering the costs. Without their hard work and financial support, CafeHusky would have been lost.

    Over the past couple of weeks, I’ve been working to migrate the site to a free cloud compute instance so that Woodschick and Dirtdame no longer have to fund it. At the same time, I’ve updated the site to a current version of XenForo (the discussion software it runs on). The previous version was outdated and no longer supported.

    Unfortunately, the new software version doesn’t support importing the old site’s styles, so for now, you’ll see the XenForo default style. This may change over time.

    Coffee didn’t document the work he did on the site, so I’ve been digging through the old setup to understand how everything was running. There may still be things I’ve missed. One known issue is that email functionality is not yet working on the new site, but I hope to resolve this over time.

    Thanks for your patience and support!

1985 CR500 Project Bike by Husky 37

HuskyT

Moderator
Staff member
At the request of Husky37 aka Stu - this thread will encompass Husky37's detailed rebuild of his 1985 CR500 husqvarna

Feel free to post up any and all thoughts on his rebuild as it progresses!

I'm looking forward to this!

Stu - I'm hoping to see some great before pics! and maybe a lot more of those race day photo's of you and your bike!

T
 
The beginning......

Fist of a little bit of History on the Bike....

I bought this direct from the UK Husquvarna importer in 1985. It was one of their demo machines which I managed to persuade them to let me have (no guns were used in this transaction... just a bit of blackmail :) )

I raced the bike through '85 and part of '86 when my job at the time stopped me... I stripped it apart in late '87 I think.. and as you can see I didn't store it very well.

A recent trip to a Vintage MX event in the Uk where I bumped into a number of old friends ignited once again... the passion.

So here we are today sorting everything out to get it ready for next season to race again.... It's not going to be a show bike... it's going to be used.

Back in '85 I wanted to make it look like the works bike in this thread

http://www.cafehusky.com/forums/showthread.php?t=5816

and now I think I can do that... money is tight at the moment but 'where there's a will there's a way'

The point of the 'Project diary' is to list the problems that I have/will encounter and describe the solution if any that was found. I have already been given advise by members already...

http://www.cafehusky.com/forums/showthread.php?t=5805
http://www.cafehusky.com/forums/showthread.php?t=5393

and others will be credited as we go along.

You will see from the pics that basically this is a 'bike in a box'......

I will do little sub-sections which cover the bits as I do them.

I hope that you enjoy the thread....

KR

Stu
 

Attachments

  • Box of bits - CH.jpg
    Box of bits - CH.jpg
    74.8 KB · Views: 138
  • Engine frame and tank -CH.jpg
    Engine frame and tank -CH.jpg
    77.5 KB · Views: 175
  • Front and Rear Wheel - CH.jpg
    Front and Rear Wheel - CH.jpg
    52.4 KB · Views: 129
  • Rads and shock - CH.jpg
    Rads and shock - CH.jpg
    55.6 KB · Views: 124
  • Seat - CH.jpg
    Seat - CH.jpg
    42.5 KB · Views: 116
First part I am looking at is the Plastics.... (as this costs the least).

I already have a new front mudguard which I bought back in '86 and will need to replace the rear mudguard.

So all that is left is the Airbox and side panels.

The tank I'm going to seal and paint due to the discolour which I have tried already to sort...

I did the Airbox and side panels today. I have the before pictures but not the after. Unfortunately I am away for a couple of day so I'll post the whole lot with the write up on Wednesday when I get back.

Stu
 
DC plastisc makes everything you need for that year . (EVERYTHING PLASTIC THAT IS)
 
Plastics - Side Panels and Air Box - Before

These are the before pictures of the Plastics I have had a go at.

The Front Mud Guard is new so nothing to do there. The Rear Mud Guard will be new too because of damage to the original one so nothing to do there also.

Ths Tank is being covered by a separate section.

Cleaning details in next post with the after pictures...
 

Attachments

  • Cleaning Tools - CH.jpg
    Cleaning Tools - CH.jpg
    39.3 KB · Views: 122
  • Before - Left Side Panel - CH.jpg
    Before - Left Side Panel - CH.jpg
    30.6 KB · Views: 99
  • Before - Air Box Cover Front - CH.jpg
    Before - Air Box Cover Front - CH.jpg
    26.1 KB · Views: 93
  • Before - Air Box and Side Panel - CH.jpg
    Before - Air Box and Side Panel - CH.jpg
    33 KB · Views: 105
Plastics - Side Panels and Air Box - After

These are the after pictures of the Plastics I have had a go at.

I used all the techiques as suggest by:-

ruwfo
Skoalman
wrx

Materials: Ajax (Lemon scented - because I'm in touch with my feminie side :doh:), Scotch Brite, Sanding Block and Stanley Blade (as used for cleaning paint off of glass) and Washing up Liquid

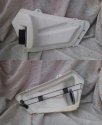
Basically I had a bowl of hot water and used each product depending on what part needing cleaning.

Washing up Liquid: On every part to degrease.
Ajax and Scotch Brite: Removed surface marks
Sanding Block and Stanley Blade: Used to remove plastics burrs and deep scratches.

This is the first pass and there still are some marks but it looks better than when I used to race every week.....

As I said before this project is not for show but for go..... Some things I will probably revisit because I'm eager to get it running again...

Not sure what the next Section will be yet but what ever it is I hope to start working on it in the next couple of days....
 

Attachments

  • After - Right Side Panel - CH.jpg
    After - Right Side Panel - CH.jpg
    21.6 KB · Views: 131
  • After - Left Side Panel - CH.jpg
    After - Left Side Panel - CH.jpg
    23.8 KB · Views: 162
  • After - Air Box FR - CH.jpg
    After - Air Box FR - CH.jpg
    21.5 KB · Views: 140
  • After - Air Box Cover - CH.jpg
    After - Air Box Cover - CH.jpg
    22.1 KB · Views: 146
Looks great

Stu,
As you've found, it never amazes me what a little elbow grease
& cleaning will do. I've bought more than my share of Husky items
for cheap because i've seen what can be done with a little cleaning
time.
Too people have that just replace it attiude, maybe that's why our
dumps are so full :thumbsdown:

Any way if the rest of your Husky cleans up that well, you'll have
a real sweet 500 :applause:

John
 
Thanks for the comments John. I have tried to keep as much as original as I can so can the money on other bits (more on this later in the build).

I have a new front mudguard that I bought 15 odd years ago so I guess I can say that original :) I couldn't get away with the rear because a chunk is missing.... (Jaws must have been following me that day... ) might look for a nice secondhand or NOS before going totally new....

Stu
 
Next Stage:

The next stages are going to run in parrallel as it's stuff which I'm not going to be able to do myself....

Engine: I have stripped the Barrel and Head off ready to be cleaned etc. Bottom end is being delivered tomorrow to a friend of mine who going to split the cases, check the balance of the crank, replace crank seals etc...

Frame: Will go off for powder coating along with the rear subframe, pegs etc

Before and after pic and details once each stage is done.....

Stu
 
Stu,
Plastic renovation looks great. Proper products/technique, elbow grease, time and patience does wonders for our old parts. Keep posting - I'm watching.
Rick
 
plastics look great , keep up the good work. I have a place in my heart for the mid 80's single shock huskys. I started working@ the Husky dealership I work now in 85 and these machines were fresh out of the crate. man did I want one. it took me 5 years to save for one . 1987 250XC. bought it as a trade-in in 1990.
 
tapio;58327 said:
Husky37, how was the 85cr500 comered to the japan bikes in the mid 80`s ?

Well what can I say... As far as I can remember if you rode like it was just a Sunday day out it wouldn't turn but.... if you got aggresive and went hard into the corners it would turn... Straight line stability is legendary.... Didn't want the Jap stuff at the time and still don't... it's the price one pays....
 
The RADS....

Here are the before pics of the RADS...

I have started spraying them myself... they will be ready for more pics in a couple of days....

Stu
 

Attachments

  • Before - RADS 1 - CH.jpg
    Before - RADS 1 - CH.jpg
    39.4 KB · Views: 51
  • Before - RADS 2 - CH.jpg
    Before - RADS 2 - CH.jpg
    38.1 KB · Views: 50
The Engine....

Started on the engine to.....

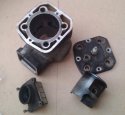
Here are some pics of the before and partial strip....

Pic1: Engine in raw state
Pic2: Engine with Clutch case off
Pic3: Ports... already been touched!! I thought too it ran like an express train :)
Pic4: Barrel assembly....

Stu
 

Attachments

  • Before - Ports - CH.jpg
    Before - Ports - CH.jpg
    24.7 KB · Views: 176
  • Before - Engine Clutch case off.JPG
    Before - Engine Clutch case off.JPG
    55.3 KB · Views: 173
  • Before - Engine - CH.jpg
    Before - Engine - CH.jpg
    20.9 KB · Views: 165
  • Before - Barrel assembley - CH.jpg
    Before - Barrel assembley - CH.jpg
    41 KB · Views: 159
RADs....

Here are the after pictures of the Rads...

I simply washed and scrubbed them then left them to dry naturally. Straightened out as many bent fins I could or dare do and then sprayed them with Satin Black in my home made spray booth (Big cardboard box :))

You will notice that the 'Filler topped' rad is slightly bowed.. I didn't notice this at the time. I can't replace this at the moment due to funds and it not being a priority but it is on the wish list.

Stu
 

Attachments

  • After - RADs 1 - CH.jpg
    After - RADs 1 - CH.jpg
    27.8 KB · Views: 89
  • After RADS 2 - CH.jpg
    After RADS 2 - CH.jpg
    25 KB · Views: 88
Back
Top