OlderHuskyRider
Husqvarna
Pro Class
EDIT: Dec 2012 - to add info that would allow for RECOVERING cam timing without removing the cams.
This was done on a 2010 TE 450, should apply to many other models/years.
I took my bike apart all wrong for this job and had to use dfeckel's excellent write-up on foolproof cam timing.
EDIT: That method is only foolproof if the dimples on the gears are correct. Mine were not. ALWAYS put the bike at absolute TDC (use a small piece of wire to line up the double dimple and the mark on the cam chest wall) and look at the dimples on the left sides of both cams to determine where the left-side dimples are located on YOUR bike, take a picture of the locations or draw a picture.
I hated taking the cam caps off and almost dropped one of the little cap collars into the engine, found it on the floor a day later...those collars are loose and you have to watch them closely.

Anyway, waiting on my parts to arrive, I got the cam timing right again and I was determined to figure out how to do this without losing the cam timing AND if I did lose it, how to get it back without pulling the cams out. So I put it all back together and started with the procedure:
1. Pull the cam cover like you're doing a valve adjust. Get it to TDC with the double dimples on the drive gear aligned with the mark on the cam chest wall.

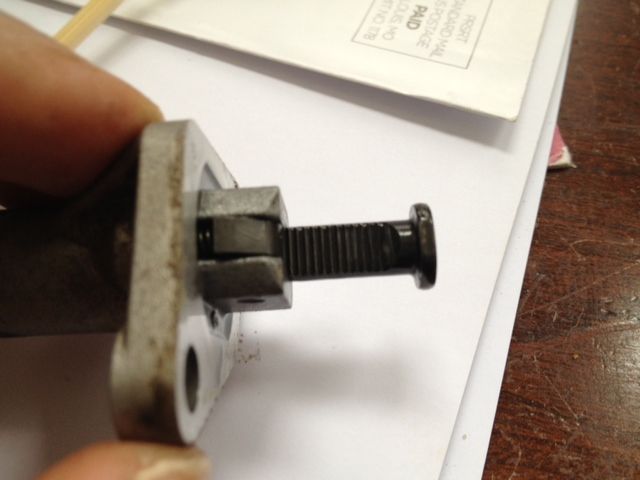
2. Pull the center bolt on the ACCT (automatic cam chain tensioner). This releases the spring so that the ACCT doesnt keep pushing inward.

3. Pull the retaining bolts for the ACCT and remove it carefully, look at the ridges and count them with a toothpick or something, or just eyeball it. As others have said, this will give you an indication of how stretched your cam chain is. Mine was 6 clicks in.
4. Get a bungee cord and hook it into the hole on the drive sprocket, run it up to the handlebars, pulling the drive gear up and to the right, into the cam gears. Make sure its tight and is not going to slip. If there is not a hole at the top, middle on your bike, use a small C-clamp, clamped to the sprocket, to hook the bungee into.
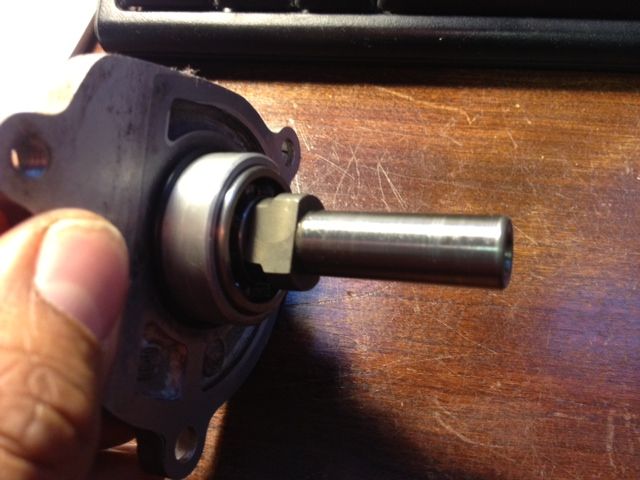
5. Remove the water pump housing and eventually, the water pump shaft, while watching the bungee keep the drive gear pulled up and in to the cam gears.

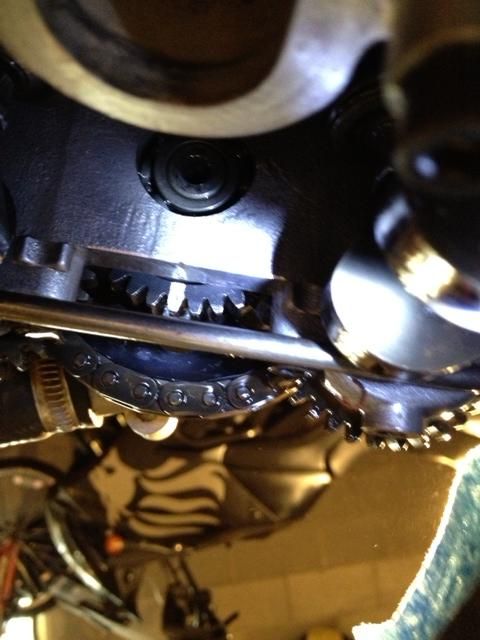
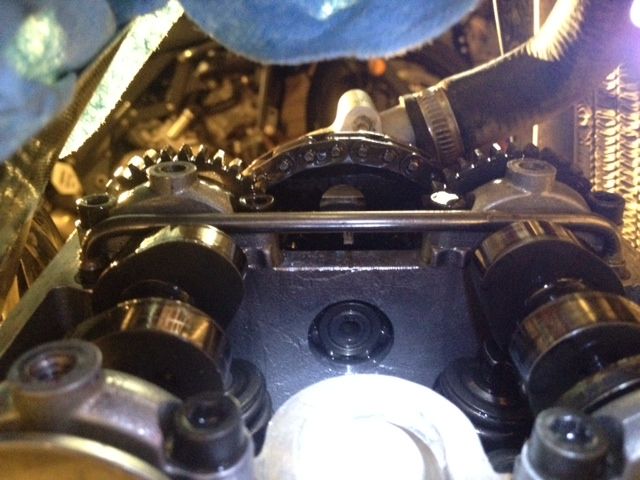
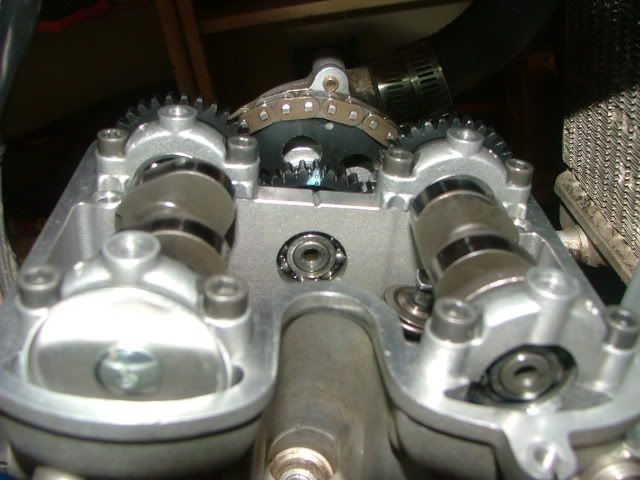
You can see in the pic above, the bungee cord pulling up, the ACCT removed to relieve tension to allow the WP shaft to be removed, the marks I put on the left side of the cam gears so I could recover the cam timing without pulling the cams.
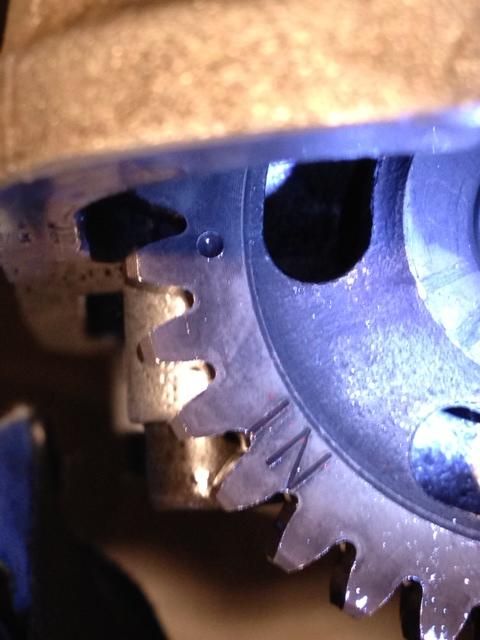
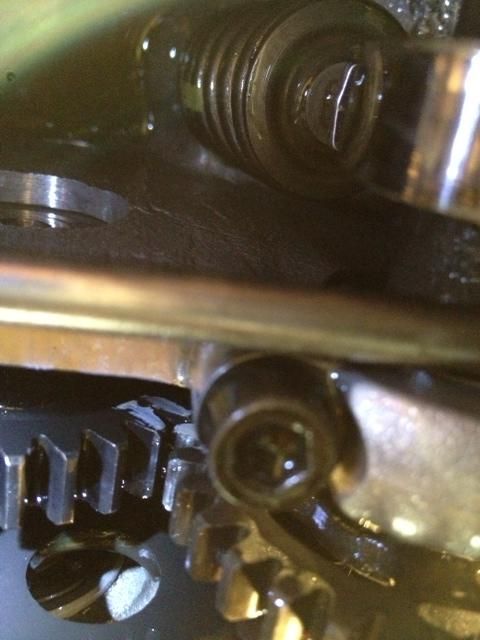
The thing is, the cam gears are ALREADY MARKED on the left side, for recovering the cam timing without pulling the cams. In the pic below, you can see where I scratched a mark on the mounting boss, and then painted 2 gear teeth, but there was already a dimple on the gear that lines up perfectly with the plane of the cam chest top edge! There's another dimple on the intake cam as well, aligned with the cam chest edge.

So now I am ready for my WP shaft and seal, I will install the seal into the WP housing, slide the new WP shaft and bearing into the housing and then slide that shaft/housing assembly into the cam chest, wiggling the bungee'd drive sprocket to the get the shaft in. Once the shaft is installed, cam timing will be locked in. THEN re-install the fully slacked-off ACCT, and when tightened down, push the plunger in gently with a pick or punch, counting the clicks as it moves to press the cam chain. Don't force it, if it needs another click, the spring will advance it another click as the bike runs, gets hot and cool, etc. You should get the same number of click sounds as you counted visually before, then install the spring into the ACCT.
Tools that came in VERY handy on this job:
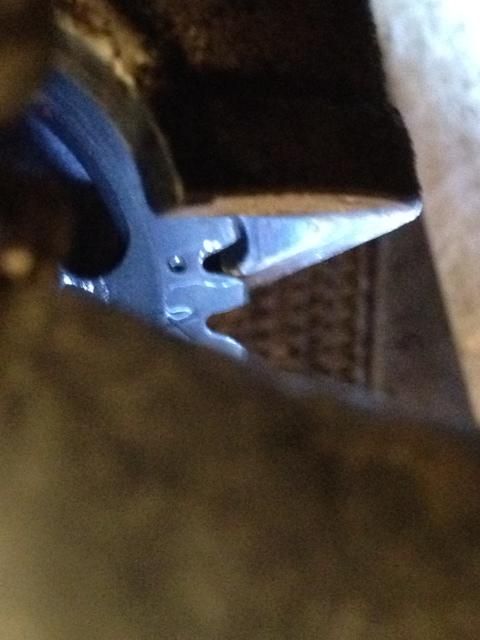
The rounded off 5mm allen wrench. I know that RayRay had a hard time making his 5mm allen fit the cam caps very well. I think the cam cap bolts are kind of dished inside and they are very shallow. The rounded aspect of the wrench in the pic seemed to grip the bolt better than a squared off wrench.
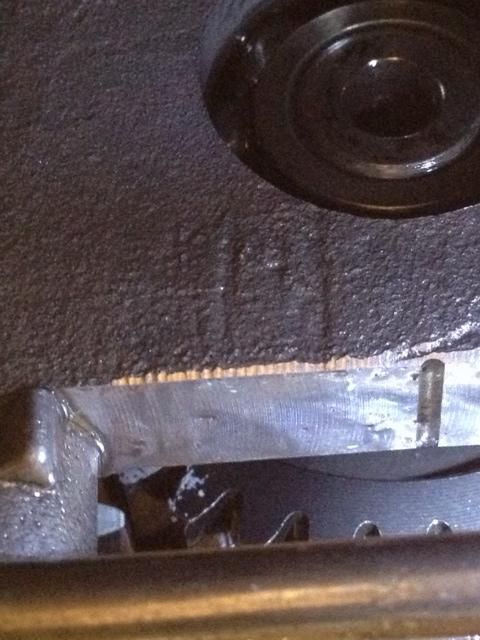
The long 5mm wide screwdriver was fast in extracting the cam cap bolts, much better than wrassling with the allen wrench or trying to use oily fingers.
The flexible 1/4" drive extension allowed me to quickly remove and install the ACCT.

This was done on a 2010 TE 450, should apply to many other models/years.
I took my bike apart all wrong for this job and had to use dfeckel's excellent write-up on foolproof cam timing.
EDIT: That method is only foolproof if the dimples on the gears are correct. Mine were not. ALWAYS put the bike at absolute TDC (use a small piece of wire to line up the double dimple and the mark on the cam chest wall) and look at the dimples on the left sides of both cams to determine where the left-side dimples are located on YOUR bike, take a picture of the locations or draw a picture.
I hated taking the cam caps off and almost dropped one of the little cap collars into the engine, found it on the floor a day later...those collars are loose and you have to watch them closely.
Anyway, waiting on my parts to arrive, I got the cam timing right again and I was determined to figure out how to do this without losing the cam timing AND if I did lose it, how to get it back without pulling the cams out. So I put it all back together and started with the procedure:
1. Pull the cam cover like you're doing a valve adjust. Get it to TDC with the double dimples on the drive gear aligned with the mark on the cam chest wall.
2. Pull the center bolt on the ACCT (automatic cam chain tensioner). This releases the spring so that the ACCT doesnt keep pushing inward.
3. Pull the retaining bolts for the ACCT and remove it carefully, look at the ridges and count them with a toothpick or something, or just eyeball it. As others have said, this will give you an indication of how stretched your cam chain is. Mine was 6 clicks in.
4. Get a bungee cord and hook it into the hole on the drive sprocket, run it up to the handlebars, pulling the drive gear up and to the right, into the cam gears. Make sure its tight and is not going to slip. If there is not a hole at the top, middle on your bike, use a small C-clamp, clamped to the sprocket, to hook the bungee into.
5. Remove the water pump housing and eventually, the water pump shaft, while watching the bungee keep the drive gear pulled up and in to the cam gears.
You can see in the pic above, the bungee cord pulling up, the ACCT removed to relieve tension to allow the WP shaft to be removed, the marks I put on the left side of the cam gears so I could recover the cam timing without pulling the cams.
The thing is, the cam gears are ALREADY MARKED on the left side, for recovering the cam timing without pulling the cams. In the pic below, you can see where I scratched a mark on the mounting boss, and then painted 2 gear teeth, but there was already a dimple on the gear that lines up perfectly with the plane of the cam chest top edge! There's another dimple on the intake cam as well, aligned with the cam chest edge.
So now I am ready for my WP shaft and seal, I will install the seal into the WP housing, slide the new WP shaft and bearing into the housing and then slide that shaft/housing assembly into the cam chest, wiggling the bungee'd drive sprocket to the get the shaft in. Once the shaft is installed, cam timing will be locked in. THEN re-install the fully slacked-off ACCT, and when tightened down, push the plunger in gently with a pick or punch, counting the clicks as it moves to press the cam chain. Don't force it, if it needs another click, the spring will advance it another click as the bike runs, gets hot and cool, etc. You should get the same number of click sounds as you counted visually before, then install the spring into the ACCT.
Tools that came in VERY handy on this job:
The rounded off 5mm allen wrench. I know that RayRay had a hard time making his 5mm allen fit the cam caps very well. I think the cam cap bolts are kind of dished inside and they are very shallow. The rounded aspect of the wrench in the pic seemed to grip the bolt better than a squared off wrench.
The long 5mm wide screwdriver was fast in extracting the cam cap bolts, much better than wrassling with the allen wrench or trying to use oily fingers.
The flexible 1/4" drive extension allowed me to quickly remove and install the ACCT.