vintageveloce
Husqvarna
AA Class
I just got a new 2010 TE250 last week. It's my first real dirt bike. I'm a rather experienced road rider, who did some racing back in the day and now fuddles with vintage bikes. A couple years back I took Rich Oliver's Mystery school as my into to dirt riding and then bought my first dirt bike, a Honda CRF150F. It was just a “play bike” but I spent some fun time on it at Ocotillo Wells. Eventually I ended up riding with some friends, and I tried a buddy’s Yamaha WR250F. I was shocked at what a difference the bigger wheels and real suspension made! And yes it had alot more power, but it was the suspension and wheels that sold me, I had to get a real bike.
The other thing that happened is my old truck was totaled when we were hit from behind. I ended up getting a 4WD pickup and took it through the Anza Borrego desert wth my wife. Wow, there were some great trails there, and all off limits unless you had a street legal vehicle. Hmm.
And so I started looking at plate-able dirt bikes. And found there appeared to be only one good one the Husqvarna TE250/310. Since I didn’t need the power of the TE310, I was sold on a great deal on a leftover 250.
First I have to thank Coffee and everyone on this forum, it has been a great help for me. And an special thank you to Dan and this thread:
http://www.cafehusky.com/threads/living-with-a-2010-husky-te-510.6249/
That's a great thread on setting up your TE and much applies to the TE250.
So here we are. My first “mod” was an hour meter. Then I put 4 hours on the engine and about 120 miles on the bike. As it had the throttle stop, I just kind of rode it, with some effort to keep the revs below 6k most of the time. It wasn’t hard as it didn’t rev very well with all the anchors on it. And it tended to stall when warm, and was also sometimes hard to start when warm. I’m one of those who doesn’t believe in babying the engine too much during break in. I know others feel a full 600 miles of slow poking is best, but I’m not going that route. So today I derestricted the bike and installed some protection on it. I thought the following pictures might help the next guy to do this, so here they are with my comments.
One comment first at the beginning. Having dine this, I’ve found the bike runs much better, even without updating the ECU with a flash. No more stalls, much easier starting and the bike runs much more smoothly. If I was going to do this again, I’d derestrict the bike right out of the box. Maybe I’d leave the throttle stop in place just to keep me in check for the first miles, but that’s it. I can’t see how pulling the other stuff could hurt the bike.
So after the initial 4 hours and 120 miles I changed the oil and filter, and cleaned the oil trap screen. And then I moved to the power up kit.
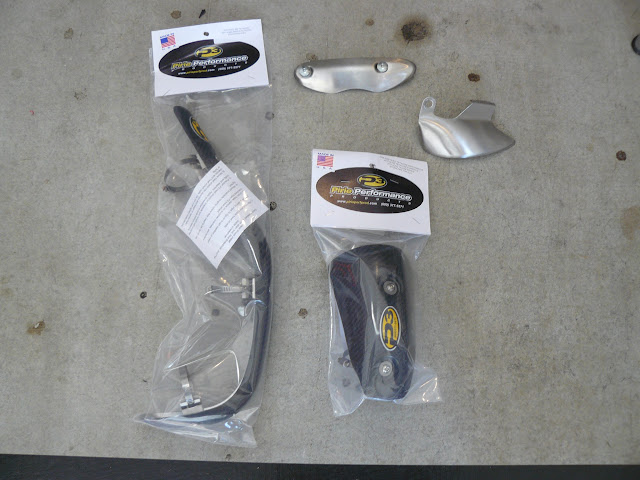
Here’s what I got in the box for the power up kit.

On the top left is a cable, that I am pretty sure is for the tailight on other models and is unused with the TE250. All wrapped up on the right is the chain. There was other stuff in the box, but it wasn't for the power up.
First thing to go was the charcoal canister. Too ugly.

And the valve on the tank vent can be a problem. It only lets air into the tank, so if your tank swells in the heat, this valve holds all that pressure in. I tossed it in the bin.

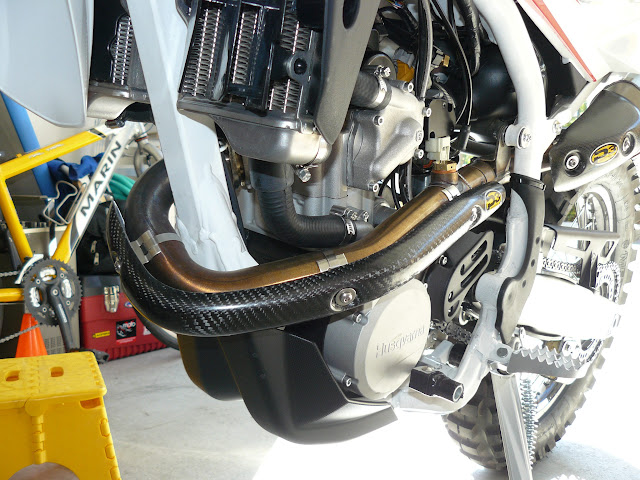
Here’s a shot of the pretty side with the charcoal canister removed.

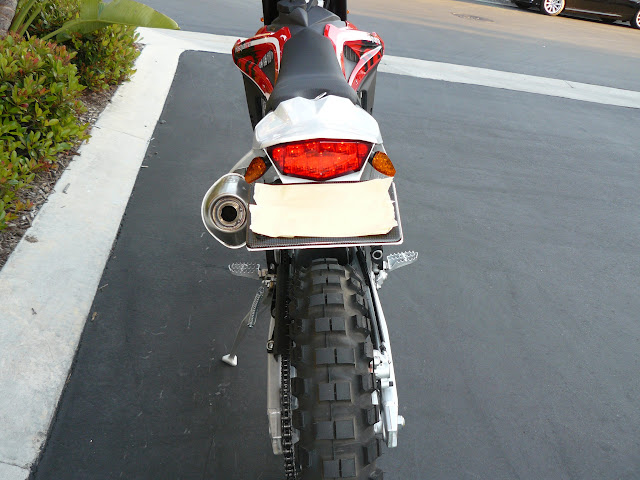
And a pic of my vent tube routing.

Next up I pulled the throttle stop. Note that it was required to remove the cables ends from the disc. I photographed it close up first and that made it easy to count the threads on the throttle cables to put it back them exactly where they where.

The other thing that happened is my old truck was totaled when we were hit from behind. I ended up getting a 4WD pickup and took it through the Anza Borrego desert wth my wife. Wow, there were some great trails there, and all off limits unless you had a street legal vehicle. Hmm.
And so I started looking at plate-able dirt bikes. And found there appeared to be only one good one the Husqvarna TE250/310. Since I didn’t need the power of the TE310, I was sold on a great deal on a leftover 250.
First I have to thank Coffee and everyone on this forum, it has been a great help for me. And an special thank you to Dan and this thread:
http://www.cafehusky.com/threads/living-with-a-2010-husky-te-510.6249/
That's a great thread on setting up your TE and much applies to the TE250.
So here we are. My first “mod” was an hour meter. Then I put 4 hours on the engine and about 120 miles on the bike. As it had the throttle stop, I just kind of rode it, with some effort to keep the revs below 6k most of the time. It wasn’t hard as it didn’t rev very well with all the anchors on it. And it tended to stall when warm, and was also sometimes hard to start when warm. I’m one of those who doesn’t believe in babying the engine too much during break in. I know others feel a full 600 miles of slow poking is best, but I’m not going that route. So today I derestricted the bike and installed some protection on it. I thought the following pictures might help the next guy to do this, so here they are with my comments.
One comment first at the beginning. Having dine this, I’ve found the bike runs much better, even without updating the ECU with a flash. No more stalls, much easier starting and the bike runs much more smoothly. If I was going to do this again, I’d derestrict the bike right out of the box. Maybe I’d leave the throttle stop in place just to keep me in check for the first miles, but that’s it. I can’t see how pulling the other stuff could hurt the bike.
So after the initial 4 hours and 120 miles I changed the oil and filter, and cleaned the oil trap screen. And then I moved to the power up kit.
Here’s what I got in the box for the power up kit.
On the top left is a cable, that I am pretty sure is for the tailight on other models and is unused with the TE250. All wrapped up on the right is the chain. There was other stuff in the box, but it wasn't for the power up.
First thing to go was the charcoal canister. Too ugly.
And the valve on the tank vent can be a problem. It only lets air into the tank, so if your tank swells in the heat, this valve holds all that pressure in. I tossed it in the bin.
Here’s a shot of the pretty side with the charcoal canister removed.
And a pic of my vent tube routing.
Next up I pulled the throttle stop. Note that it was required to remove the cables ends from the disc. I photographed it close up first and that made it easy to count the threads on the throttle cables to put it back them exactly where they where.